Trying to eat better and lose weight can feel like a big challenge, right? You want to enjoy delicious meals while also making healthy choices. That’s why I created this post filled with 30 meal prep recipes that will help you on your journey. Whether you’re looking to shed a few pounds or just want to eat better, meal prepping can be a game-changer.
If you’re someone who loves cooking but struggles to find the time during a busy week, this post is for you. Maybe you’re juggling work, family, and social life while still trying to make nutritious choices. You’re not alone in this. Many of us face the same hurdles and find ourselves reaching for quick, unhealthy options instead of the meals we truly enjoy.
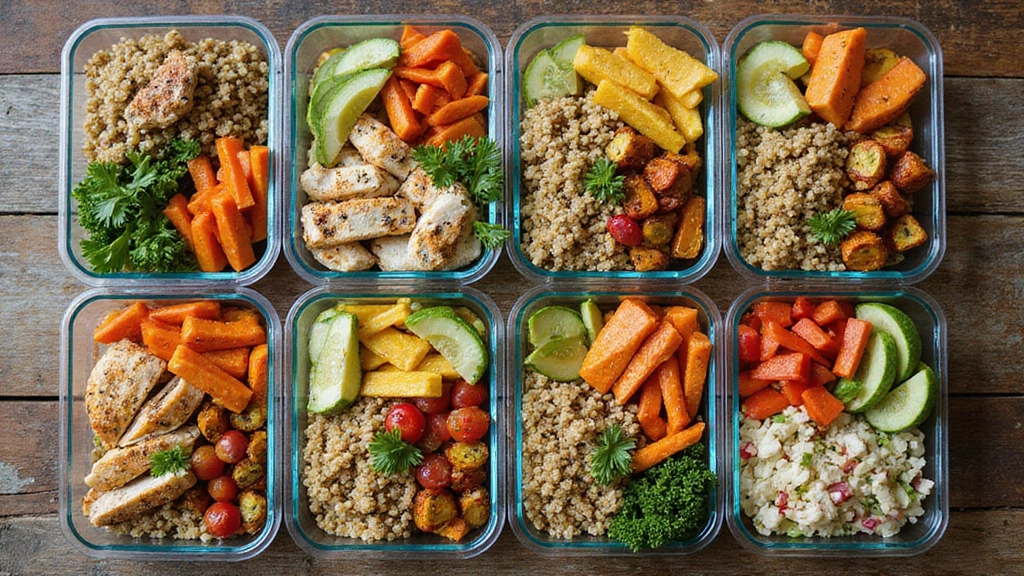
What you’ll get from this collection is a variety of recipes that are easy, flavorful, and perfect for any lifestyle. From tasty breakfast options to satisfying dinners, you’ll have meals ready to go that keep you on track. Imagine opening your fridge and seeing colorful, healthy meals waiting for you, making your life just a bit easier.
Each recipe is designed with simplicity in mind, so you don’t have to be a chef to whip them up. Plus, they’re packed with nutrients to keep you full and energized throughout the day. Meal prepping not only saves you time but also helps you resist those tempting takeout options.
So, let’s dive into these delicious recipes. Get ready to enjoy the benefits of meal prep and watch how it positively impacts your health and well-being. You’ve got this!
1. Grilled Chicken and Quinoa Bowls

Start your week on a healthy note with these tasty grilled chicken and quinoa bowls. They’re simple to make and packed with nutrients. Imagine tender, juicy chicken paired with fluffy quinoa and a rainbow of fresh veggies. Each bite offers a satisfying crunch and bursts of flavor, making your healthy eating feel exciting.
These bowls are perfect for meal prep. You can easily store them in the fridge, ready to grab when hunger strikes. The mix of protein from the chicken and fiber from the quinoa helps keep you full longer. Plus, the colorful vegetables add essential vitamins and minerals to your diet.
Ingredients:
– 4 boneless, skinless chicken breasts
– 1 cup quinoa
– 2 cups vegetable broth
– 1 cup cherry tomatoes, halved
– 1 bell pepper, diced
– 1 zucchini, sliced
– Olive oil, salt, pepper, and your favorite spices
Instructions:
1. Rinse the quinoa under cold water until it runs clear.
2. In a pot, combine the quinoa and vegetable broth. Bring to a boil, then reduce heat, cover, and simmer for about 15 minutes.
3. While the quinoa cooks, season the chicken with olive oil, salt, pepper, and your choice of spices. Grill for 6-7 minutes on each side until cooked through.
4. Sauté the veggies in a bit of olive oil until they’re tender and vibrant.
5. To assemble, layer the cooked quinoa, sliced chicken, and sautéed vegetables in meal prep containers.
Tips:
– Mix up the spices for different flavors each week!
– Swap chicken for tofu or chickpeas for a vegetarian twist.
– Store bowls in airtight containers for easy access.
– Freeze before adding fresh veggies for a quick meal later.
FAQ:
Can I freeze these bowls? Yes! Just freeze before adding fresh veggies for the best texture.
Grilled Chicken and Quinoa Bowls
Editor’s Choice

50 Pack (100-Piece) 32 oz Meal Prep Containers Reusable with Lids 3-Comp…
2. Sweet Potato and Black Bean Tacos

Servings: 4 Prep Time: 10 minutes
Cook Time: 25 minutes
Total Time: 35 minutes
Calories: 300 per serving
Looking for a tasty way to eat healthier? Try these sweet potato and black bean tacos! They’re not just nutritious; they’re packed with delightful flavors. The sweetness of roasted sweet potatoes blends perfectly with the hearty black beans, making each bite satisfying. Plus, you can customize them with your favorite toppings, so you never get bored.
Tacos are a fun meal option for lunch or dinner. Prepare the sweet potatoes ahead of time, and keep the other ingredients separate. When you’re ready to eat, simply load your taco shells and dig in! This dish is also vegan, making it a great choice for everyone.
Ingredients:
– 2 medium sweet potatoes, peeled and diced
– 1 can black beans, drained and rinsed
– 1 teaspoon cumin
– 1 teaspoon paprika
– Corn tortillas
– Avocado, salsa, and cilantro for toppings
Instructions:
1. Preheat your oven to 400°F (200°C).
2. In a bowl, toss the sweet potatoes with olive oil, cumin, paprika, salt, and pepper. Spread them out on a baking sheet and roast for 20 minutes, or until tender.
3. While the sweet potatoes are roasting, mix the black beans in a bowl with a pinch of salt and pepper.
4. Once everything is ready, assemble your tacos by adding roasted sweet potatoes and black beans into the tortillas. Top with avocado, salsa, and fresh cilantro for extra flavor.
Tips: Prepare a larger batch of sweet potatoes to use in salads or as a side dish for other meals!
FAQ: How do I store leftovers? Simply keep them in airtight containers in the fridge for up to 4 days. Enjoy your delicious, healthy tacos!
Sweet Potato and Black Bean Tacos
Editor’s Choice

Bentgo Prep – 20-Piece 3-Compartment Reusable Meal Prep Containers with …
3. Mediterranean Chickpea Salad

Servings: 4 Prep Time: 15 minutes
Cook Time: 0 minutes
Total Time: 15 minutes
Calories: 250 per serving
Are you looking for a quick and healthy meal prep option? Try this Mediterranean Chickpea Salad! It’s colorful, tasty, and loaded with nutrients. With fresh ingredients like cucumbers, tomatoes, and olives, this salad is not only a feast for your eyes but also a powerhouse of protein and antioxidants.
You can whip this salad up in just 15 minutes. It keeps well in the fridge for days, making it perfect for busy weeks. Enjoy it as a main dish or a side; either way, you’ll feel satisfied and nourished. Chickpeas provide a hearty plant-based protein, helping you stay full longer.
Here’s how to make it:
Ingredients:
– 1 can chickpeas, drained and rinsed
– 1 cup cherry tomatoes, halved
– 1 cucumber, diced
– 1/2 red onion, chopped
– 1/2 cup Kalamata olives, pitted and sliced
– 1/4 cup feta cheese (optional)
– Juice of 1 lemon
– 2 tablespoons olive oil
– Salt and pepper to taste
Instructions:
1. In a large bowl, mix the chickpeas, tomatoes, cucumber, onion, olives, and feta.
2. Squeeze lemon juice over the salad and drizzle with olive oil.
3. Season with salt and pepper, then toss until everything is well combined.
Tips: Let the salad chill in the fridge for a few hours or overnight for the best flavor!
FAQ: Can I add other ingredients? Yes! Feel free to mix in bell peppers, avocado, or any veggies you love for extra crunch and flavor.
This Mediterranean Chickpea Salad is not just a meal; it’s a step toward healthier eating. Enjoy creating your own version and make it work for you!
Mediterranean Chickpea Salad
Editor’s Choice
50 Pack (100-Piece) 32 oz Meal Prep Containers Reusable with Lids 3-Comp…

OXO Good Grips Salad Spinner | Lettuce Spinner | Fruit Washer | Fruit Wa…

AOZITA 17oz Glass Olive Oil Bottle Dispenser – 500ml Green Oil and Vineg…
4. Spinach and Feta Stuffed Chicken Breasts

Servings: 4 Prep Time: 20 minutes
Cook Time: 30 minutes
Total Time: 50 minutes
Calories: 400 per serving
Craving a dish that’s both tasty and healthy? Try these spinach and feta stuffed chicken breasts. They’re not only packed with flavor but also loaded with nutrients. This dish is perfect for meal prep, helping you stay on track with your health goals while enjoying every bite.
Making stuffed chicken may sound fancy, but it’s surprisingly simple. The creamy feta cheese blends beautifully with fresh spinach, creating a burst of flavor in every slice. Plus, these chicken breasts can be made ahead and frozen, making dinner a breeze later in the week.
Ingredients:
– 4 boneless, skinless chicken breasts
– 1 cup fresh spinach, chopped
– 1/2 cup feta cheese, crumbled
– 1 garlic clove, minced
– Olive oil, salt, and pepper
Instructions:
1. Preheat your oven to 375°F (190°C).
2. In a bowl, mix together the chopped spinach, crumbled feta, minced garlic, salt, and pepper until well combined.
3. Carefully cut a pocket into each chicken breast and stuff it with the spinach mixture.
4. Lightly brush the outside of the chicken with olive oil and season with salt and pepper.
5. Arrange the stuffed chicken breasts in a baking dish and bake for 30 minutes or until they are fully cooked.
Tips: Serve these chicken breasts with brown rice or a fresh salad for a complete meal!
FAQ: Can I use frozen spinach instead? Yes, just be sure to thaw and drain it well first.
Spinach and Feta Stuffed Chicken Breasts
Editor’s Choice
50 Pack (100-Piece) 32 oz Meal Prep Containers Reusable with Lids 3-Comp…

TrendPlain 16oz/470ml Glass Olive Oil Sprayer for Cooking – 2 in 1 Olive…

Kitessensu High Effective Garlic Press With Studs, Heavy Duty Garlic Min…
5. Overnight Oats with Berries

Servings: 4 Prep Time: 10 minutes
Cook Time: 0 minutes
Total Time: 10 minutes
Calories: 200 per serving
Kickstart your day with a delicious bowl of overnight oats! This easy recipe takes just minutes to prepare the night before, freeing up your morning for more important things. Each bite is packed with the natural sweetness of fresh berries, making it a tasty way to fuel your morning.
Oats are a powerhouse of fiber, which means they help you feel full longer. Plus, they’re low in calories, making them a smart choice for weight loss. You can easily personalize your oats by swapping in your favorite fruits and toppings, so feel free to get creative!
Here’s how to whip up this delightful breakfast:
Ingredients:
– 2 cups rolled oats
– 2 cups almond milk (or any milk you prefer)
– 1 cup mixed berries (like strawberries, blueberries, and raspberries)
– 2 tablespoons honey or maple syrup (optional)
– Chia seeds (optional for extra nutrition)
Instructions:
1. In a mixing bowl, combine the rolled oats, almond milk, and your choice of sweetener.
2. Gently fold in half of the mixed berries and chia seeds, if you’re using them.
3. Spoon the mixture into jars or containers, and top with the remaining berries.
4. Seal and refrigerate overnight. In the morning, grab one and enjoy!
Tips: Add nuts or seeds in the morning for an extra crunch! You can mix in a dollop of yogurt for creaminess, too.
FAQ:
How long do they last? Overnight oats can be kept in the fridge for 3-4 days, making them perfect for meal prep!
Now you’re ready to enjoy a simple, nutritious breakfast that supports your health goals. Overnight oats are not just convenient; they’re also delicious and versatile. Enjoy your mornings with a tasty treat that you can prepare in a flash!
Overnight Oats with Berries
Editor’s Choice
Bentgo Prep – 20-Piece 3-Compartment Reusable Meal Prep Containers with …

Garden of Life Chia Seeds 100% Organic for Smoothies, Pudding – Raw Orga…

Bob’s Red Mill Gluten Free Old Fashioned Rolled Oats, 32oz (Pack of 4) -…
6. Zucchini Noodles with Marinara Sauce

Servings: 4 Prep Time: 15 minutes
Cook Time: 10 minutes
Total Time: 25 minutes
Calories: 150 per serving
Are you looking for a tasty, low-calorie meal that feels indulgent without the guilt? Look no further than zucchini noodles, affectionately known as “zoodles.” These spiralized veggies are a fantastic alternative to traditional pasta, making them perfect for weight loss meal prep. With a rich homemade marinara sauce, you can enjoy a satisfying dish that’s both delicious and nutritious.
Making this dish is quick and simple. You’ll whip up the marinara sauce in no time, and the best part? You can make it in large batches and store it for future meals. This not only saves you time but also enhances your healthy eating journey.
Ingredients:
– 4 medium zucchinis, spiralized
– 2 cups crushed tomatoes
– 1 onion, diced
– 2 garlic cloves, minced
– Olive oil, salt, pepper, and herbs (like basil and oregano)
Instructions:
1. Heat a splash of olive oil in a skillet over medium heat. Add the diced onion and minced garlic, sautéing until fragrant.
2. Stir in the crushed tomatoes, along with salt, pepper, and a sprinkle of your favorite herbs. Let this simmer for about 10 minutes to let the flavors meld.
3. While the sauce simmers, take a separate pan and sauté the spiralized zucchini noodles for 3-4 minutes. Just enough to soften them, but keep them firm!
4. Serve the zucchini noodles topped with your homemade marinara sauce.
Tips: Keep the zoodles slightly undercooked for the best texture!
FAQ:
Can I use store-bought sauce? Yes, but choose a low-sugar variety for a healthier option.
Enjoy this guilt-free meal that satisfies your cravings while helping you stay on track with your weight loss goals!
Zucchini Noodles with Marinara Sauce
Editor’s Choice

Veggetti Veggie Slicer, Dual Stainless Steel Blade Vegetable Cutter for …
50 Pack (100-Piece) 32 oz Meal Prep Containers Reusable with Lids 3-Comp…

365 by Whole Foods Market, Organic Marinara Pasta Sauce, 25 Ounce
7. Thai Peanut Sweet Potato Buddha Bowl

Servings: 4 Prep Time: 15 minutes
Cook Time: 25 minutes
Total Time: 40 minutes
Calories: 400 per serving
Are you looking for a meal that’s not only delicious but also easy to prepare? Try this Thai Peanut Sweet Potato Buddha Bowl! It’s a bowl full of goodness, combining sweet potatoes with crisp veggies and a creamy peanut sauce. This dish is more than a meal; it’s a colorful and flavorful experience that makes healthy eating exciting.
Perfect for busy days, you can whip this up in advance. Store it in your fridge for quick lunches or dinners. This bowl is gluten-free and vegan, so it fits into many diets. Plus, every bite is a tasty reminder that healthy choices can be fun!
Ingredients:
– 2 medium sweet potatoes, diced
– 1 bell pepper, sliced
– 1 carrot, julienned
– 2 cups cooked quinoa
– For the peanut sauce:
– 1/2 cup peanut butter
– 1 tablespoon soy sauce
– 1 tablespoon maple syrup
– Water to thin
Instructions:
1. Preheat your oven to 425°F (220°C).
2. Toss the cubed sweet potatoes with olive oil, salt, and pepper. Spread them on a baking sheet and roast for 20 minutes, or until they’re tender and slightly crispy.
3. In a bowl, whisk together the peanut butter, soy sauce, maple syrup, and enough water to achieve your desired consistency.
4. To assemble your Buddha bowls, place a scoop of quinoa at the bottom. Top with the roasted sweet potatoes, sliced bell pepper, and julienned carrot. Drizzle with the creamy peanut sauce.
Tips:
– Add your favorite veggies like snap peas or cucumbers for extra crunch!
– You can store this bowl in the fridge for 3-4 days, making it a great option for meal prep.
Enjoy creating this delightful bowl and savoring the vibrant flavors all week long!
Thai Peanut Sweet Potato Buddha Bowl
Editor’s Choice

Bento Box Adult Lunch Box, Containers for Adults Men Women with 4 Compar…
8. Cauliflower Fried Rice

Servings: 4
Prep Time: 10 minutes
Cook Time: 15 minutes
Total Time: 25 minutes
Calories: 200 per serving
Are you craving a tasty meal that won’t weigh you down? Look no further than cauliflower fried rice! This dish puts a healthy spin on the classic takeout favorite, giving you all the flavor without the guilt. With just a few simple ingredients, you can whip up a satisfying meal that’s packed with veggies.
Cauliflower fried rice works perfectly as a side dish or a main meal. You can easily customize it with any proteins or vegetables you have on hand, making it a versatile addition to your meal prep routine. Plus, when you make it in advance, you always have a quick, delicious option ready to go when hunger hits!
Ingredients:
– 1 head cauliflower, riced (or 4 cups pre-riced)
– 2 carrots, diced
– 1 cup peas
– 2 eggs, beaten (optional)
– Soy sauce
– Sesame oil
– Green onions for garnish
Instructions:
1. Start by heating sesame oil in a skillet over medium heat. Add the diced carrots and peas, sautéing them until tender, about 3-5 minutes.
2. Next, stir in the riced cauliflower. Cook for another 5-7 minutes, stirring occasionally, until it’s tender and slightly golden.
3. If you’re using eggs, push the veggies to the side, pour in the beaten eggs, and scramble them in the pan.
4. Combine everything together. Drizzle with soy sauce to taste and garnish with chopped green onions.
Quick Tip: Leftovers make for a fantastic lunch the next day! Just reheat and enjoy.
FAQ: Can I add chicken or shrimp? Yes! Just make sure they’re cooked before mixing them in for a protein boost.
With this easy cauliflower fried rice, you’re set for a tasty meal that keeps you on track with your health goals. Enjoy every bite!
Cauliflower Fried Rice
Editor’s Choice

Rubbermaid Brilliance Food Storage Containers BPA Free Airtight Lids Ide…


SENSARTE Nonstick Frying Pan Skillet, Swiss Granite Coating Omelette Pan…
9. Egg Muffins with Spinach and Cheese

Servings: 12 muffins
Prep Time: 10 minutes
Cook Time: 20 minutes
Total Time: 30 minutes
Calories: 100 per muffin
Looking for a quick breakfast that keeps you energized? These egg muffins with spinach and cheese are your answer. Packed with protein and fresh veggies, they’re perfect for busy mornings when you need something healthy on the go. Imagine starting your day with a tasty treat that’s also good for you! Plus, you can easily switch up the ingredients based on what you have on hand, making them a fun and customizable option for meal prep. Store them in your fridge, and you have a nutritious breakfast ready all week long!
Ingredients:
– 6 large eggs
– 1 cup spinach, chopped
– 1/2 cup cheese (cheddar or feta)
– Salt and pepper to taste
– Optional: diced bell pepper or onion for extra flavor
Instructions:
1. Preheat your oven to 350°F (175°C). Grease a muffin tin to prevent sticking.
2. In a mixing bowl, whisk together the eggs, salt, and pepper until combined. Stir in the chopped spinach, cheese, and any optional ingredients you choose.
3. Pour the egg mixture evenly into the muffin tin. Each cup should be about three-quarters full.
4. Bake for 18-20 minutes or until the muffins are fully set and slightly golden on top.
Tips: Allow the muffins to cool completely before placing them in the fridge. This helps them stay fresh longer!
FAQ: How long do these muffins last in the fridge? You can store them for up to 5 days, making them a convenient choice for meal prep.
Enjoy these delicious egg muffins as a hearty breakfast or even a quick snack throughout your busy day. They’re not just easy to make; they also taste fantastic!
Egg Muffins with Spinach and Cheese
Editor’s Choice

Amazon Basics Nonstick Round Muffin Baking Pan, 12 Cups, Set of 2, Gray,…

Walfos Silicone Whisk,Stainless Steel Wire Whisk Set of 3 -Heat Resistan…
50 Pack (100-Piece) 32 oz Meal Prep Containers Reusable with Lids 3-Comp…
10. Lemon Garlic Shrimp with Asparagus

Servings: 4 Prep Time: 10 minutes
Cook Time: 15 minutes
Total Time: 25 minutes
Calories: 300 per serving
If you’re looking for a quick and tasty meal, try this Lemon Garlic Shrimp with Asparagus. It’s the perfect solution for busy weeknights when you want something healthy yet satisfying. The combination of zesty lemon and savory garlic makes each bite pop with flavor, while the shrimp offers lean protein and the asparagus adds a delightful crunch.
Cooking shrimp is fast and easy. They soak up flavors beautifully, making this dish a hit. You can prepare it in about 25 minutes, so it’s great for those evenings when time is short but you still want a delicious home-cooked meal.
Ingredients:
– 1 lb shrimp, peeled and deveined
– 1 bunch asparagus, trimmed
– 3 cloves garlic, minced
– Juice of 1 lemon
– 2 tablespoons olive oil
– Salt and pepper to taste
Instructions:
1. Heat olive oil in a skillet over medium-high heat. Add minced garlic and sauté for about 1 minute until fragrant.
2. Toss in the shrimp and asparagus. Cook for 3-4 minutes until the shrimp turns pink and the asparagus is tender-crisp.
3. Squeeze the fresh lemon juice over the shrimp and asparagus. Season with salt and pepper to your liking.
Tips: Serve this dish over brown rice or quinoa for an extra filling meal!
FAQ: Can I use frozen shrimp? Absolutely! Just remember to thaw them before you start cooking for the best results.
Enjoy your flavorful, healthy meal that fits perfectly into your meal prep routine! You’ll not only feel satisfied but also energized, making it an excellent choice for your weight-loss journey.
Lemon Garlic Shrimp with Asparagus
Editor’s Choice
Bento Box Adult Lunch Box, Containers for Adults Men Women with 4 Compar…
Kitessensu High Effective Garlic Press With Studs, Heavy Duty Garlic Min…

CAROTE Nonstick Frying Pan Skillet,Non Stick Granite Fry Pan Egg Pan Ome…
11. Black Bean and Quinoa Stuffed Peppers

Servings: 4 Prep Time: 15 minutes
Cook Time: 30 minutes
Total Time: 45 minutes
Calories: 350 per serving
Are you searching for a tasty way to eat healthier? These Black Bean and Quinoa Stuffed Peppers are colorful, satisfying, and full of nutrients. They make meal prep a breeze, staying fresh in the fridge for days. You’ll love how the creamy filling pairs with the crunchy pepper, creating a delightful bite every time.
The blend of black beans, fluffy quinoa, and spices gives you protein and flavor without the guilt. Plus, you can customize them easily. Want a little kick? Add more chili powder or your favorite toppings! This recipe is perfect for anyone looking to lose weight while enjoying delicious food.
Ingredients:
– 4 bell peppers, halved and seeds removed
– 1 cup cooked quinoa
– 1 can black beans, drained and rinsed
– 1 teaspoon cumin
– 1 teaspoon chili powder
– Cheese for topping (optional)
Instructions:
1. Preheat your oven to 375°F (190°C).
2. In a bowl, combine the cooked quinoa, black beans, cumin, chili powder, and salt. Mix well.
3. Stuff each halved pepper with the quinoa mixture and place them in a baking dish.
4. If you like cheesy goodness, sprinkle cheese on top. Bake for 30 minutes until the peppers are tender.
Tips: Add a dollop of sour cream or some sliced avocado on top before serving. It adds a nice creaminess!
FAQ: How long do these stuffed peppers last? You can keep them in the fridge for up to 4 days. Enjoy these healthy, filling peppers that make your meal prep simple and delicious!
Black Bean and Quinoa Stuffed Peppers
Editor’s Choice
50 Pack (100-Piece) 32 oz Meal Prep Containers Reusable with Lids 3-Comp…

Pride Of India – Natural Royal Red Bolivian Quinoa – Protein Rich Whole …

Spice Rack Kitchen Cabinet Organizer- 3 Tier Bamboo Expandable Display S…
12. Baked Salmon with Broccoli

Servings: 4 Prep Time: 10 minutes
Cook Time: 20 minutes
Total Time: 30 minutes
Calories: 350 per serving
If you’re looking for a quick and healthy dinner, try baked salmon with broccoli. This delightful dish combines the rich flavors of salmon with the crunch of fresh broccoli. Not only is it delicious, but it’s also loaded with omega-3 fatty acids and essential nutrients. Plus, you can whip it up in just 30 minutes!
Imagine sinking your teeth into flaky salmon paired with tender broccoli. This meal gives you a perfect balance of protein and fiber, helping you stay full and satisfied while working towards your weight loss goals. It’s a fantastic option for meal prep, letting you enjoy healthy, homemade food throughout the week without much fuss.
Ingredients:
– 4 salmon fillets
– 2 cups broccoli florets
– 2 tablespoons olive oil
– Salt and pepper to taste
– Lemon wedges for serving
Instructions:
1. Preheat your oven to 400°F (200°C).
2. On a baking sheet, place the salmon fillets and broccoli florets.
3. Drizzle with olive oil and sprinkle with salt and pepper.
4. Bake for 15-20 minutes, until the salmon flakes easily with a fork and the broccoli is tender.
Tips: Serve with lemon wedges to brighten up the flavors!
FAQ: Can I use frozen salmon? Absolutely! Just make sure it’s fully thawed before cooking.
This baked salmon with broccoli is not only easy to make but also perfect for busy weeknights. Enjoy a nutritious meal that’s as satisfying as it is simple!
Baked Salmon with Broccoli
Editor’s Choice

Bumble Bee Smoke Flavored Red Coho Salmon Fillets in Oil, 3.75 oz (Pack …
TrendPlain 16oz/470ml Glass Olive Oil Sprayer for Cooking – 2 in 1 Olive…
13. Turkey and Spinach Lettuce Wraps

Servings: 4 Prep Time: 10 minutes
Cook Time: 10 minutes
Total Time: 20 minutes
Calories: 250 per serving
If you’re looking for a tasty, low-carb meal that fits your busy lifestyle, these turkey and spinach lettuce wraps are just what you need. In just 20 minutes, you can whip up a satisfying lunch that’s both nutritious and easy to eat on the go. Swapping out bread for crisp lettuce adds a refreshing crunch and keeps the calories in check.
These wraps are packed with lean ground turkey and fresh spinach, making them a protein powerhouse. You can easily customize them with your favorite toppings or sauces, like creamy avocado or zesty shredded carrots. Each bite is not only delicious but also helps you stay on track with your health goals.
Ingredients:
– 1 lb ground turkey
– 4 cups fresh spinach
– 8 large lettuce leaves (romaine or butter lettuce work well)
– Soy sauce or teriyaki sauce for extra flavor
– Olive oil, salt, and pepper
Instructions:
1. Heat olive oil in a skillet over medium heat. Add the ground turkey and cook until browned, about 5-7 minutes.
2. Stir in the spinach and cook until it wilts, seasoning with soy sauce, salt, and pepper to taste.
3. Spoon the turkey and spinach mixture into lettuce leaves. Roll them up and enjoy!
Tips: Make a larger batch and store the extra filling in the fridge. This way, you have quick meals ready for the week!
FAQ: Want to add more flavor or crunch? Toss in some diced bell peppers or cool cucumbers for an extra twist!
These lettuce wraps are not just a meal; they’re a simple way to enhance your eating habits while enjoying a variety of flavors. You’ll love how easy they are to make, and they’ll keep you feeling full and energized throughout your day.
Turkey and Spinach Lettuce Wraps
Editor’s Choice
Bento Box Adult Lunch Box, Containers for Adults Men Women with 4 Compar…

YARRAMATE 16oz/470ml Glass Olive Oil Sprayer for Cooking with Stickers, …
14. Creamy Avocado Pasta

Servings: 4 Prep Time: 10 minutes
Cook Time: 10 minutes
Total Time: 20 minutes
Calories: 400 per serving
Looking for a quick, healthy dish that feels indulgent? Try creamy avocado pasta! This recipe combines the richness of avocados with zesty lemon and garlic, transforming your weeknight dinners into something special. Plus, it’s simple to make and packed with healthy fats that keep you satisfied.
To enjoy this dish later, meal prep is key. Just keep the pasta and sauce separate until you’re ready to dig in. It’s a comforting option that won’t derail your healthy eating goals!
Ingredients:
– 12 oz whole wheat pasta
– 2 ripe avocados
– 2 garlic cloves
– Juice of 1 lemon
– Olive oil, salt, and pepper
Instructions:
1. Cook the pasta according to the package directions. Once done, drain it and set aside.
2. Grab a blender and combine the avocados, garlic, lemon juice, olive oil, salt, and pepper. Blend until you achieve a smooth consistency.
3. Toss the cooked pasta in the creamy avocado sauce until every strand is coated.
Tips: Garnish your dish with cherry tomatoes or roasted nuts for a delightful crunch!
FAQ: Can I prepare it ahead of time? Absolutely! Just store the pasta and sauce in separate containers to keep everything fresh.
With this delightful recipe, you’ll satisfy your cravings without the guilt. Enjoy your creamy avocado pasta, and feel good about your meal choices!
Creamy Avocado Pasta
Editor’s Choice
50 Pack (100-Piece) 32 oz Meal Prep Containers Reusable with Lids 3-Comp…

Ninja BL660 Professional Compact Smoothie & Food Processing Blender, 110…

365 by Whole Foods Market, Organic Whole Wheat Penne Rigate, 16 Ounce
15. Roasted Vegetable and Hummus Wrap

Servings: 4 Prep Time: 15 minutes
Cook Time: 30 minutes
Total Time: 45 minutes
Calories: 300 per serving
Are you looking for a quick, healthy meal that doesn’t compromise on flavor? Try these delightful roasted vegetable and hummus wraps! They’re packed with nutrients and bursting with color, making them perfect for lunch or dinner. The sweetness of the roasted veggies combined with creamy hummus will satisfy your hunger without weighing you down.
Roasting vegetables enhances their natural flavors, making them sweeter and more delicious. You can mix and match your favorite seasonal veggies, so feel free to get creative! These wraps are also a fantastic meal prep option. Make them ahead of time, and you’ll have a nutritious meal ready for those busy days.
Here’s how to make them:
Ingredients:
– 2 zucchinis, sliced
– 1 red bell pepper, sliced
– 1 eggplant, diced
– 1 cup hummus
– 4 whole grain wraps
– Olive oil, salt, pepper
Instructions:
1. Preheat your oven to 400°F (200°C).
2. Toss the sliced zucchini, bell pepper, and eggplant with olive oil, salt, and pepper. Spread them evenly on a baking sheet.
3. Roast in the oven for 25-30 minutes, until they are tender and golden.
4. Take your whole grain wraps and spread a generous layer of hummus on each one.
5. Add a portion of the roasted vegetables and roll the wrap tightly to enclose the filling.
Tips:
– Add fresh greens like spinach or arugula for extra crunch and nutrition!
– Don’t hesitate to switch up the vegetables based on what you have on hand.
FAQ:
Can I use different veggies? Absolutely! Customize this recipe with whatever you love.
Enjoy your delicious and colorful wraps! They’re not just good for you; they’re also a treat for your taste buds.
Fun fact: A roasted vegetable and hummus wrap clocks in at about 300 calories per serving. Batch prep for your week with these colorful wraps to stay on track with meal prep for losing weight recipes. They’re quick, satisfying, and perfect for busy professionals who want flavor without the fuss.
Roasted Vegetable and Hummus Wrap
Editor’s Choice
50 Pack (100-Piece) 32 oz Meal Prep Containers Reusable with Lids 3-Comp…

Fullstar The Original Pro Chopper – Vegetable Chopper and Spiralizer, Fo…

Hamilton Beach Food Processor & Vegetable Chopper for Slicing, Shredding…
16. Chickpea Curry with Brown Rice

Craving a warm and hearty meal that supports your weight loss goals? Look no further than chickpea curry with brown rice! This dish is not just delicious; it’s also packed with protein and fiber. Perfect for meal prep, you can make a big batch and enjoy it throughout the week. When the weather turns chilly, this curry provides the comfort you need while keeping your diet on track.
Imagine the rich aroma of spices filling your kitchen as you cook. The creamy coconut milk blends beautifully with the chickpeas, creating a satisfying dish that warms you from the inside out. Pair it with nutty brown rice to round out your meal. You’ll love how flavorful and filling this dish is!
Ingredients:
– 2 cans chickpeas, drained and rinsed
– 1 can coconut milk
– 1 onion, chopped
– 2 cloves garlic, minced
– 1 tablespoon curry powder
– 2 cups cooked brown rice
Instructions:
1. Start by heating a pot over medium heat. Sauté the chopped onion and minced garlic until they become soft and translucent. This should take about 3-4 minutes.
2. Add the chickpeas, coconut milk, and curry powder to the pot. Stir everything together and let it simmer for about 20 minutes. The longer it cooks, the richer the flavor will be!
3. Serve the curry over a generous scoop of cooked brown rice. Enjoy your wholesome meal!
Tips:
– Make it a day ahead. The flavors deepen and improve overnight!
– Add veggies like spinach or bell peppers for extra nutrients.
– Want a spicy kick? Toss in some chopped chili peppers!
FAQ:
Can I use dried chickpeas? Yes, just cook them until tender before adding them to the curry!
This chickpea curry is not only easy to make, but it’s also a great way to introduce more plant-based meals into your diet. Enjoy this crowd-pleaser any day of the week!
Chickpea Curry with Brown Rice
Editor’s Choice

50 Pack (100-Piece) 24 oz Meal Prep Containers Reusable with Lids, Sturd…

Amazon Grocery, Curry Powder, 3 Oz (Previously Happy Belly, Packaging Ma…

Simply Asia Unsweetened Coconut Milk, 13.66 fl oz – One 13.66 Ounce Can …
17. Greek Yogurt Parfaits

Servings: 4 Prep Time: 10 minutes
Cook Time: 0 minutes
Total Time: 10 minutes
Calories: 250 per serving
If you’re looking for a quick and healthy snack or breakfast, Greek yogurt parfaits are your answer. They take just minutes to prepare and are a feast for the eyes and taste buds! Picture layers of creamy Greek yogurt, fresh berries, and crunchy granola. It’s not just delicious; it’s also packed with protein and probiotics, which are great for your gut health. Plus, you can make them ahead of time and store them in your fridge for busy mornings!
You can easily customize these parfaits to match your taste. Want to use seasonal fruits? Go for it! This flexibility keeps your meals exciting and fresh.
Here’s how to whip up your Greek yogurt parfaits:
Ingredients:
– 2 cups Greek yogurt
– 2 cups mixed berries (strawberries, blueberries, raspberries)
– 1 cup granola
– Honey for drizzling (optional)
Instructions:
1. Grab some cups or jars. Start by spooning a layer of Greek yogurt into the bottom.
2. Add a generous handful of mixed berries on top of the yogurt.
3. Sprinkle a layer of granola over the berries.
4. If you like, drizzle a little honey for added sweetness.
5. Repeat the layers until you’ve used all your ingredients.
Tips:
– Choose fruits that are in season for the best flavor.
– Keep the granola separate until you’re ready to eat to maintain its crunch.
FAQ:
Can I prepare these in advance? Absolutely! Just remember to add the granola right before you eat to keep it crunchy. Enjoy your healthy treat!
These parfaits are not just a meal; they’re a delightful way to start your day or satisfy your cravings.
Greek Yogurt Parfaits
Editor’s Choice

HOMBERKING 10 Pack Borosilicate Glass Meal Prep Containers with Locking …

365 By Whole Foods Market, Greek Yogurt, Plain Nonfat, 32 Ounce

Nature Valley Protein Granola, Oats and Honey Granola, Resealable Snack …
18. Shrimp Tacos with Cabbage Slaw

Servings: 4
Prep Time: 15 minutes
Cook Time: 10 minutes
Total Time: 25 minutes
Calories: 300 per serving
Craving a fresh and zesty meal? These shrimp tacos with cabbage slaw are a fantastic choice! They burst with flavor and crunch, making each bite an exciting experience. Perfect for lunch or dinner during a busy week, you can whip these up in just under 30 minutes. Serve them with creamy avocado on the side for a delightful twist!
To get started, gather these simple ingredients:
– 1 lb shrimp, peeled and deveined
– 2 cups shredded cabbage
– 1 tablespoon lime juice
– Corn tortillas
– Olive oil, salt, and pepper
Now, let’s dive into the cooking process:
1. Heat a skillet over medium-high heat. Add a splash of olive oil.
2. Toss in the shrimp. Cook until they turn opaque, about 3-4 minutes.
3. In a bowl, combine the shredded cabbage with lime juice, salt, and pepper. Mix well.
4. Warm the corn tortillas in a dry pan for 30 seconds on each side.
5. Assemble your tacos by layering the shrimp and cabbage slaw in the tortillas.
Tips: Add slices of avocado for extra creaminess! You can also spice it up with your favorite salsa or hot sauce if you like a kick.
FAQ: Can I use frozen shrimp? Yes! Just make sure to thaw them before cooking. Enjoy your tasty and healthy meal!
Shrimp Tacos with Cabbage Slaw
Editor’s Choice
CAROTE Nonstick Frying Pan Skillet,Non Stick Granite Fry Pan Egg Pan Ome…

Maine Man Shrimp Peeler Deveiner Cleaner Tool, 8-Inches, Red

Imusa 8in Plastic Tortilla Warmer, Terracotta Color, Traditional Mexican…
19. Chicken Stir-Fry with Vegetables

Servings: 4
Prep Time: 10 minutes
Cook Time: 15 minutes
Total Time: 25 minutes
Calories: 350 per serving
If you’re looking for a quick and healthy meal, chicken stir-fry with vegetables is a fantastic choice. This dish is not only packed with protein, but it also bursts with colorful veggies that keep your plate vibrant and your taste buds happy. It’s the perfect solution for busy nights when you want something nutritious and delicious without spending hours in the kitchen. Plus, it fits right into your weight loss goals by being low in calories yet high in satisfaction.
You can customize this stir-fry based on what you have in your fridge. Use seasonal vegetables or whatever catches your eye at the store. This flexibility makes it a go-to option for meal prep. Imagine crisp bell peppers, tender broccoli, and sweet carrots all coming together in a light soy sauce. It’s a dish that truly celebrates the flavors of fresh produce.
Ready to cook? Here’s what you’ll need:
Ingredients:
– 1 lb chicken breast, sliced
– 2 cups mixed vegetables (like bell peppers, broccoli, and carrots)
– 2 tablespoons soy sauce
– 1 tablespoon olive oil
– Salt and pepper to taste
Instructions:
1. Heat olive oil in a large skillet over medium heat. Add the sliced chicken and cook until it turns golden brown and is no longer pink inside, about 5-7 minutes.
2. Toss in your mixed vegetables. Stir-fry everything together for another 5-7 minutes until the veggies are tender yet crisp.
3. Pour in the soy sauce and stir well. Cook for an additional 2 minutes to let the flavors meld together.
Tips: For a heartier meal, serve this stir-fry over brown rice or quinoa. It adds fiber and keeps you feeling full longer!
FAQ:
Can I use tofu instead of chicken? Absolutely! Just press and cube the tofu before cooking. It’s a great vegetarian option that absorbs flavors beautifully.
Enjoy your healthy and colorful chicken stir-fry! It’s a dish that not only nourishes but also makes meal prep a breeze.
Chicken Stir-Fry with Vegetables
Editor’s Choice
50 Pack (100-Piece) 24 oz Meal Prep Containers Reusable with Lids, Sturd…
20. Peanut Butter Banana Smoothie

Servings: 2 Prep Time: 5 minutes
Cook Time: 0 minutes
Total Time: 5 minutes
Calories: 300 per serving
Need a quick, healthy boost to kickstart your day? Look no further than this Peanut Butter Banana Smoothie! It’s rich, creamy, and ready in just five minutes. Perfect for those hectic mornings or as a post-workout snack, this smoothie satisfies your hunger while packing in loads of nutrition.
Imagine the sweet taste of ripe bananas blended with the nutty flavor of peanut butter. You’ll get a great source of protein and healthy fats from the peanut butter, while the bananas provide natural energy and fiber. Feeling adventurous? Toss in some spinach or a scoop of protein powder for an extra health kick.
Let’s get blending! Here’s how:
Ingredients:
– 2 ripe bananas
– 2 tablespoons peanut butter
– 1 cup almond milk (or your favorite milk)
– Ice cubes
Instructions:
1. Peel the bananas and break them into chunks.
2. In a blender, add the banana chunks, peanut butter, almond milk, and a handful of ice cubes.
3. Blend on high until everything is smooth and creamy.
Enjoy it fresh for the best taste! If you have leftovers, you can store it in the fridge for up to 24 hours, but keep in mind it’s best enjoyed immediately.
Tips:
– Add a handful of spinach for extra nutrients without changing the flavor!
– Use frozen bananas for a colder, thicker smoothie.
– Experiment with different nut butters like almond or cashew for a twist.
This Peanut Butter Banana Smoothie is not just a treat; it’s a game-changer for your morning routine. Sip, smile, and start your day right!
Peanut Butter Banana Smoothie
Editor’s Choice

nutribullet Personal Blender, Shakes, Smoothies, Food Prep, and Frozen B…

Reusable Food Bags, 12 Pack 100% Silicone Food Storage Bags Stand Up Zip…

Isopure Zero Carb 100% Pure Whey Isolate Protein Powder, Lactose Free, G…
21. Cabbage and Carrot Slaw

Servings: 4
Prep Time: 10 minutes
Cook Time: 0 minutes
Total Time: 10 minutes
Calories: 100 per serving
Looking for a crunchy, vibrant side dish that packs a nutritional punch? Try this easy Cabbage and Carrot Slaw! This dish isn’t just refreshing; it’s also low in calories and full of vitamins. You can whip it up in just 10 minutes, making it perfect for busy meal prep days. Use it as a colorful topping for tacos or serve it alongside grilled chicken for a delightful crunch. You’ll love how the tangy dressing brings everything together, and feel free to adjust it to suit your taste buds!
Ready to make some slaw? Here’s what you’ll need:
Ingredients:
– 4 cups shredded cabbage
– 2 cups shredded carrots
– 1/4 cup apple cider vinegar
– 2 tablespoons olive oil
– Salt and pepper to taste
Instructions:
1. In a large bowl, mix the shredded cabbage and carrots.
2. In a separate bowl, whisk together the apple cider vinegar, olive oil, salt, and pepper until well combined.
3. Pour the dressing over the cabbage and carrot mixture. Toss well to coat every piece.
Tips:
– Let the slaw sit in the fridge for a few hours to enhance the flavor!
– Feel free to add other veggies like bell peppers or radishes for extra color and crunch!
– This slaw stays fresh in the fridge for up to four days, making it a great make-ahead option.
– Serve it on tacos, sandwiches, or as a side dish to your favorite protein for a balanced meal!
With this Cabbage and Carrot Slaw, you’ll have a delicious and healthy addition to your meal prep that everyone will enjoy!
Cabbage and Carrot Slaw
Editor’s Choice
HOMBERKING 10 Pack Borosilicate Glass Meal Prep Containers with Locking …

Amazon Grocery, Apple Cider Vinegar, 16 Fl Oz (Previously Amazon Fresh, …
22. Oven-Baked Chicken Fajitas

Servings: 4
Prep Time: 10 minutes
Cook Time: 30 minutes
Total Time: 40 minutes
Calories: 300 per serving
Oven-baked chicken fajitas bring a burst of flavor to your dinner table, making them a family favorite. This dish combines tender chicken with vibrant peppers and onions, creating a colorful plate that’s both healthy and satisfying. You’ll love how easy it is to whip up this meal, perfect for busy weeknights or meal prep days.
To save time, chop your veggies in advance and store them in the fridge. On those hectic evenings, dinner will come together in no time. Plus, this dish is flexible—add your favorite toppings or swap in different proteins for variety.
Ingredients:
– 1 lb chicken breast, sliced
– 3 bell peppers (any colors you like), sliced
– 1 onion, sliced
– 2 tablespoons fajita seasoning
– Olive oil
– Tortillas for serving
Instructions:
1. Preheat your oven to 400°F (200°C).
2. On a large baking sheet, toss the chicken, sliced peppers, onions, and fajita seasoning together with a drizzle of olive oil. Make sure everything is well-coated.
3. Spread the mixture out in a single layer for even cooking. Bake for 25-30 minutes, or until the chicken is fully cooked and the veggies are tender.
4. Serve the fajita mix in warm tortillas, and let everyone customize their own with toppings.
Tips: Add avocado slices or a spoonful of salsa for an extra kick! Enjoy your delicious meal that’s packed with flavor and nutrients.
FAQ: Can I use beef instead of chicken? Absolutely! Just remember to adjust the cooking time to ensure it’s cooked through.
Oven-Baked Chicken Fajitas
Editor’s Choice
50 Pack (100-Piece) 32 oz Meal Prep Containers Reusable with Lids 3-Comp…

Gourmet World Flavors Seasoning Collection | Non GMO Verified | 6 Magnet…

GoodCook Everyday Nonstick Carbon Steel Baking Sheet Set, 3 Pack – Small…
23. Spaghetti Squash with Marinara

Servings: 4
Prep Time: 10 minutes
Cook Time: 45 minutes
Total Time: 55 minutes
Calories: 200 per serving
Looking for a tasty way to enjoy a low-carb meal? Spaghetti squash with marinara sauce is your answer! This dish swaps out traditional pasta for a healthier alternative that’s just as filling. You’ll love how easy it is to prepare, making it perfect for your meal prep. Plus, the flavors are comforting and satisfying, making it a go-to option for busy weeks.
Cooking spaghetti squash is simple, and it can be done ahead of time. Just bake it and store it in the fridge. When you’re ready to eat, add your favorite marinara sauce—homemade or store-bought. It’s a quick way to whip up a warm, flavorful meal.
Ingredients:
– 1 medium spaghetti squash
– 2 cups marinara sauce
– Olive oil, salt, and pepper
Instructions:
1. Preheat your oven to 400°F (200°C).
2. Carefully cut the spaghetti squash in half. Scoop out the seeds.
3. Drizzle the squash with olive oil, salt, and pepper.
4. Place the squash halves cut-side down on a baking sheet. Bake for 35-45 minutes until tender.
5. Once soft, use a fork to scrape out the inside, creating spaghetti-like strands. Serve with warm marinara sauce on top.
Tips:
– Add a sprinkle of parmesan cheese for a delicious twist!
– Pair with a side salad for a complete meal.
FAQ:
How do I store leftovers? Keep any leftovers in an airtight container in the fridge for up to 4 days. Reheat when you’re ready to enjoy!
Fun fact: A cup of spaghetti squash has far fewer carbs and calories than pasta—about 31 calories per cup, with a satisfying texture. When you meal prep for losing weight recipes, this marinara-style meal keeps you full and on track all week.
Spaghetti Squash with Marinara
Editor’s Choice


Francesco Rinaldi No Salt Added Pasta Sauce-23.5 oz.
24. Lentil Soup

Servings: 4
Prep Time: 10 minutes
Cook Time: 30 minutes
Total Time: 40 minutes
Calories: 250 per serving
Imagine coming home after a busy day to a warm bowl of lentil soup. This dish is not just comforting; it’s packed with nutrition, making it a fantastic choice for weight loss and overall wellness. Lentils are rich in fiber and protein, so they keep you full and satisfied without breaking the bank. Plus, this soup is simple to make and perfect for meal prep! You can whip up a big batch and store it in portions for easy lunches or dinners throughout the week.
To get started, gather these ingredients:
– 1 cup lentils, rinsed
– 1 carrot, diced
– 1 onion, chopped
– 2 celery sticks, diced
– 4 cups vegetable broth
– Olive oil, salt, and pepper
Here’s how to make it:
1. In a large pot, heat a splash of olive oil over medium heat. Add the chopped onion, diced carrot, and celery. Sauté until they soften, about 5 minutes.
2. Stir in the rinsed lentils and pour in the vegetable broth. Bring the mixture to a boil.
3. Once boiling, reduce the heat and let it simmer for 25-30 minutes, or until the lentils are tender.
Want a smoother texture? Just blend the soup until creamy! Prefer it chunky? Leave it as is. This flexibility lets you tailor the soup to your taste.
Tips: Feel free to add cooked chicken or sausage for a heartier meal. This soup is great for busy nights, making it easy to stay on track with your health goals.
• Use fresh herbs like parsley for added flavor
• Choose low-sodium broth to keep it healthy
• Add spices like cumin or paprika for a kick
• Store leftovers in the fridge for up to five days
Fun fact: A cup of cooked lentils has roughly 18 grams of protein and 16 grams of fiber, helping you feel full longer. That makes lentil soup a smart pick for meal prep for losing weight recipes.
Lentil Soup
Editor’s Choice
Bento Box Adult Lunch Box, Containers for Adults Men Women with 4 Compar…

Immersion Blender Handheld Corded Hand Blenders Set 1100W, Trigger Varia…

365 by Whole Foods Market, Organic Low Sodium Vegetable Broth, 32 Fl Oz
25. Honey Garlic Chicken

Servings: 4
Prep Time: 15 minutes
Cook Time: 20 minutes
Total Time: 35 minutes
Calories: 350 per serving
Looking for a tasty meal that’s easy to prepare and helps you lose weight? Say hello to honey garlic chicken! This dish combines sweet and savory flavors that will make your taste buds dance. The sticky sauce adds a delightful touch, making it a perfect pairing for rice or your favorite veggies. You can whip it up quickly, making it ideal for busy weeknights or meal prep for work lunches.
With this recipe, you can enjoy delicious, homemade food while keeping your portion sizes in check. Plus, it’s simple enough for anyone to make. Let’s dive into the ingredients and steps to create this scrumptious dish!
Ingredients:
– 1 lb chicken breast, cut into bite-sized pieces
– 1/4 cup honey
– 1/4 cup soy sauce
– 3 cloves garlic, minced
– Olive oil, salt, and pepper
Instructions:
1. Heat a skillet over medium heat and add a drizzle of olive oil.
2. Sauté the chicken pieces until they turn golden brown, about 5-7 minutes.
3. Stir in the honey, soy sauce, and minced garlic. Cook until the sauce thickens, around 5 minutes.
4. Serve the chicken over a bed of fluffy rice or alongside steamed veggies for a colorful plate.
Tips: For an extra crunch, sprinkle sesame seeds on top before serving!
FAQ: Can I swap the chicken for other proteins? Yes! Shrimp or tofu work wonderfully too, so feel free to get creative with your choices!
Honey Garlic Chicken
Editor’s Choice
Bento Box Adult Lunch Box, Containers for Adults Men Women with 4 Compar…
SENSARTE Nonstick Frying Pan Skillet, Swiss Granite Coating Omelette Pan…
26. Vegetable Minestrone Soup

Servings: 4 Prep Time: 10 minutes
Cook Time: 30 minutes
Total Time: 40 minutes
Calories: 200 per serving
Are you looking for a warm and satisfying meal that fits perfectly into your weight-loss goals? Try this vibrant Vegetable Minestrone Soup. It’s a symphony of fresh vegetables and hearty beans that leaves you feeling full without weighing you down. This soup is not just nutritious; it’s also incredibly versatile and can be enjoyed year-round.
Making a big batch of minestrone is a smart move for meal prep. You can store it in the refrigerator for quick dinners or lunches. Each bowl is brimming with fiber and vitamins to help you power through your day. Plus, the flavors only get better after a day or two in the fridge!
Ingredients:
– 1 can diced tomatoes
– 1 cup green beans, chopped
– 1 cup carrots, diced
– 1 cup zucchini, diced
– 4 cups vegetable broth
– 2 tablespoons olive oil
– Salt and pepper to taste
Instructions:
1. Heat the olive oil in a large pot over medium heat. Add the chopped carrots and green beans, cooking until they soften, about 5 minutes.
2. Stir in the diced tomatoes, zucchini, and vegetable broth. Bring the mixture to a boil.
3. Reduce the heat and let it simmer for about 20 minutes until the vegetables are tender.
4. Season with salt and pepper to your liking.
Tips: Add some small pasta for an extra filling dish!
FAQ: How long does this soup last? You can keep it in the fridge for up to a week, making it a great make-ahead meal.
Enjoy your delicious, healthy minestrone soup, and feel free to customize it with your favorite veggies!
Vegetable Minestrone Soup
Editor’s Choice
Fullstar The Original Pro Chopper – Vegetable Chopper and Spiralizer, Fo…

KitchenAid Variable Speed Corded Hand Blender KHBV53, Contour Silver
27. Fruit Salad with Mint

Servings: 4
Prep Time: 10 minutes
Cook Time: 0 minutes
Total Time: 10 minutes
Calories: 150 per serving
Are you looking for a delicious way to satisfy your sweet tooth while keeping your health goals on track? This refreshing fruit salad with mint is your answer! Bursting with juicy fruits and a hint of mint, it’s perfect as a light dessert or a midday snack. The bright flavors will make your taste buds dance and leave you feeling refreshed. Plus, you can customize it with your favorite fruits, so it’s always in season!
To whip up this delightful salad, gather these simple ingredients:
Ingredients:
– 2 cups strawberries, sliced
– 2 cups blueberries
– 2 cups watermelon, diced
– 1/4 cup fresh mint leaves, chopped
– Juice of 1 lime
Instructions:
1. In a large mixing bowl, combine the sliced strawberries, blueberries, and diced watermelon.
2. Squeeze fresh lime juice over the mixed fruits and toss gently to coat.
3. Add the chopped mint leaves and mix again for a refreshing burst of flavor.
Tip: Chill your salad in the fridge for about 30 minutes before serving. This enhances the flavors and makes it extra refreshing!
FAQ: Can I use other fruits? Absolutely! Try adding bananas, kiwi, or even peaches based on what you have at home. This versatility makes it a fantastic choice for meal prep or a quick snack anytime. Enjoy your vibrant, healthy treat!
Fruit Salad with Mint
Editor’s Choice
50 Pack (100-Piece) 32 oz Meal Prep Containers Reusable with Lids 3-Comp…
28. Stuffed Acorn Squash with Quinoa

Servings: 4
Prep Time: 15 minutes
Cook Time: 45 minutes
Total Time: 60 minutes
Calories: 400 per serving
Looking for a delicious way to eat better? Stuffed acorn squash with quinoa is your answer! This dish is hearty, healthy, and perfect for cozy fall and winter dinners. The sweet taste of acorn squash blends perfectly with the savory quinoa filling, making each bite satisfying and flavorful. Plus, it looks gorgeous on the dinner table, impressing your family or guests without much effort. It’s also a fantastic meal prep option since you can make it ahead of time and reheat it for a quick meal later on. Let’s dive into how to prepare this tasty dish!
Ingredients:
– 2 acorn squashes, halved and seeds removed
– 1 cup cooked quinoa
– 1/2 cup dried cranberries
– 1/2 cup walnuts, chopped
– Olive oil, salt, and pepper to taste
Instructions:
1. Preheat your oven to 375°F (190°C).
2. Brush the cut sides of the acorn squash with olive oil, then sprinkle with salt and pepper. Place them cut-side down on a baking sheet and bake for 30 minutes.
3. While the squash is baking, mix cooked quinoa, cranberries, and walnuts in a bowl. This mixture is packed with nutrients and adds great texture!
4. Once the squash is tender, carefully flip them over. Stuff each half with the quinoa mixture and bake for an additional 15 minutes.
Tips:
Add a sprinkle of feta cheese on top for an extra burst of flavor! You can also swap quinoa for other grains like rice or barley if you prefer.
FAQ:
Can I use different nuts? Yes, almonds or pecans work well too! Enjoy this dish as a delightful main course or a beautiful side. It’s a nutritious way to fill your plate and your heart. Enjoy your cooking adventure!
Stuffed Acorn Squash with Quinoa
Editor’s Choice
HOMBERKING 10 Pack Borosilicate Glass Meal Prep Containers with Locking …

Viva Naturals Organic Quinoa, 4 lb – Pre-Washed Whole Grain, Plant Prote…

Pompeian USDA Certified Organic Extra Virgin Olive Oil Non-Stick Cooking…
29. Chia Seed Pudding

Servings: 4 Prep Time: 10 minutes
Cook Time: 0 minutes
Total Time: 10 minutes
Calories: 200 per serving
Are you searching for a quick, nutritious snack or breakfast? Look no further than chia seed pudding! This easy-to-make dish is packed with vitamins and minerals. Just mix chia seeds with your choice of milk, and watch them transform into a creamy delight. It’s like magic in your kitchen!
Chia seed pudding is perfect for meal prep. You can make it ahead of time and store it in your fridge for up to five days. Dress it up with your favorite fruits, nuts, or granola to keep things exciting. This way, you get a delicious boost of healthy fats and fiber to keep you feeling full and satisfied.
Let’s dive into how to make this tasty treat!
Ingredients:
– 1/2 cup chia seeds
– 2 cups almond milk (or any milk you prefer)
– 2 tablespoons honey or maple syrup
– Toppings: fresh fruits, nuts, or granola
Instructions:
1. In a mixing bowl, combine chia seeds, almond milk, and your chosen sweetener.
2. Stir the mixture well, then let it sit for about 10 minutes. Stir again to break up any clumps.
3. Cover and refrigerate for at least 2 hours, or overnight. It will thicken up beautifully!
4. When ready to serve, scoop into bowls and top with your favorite fruits and nuts.
Tips:
– Experiment with different types of milk for unique flavors!
– Layer it with yogurt for a parfait-style dessert.
With chia seed pudding, you can enjoy a wholesome treat that’s both easy to make and incredibly tasty. Perfect for breakfast or a quick snack, it’s a wonderful way to eat better while losing weight!
Chia Seed Pudding
Editor’s Choice

BetterBody Foods Organic Chia Seeds 2 lbs, 32 Oz, with Omega-3, Non-GMO,…

Silk Shelf-Stable Almond Milk, Unsweetened Vanilla, Dairy-Free, Vegan, N…
50 Pack (100-Piece) 24 oz Meal Prep Containers Reusable with Lids, Sturd…
30. Grilled Veggie Skewers

Servings: 4 Prep Time: 15 minutes
Cook Time: 15 minutes
Total Time: 30 minutes
Calories: 200 per serving
Grilled veggie skewers are a delicious way to add color and flavor to your meals. Perfect for summer barbecues or a healthy side dish year-round, these skewers are not only tasty but also packed with nutrients. They are an excellent choice if you’re looking to lose weight and eat better.
You can easily mix and match your favorite vegetables. Think bell peppers, zucchini, and cherry tomatoes for a bright presentation. Even fruits like pineapple can add a sweet twist! These skewers are quick to make and easy to store. Just prepare them ahead of time, and you can reheat them in minutes on busy nights. Pair them with a tangy dip or your favorite grilled protein for a complete meal.
Ingredients:
– 1 bell pepper, cut into chunks
– 1 zucchini, sliced
– 1 red onion, cut into chunks
– 1 cup cherry tomatoes
– 2 tablespoons olive oil
– Salt and pepper to taste
Instructions:
1. Preheat your grill to medium-high heat.
2. In a large bowl, toss the chopped vegetables with olive oil, salt, and pepper until well coated.
3. Thread the vegetables onto skewers, alternating the types for a colorful display.
4. Grill the skewers for 10-15 minutes, turning occasionally, until the veggies are tender and slightly charred.
Tips: Serve with a yogurt dip for a refreshing flavor boost!
FAQ: Can I use other vegetables? Absolutely! Feel free to add mushrooms, eggplant, or even fruits like peaches for different tastes and textures.
Enjoy your grilled veggie skewers as a fun and healthy addition to any meal prep plan!
Grilled Veggie Skewers
Editor’s Choice
50 Pack (100-Piece) 32 oz Meal Prep Containers Reusable with Lids 3-Comp…
YARRAMATE 16oz/470ml Glass Olive Oil Sprayer for Cooking with Stickers, …
Conclusion

Incorporating these meal prep recipes into your weekly routine can make a significant difference in achieving your weight loss goals and maintaining a healthy lifestyle. By taking a little time each week to plan and prepare your meals, you can enjoy delicious, homemade options that cater to your busy schedule without sacrificing nutrition.
Start small, choosing a few of these recipes to try out, and see how they fit into your routine. As you become more comfortable with meal prep, you’ll find it easier to stay on track and feel great throughout your busy days.
Note: We aim to provide accurate product links, but some may occasionally expire or become unavailable. If this happens, please search directly on Amazon for the product or a suitable alternative.
This post contains Amazon affiliate links, meaning I may earn a small commission if you purchase through my links, at no extra cost to you.
Frequently Asked Questions
What Are Some Easy Meal Prep Recipes for Weight Loss?
Looking for easy meal prep recipes that support your weight loss journey? Try starting with dishes like chicken stir-fry or quinoa salad. These recipes are not only simple to prepare but also packed with nutrients to keep you full and satisfied throughout the day.
Another fantastic option is vegetable soup, which is low in calories but high in fiber. The key is to choose recipes that use fresh ingredients and are free from excess sugars and unhealthy fats!
How Can I Incorporate Healthy Meal Prep Ideas into My Busy Schedule?
Juggling a busy lifestyle doesn’t mean you can’t enjoy healthy meal prep ideas! Start by dedicating just a couple of hours on the weekend to plan and prepare meals for the week. Choose recipes that are versatile and can be easily reheated, like baked chicken breasts or stir-fried veggies.
Additionally, consider using tools like slow cookers or instant pots, which can save you time while delivering delicious and nutritious meals!
What Are the Benefits of Weight Loss Meal Prep?
The benefits of weight loss meal prep are countless! First, it saves you time during the week, allowing you to grab healthy meals on the go. Second, it helps control portion sizes, making it easier to stick to your calorie goals.
Plus, meal prepping encourages you to eat more home-cooked meals, which are typically healthier than takeout. You’ll also save money by buying ingredients in bulk and reducing food waste!
What Are Some Nutritious Meal Planning Tips for Weight Loss?
When it comes to nutritious meal planning for weight loss, variety is key! Incorporate a range of proteins, fruits, and veggies to ensure you’re getting all the nutrients you need.
Aim for a balance of macronutrients by including lean proteins, healthy fats, and whole grains in your meals. Don’t forget to plan for snacks, too! Options like hummus with veggies or Greek yogurt can keep your energy up without sabotaging your weight loss goals.
What Are Some Low-Calorie Meal Prep Ideas I Can Try?
If you’re looking for low-calorie meal prep ideas, consider meals like zucchini noodles with marinara sauce or chicken and vegetable stir-fry. These options are filling without packing in too many calories.
Additionally, try preparing overnight oats with fruits and nuts for a satisfying breakfast that won’t break the calorie bank. Remember, the key is to focus on whole, nutrient-dense foods that keep you full and energized!
Related Topics
meal prep
weight loss recipes
healthy meal prep
easy meal prep
nutritious planning
low-calorie meals
quick meals
busy professionals
easy cooking
meal prep for losing weight
healthy eating
meal planning tips