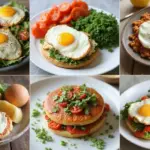
When you’re managing type 2 diabetes, meal prep can feel like a daunting task. You might often find yourself craving delicious food that fits your dietary needs. That’s why I created this post—because I know how important it is to have tasty options that make meal planning easier and healthier.
If you’re someone who wants to enjoy your meals without constantly worrying about your blood sugar levels, this one’s for you. You deserve to eat well and feel good about what’s on your plate. The right recipes can help you strike that balance, making your eating experience both enjoyable and satisfying.
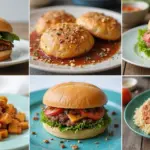
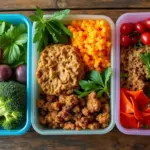
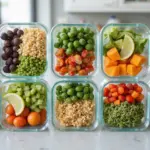
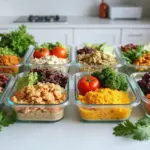
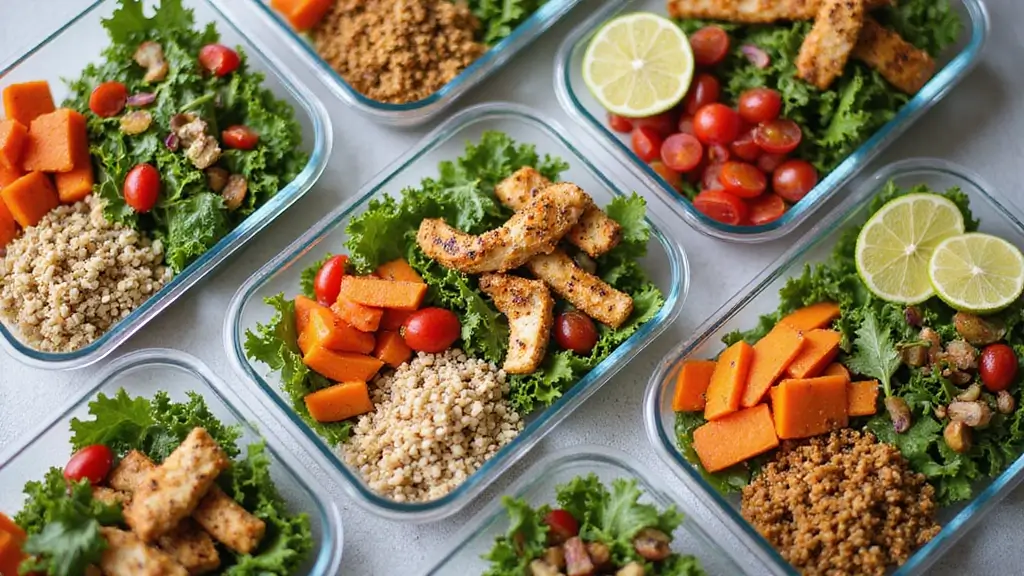
In this post, I’ve gathered 25 meal prep recipes for diabetics type 2 that taste amazing. These meals are not only simple to prepare, but they are also packed with flavor and nutrition. You’ll find options that fit into your busy lifestyle without sacrificing taste. Whether you’re looking for filling breakfasts, satisfying lunches, or hearty dinners, there’s something here for everyone.
Imagine having a week’s worth of meals ready to go, all while keeping your health on track. You’ll get to try new ingredients and flavors that will keep your taste buds excited. Plus, these recipes focus on whole foods that help support your health journey.
So, let’s dive in and discover how meal prepping can be both a fun and fulfilling part of your routine. With these recipes, you’ll be ready to take control of your meals and enjoy the process along the way!
1. Quinoa and Black Bean Salad

Start your meal prep on a delicious note with a vibrant quinoa and black bean salad. This dish packs a punch with protein and fiber, making it a perfect choice for keeping your blood sugar steady. Plus, it’s a colorful mix that delights your taste buds!
Quinoa is low on the glycemic index, which means it’s great for managing blood sugar. When you toss it with black beans, sweet corn, juicy cherry tomatoes, and fresh cilantro, you create a salad that’s not only healthy but also satisfying. A zesty dressing of lime juice and olive oil brings everything together, adding flavor without piling on calories.
Recipe Overview: 4 servings, Prep Time: 15 mins, Cook Time: 15 mins, Total Time: 30 mins, Calories: 220 per serving.
Nutrition Information: 9g protein, 8g fiber, 28g carbs, 6g fat.
Ingredients:
– 1 cup quinoa
– 2 cups water
– 1 can (15 oz) black beans, rinsed
– 1 cup corn (frozen or canned)
– 1 cup cherry tomatoes, halved
– 1/4 cup cilantro, chopped
– Juice of 1 lime
– 2 tablespoons olive oil
– Salt and pepper to taste
Instructions:
1. Rinse the quinoa under cold water. In a saucepan, combine quinoa and water. Bring to a boil, then lower the heat and simmer until fluffy (about 15 minutes).
2. In a large bowl, mix the cooked quinoa, black beans, corn, tomatoes, and cilantro together.
3. In a separate small bowl, whisk the lime juice, olive oil, salt, and pepper.
4. Drizzle the dressing over the salad and toss it all together until well combined.
5. Divide into meal prep containers for easy grab-and-go meals throughout the week.
Tips: This salad stays fresh in the fridge for up to 5 days.
FAQs: Can I add avocado? Yes, but add it fresh to avoid browning!
Enjoy this tasty salad as a quick lunch or dinner. You’ll love how easy it is to make ahead and how good it feels to eat something so nourishing!
Quinoa and Black Bean Salad
Editor’s Choice

50 Pack (100-Piece) 32 oz Meal Prep Containers Reusable with Lids 3-Comp…

BetterBody Foods Organic Quinoa, Vegan, Gluten Free, Low Glycemic Rice R…

Pompeian Robust Extra Virgin Olive Oil, Contains Polyphenols, First Cold…
2. Grilled Lemon Herb Chicken

Grilled lemon herb chicken is a fantastic choice for your meal prep. It’s not just easy to make; it bursts with flavor. You’ll love how well it fits into salads or pairs with your favorite steamed veggies. Plus, this dish is perfect for anyone managing diabetes, thanks to its low-carb and high-protein profile.
Imagine taking a bite of tender chicken marinated in zesty lemon juice and aromatic garlic. Fresh herbs like rosemary add a delightful touch. This recipe keeps your meals exciting without adding unnecessary carbs. Let’s dive into the simple steps to create a dish that’s both nourishing and delicious.
Recipe Overview:
– Servings: 4
– Prep Time: 10 minutes
– Cook Time: 20 minutes
– Total Time: 30 minutes
– Calories: 180 per serving
Nutrition Information:
– 30g protein
– 0g carbs
– 7g fat
Ingredients:
– 4 boneless, skinless chicken breasts
– Juice of 2 lemons
– 3 garlic cloves, minced
– 2 tablespoons olive oil
– 1 tablespoon fresh rosemary, chopped
– Salt and pepper to taste
Instructions:
1. Start by whisking together lemon juice, minced garlic, olive oil, rosemary, salt, and pepper in a bowl.
2. Add the chicken breasts to the marinade. Let them soak for at least 15 minutes to absorb those fantastic flavors.
3. Preheat your grill or skillet over medium heat.
4. Grill each chicken breast for 6-7 minutes on each side until they’re fully cooked.
5. Allow the chicken to rest for a few minutes. Then, slice it into strips for your meal prep containers.
Tips:
Mix and match this chicken with a variety of vegetables to keep your meals interesting. You can even toss it into wraps or grain bowls for added flair.
FAQs:
Can I use this marinade for other proteins? Absolutely! It works great with fish and tofu too, so you can easily switch things up.
Enjoy making this grilled lemon herb chicken a staple in your meal prep routine. It’s quick, tasty, and perfect for staying on track with your health goals.
Grilled Lemon Herb Chicken
Editor’s Choice

HOMBERKING 10 Pack Borosilicate Glass Meal Prep Containers with Locking …

Etekcity Food Kitchen Scale, Digital Grams and Ounces for Weight Loss, B…

SENSARTE Nonstick Grill Pan for Stove Tops, Versatile Griddle with Pour …
3. Sweet Potato and Chickpea Bowl

Let’s talk about a delicious and nutritious meal that’s perfect for any time of the day: the Sweet Potato and Chickpea Bowl. This bowl is not just tasty; it’s also packed with fiber and protein, making it a fulfilling choice for lunch or dinner. Sweet potatoes bring a natural sweetness, and when roasted, they become even more flavorful. Chickpeas add a delightful crunch that balances the soft texture of sweet potatoes. Drizzle a creamy tahini dressing on top, and you have a meal that’s both satisfying and guilt-free!
Ready to make this? Here’s how you can whip it up in no time.
Recipe Overview:
– Servings: 4
– Prep Time: 15 mins
– Cook Time: 25 mins
– Total Time: 40 mins
– Calories: 350 per serving
Nutrition Information:
– Protein: 12g
– Fiber: 14g
– Carbs: 58g
– Fat: 10g
Ingredients:
– 2 medium sweet potatoes, diced
– 1 can (15 oz) chickpeas, rinsed
– 2 tablespoons olive oil
– 1 teaspoon paprika
– Salt and pepper, to taste
– 4 cups spinach or kale
– 1/4 cup tahini
– Juice of 1 lemon
Instructions:
1. Preheat your oven to 400°F (200°C).
2. On a baking sheet, toss the diced sweet potatoes with olive oil, paprika, salt, and pepper.
3. Roast the sweet potatoes for about 20 minutes, or until they’re tender.
4. During the last 10 minutes, add the chickpeas to another baking sheet and roast them until they’re crispy.
5. In a bowl, mix tahini, lemon juice, and a little water until you reach your desired consistency.
6. Serve the roasted sweet potatoes and chickpeas over a bed of fresh spinach or kale. Drizzle with the tahini dressing for extra flavor.
Tips:
– Add roasted nuts for a nice crunch!
– Use different greens like arugula for a peppery twist.
– Prepare extra for meal prep; this bowl keeps well in the fridge.
FAQs:
– Can I make this vegan? Yes, tahini is already vegan-friendly!
– What if I don’t have tahini? You can substitute with a yogurt dressing for a different flavor.
This Sweet Potato and Chickpea Bowl is not just a meal; it’s a burst of flavors and nutrients that you can enjoy any day of the week!
Sweet Potato and Chickpea Bowl
Editor’s Choice
50 Pack (100-Piece) 32 oz Meal Prep Containers Reusable with Lids 3-Comp…

365 by Whole Foods Market, Organic Tahini, 16 Ounce
4. Spinach and Feta Stuffed Peppers

Imagine a dish that’s not just a feast for the eyes but also a powerhouse of nutrients. These Spinach and Feta Stuffed Peppers are exactly that! They are not only delightful to look at, but they also make for a perfect meal prep option that fits seamlessly into your busy lifestyle.
Each bell pepper acts as a colorful bowl, brimming with a tasty mixture of sautéed spinach, creamy feta cheese, and fluffy quinoa. This dish delivers a great punch of vitamins while keeping carbs low, making it an excellent choice for anyone managing diabetes. Plus, the hint of feta adds a tangy flavor that you won’t resist.
Recipe Overview: 4 servings, Prep Time: 15 mins, Cook Time: 30 mins, Total Time: 45 mins, Calories: 200 per serving.
Nutrition Information: 8g protein, 6g fiber, 28g carbs, 9g fat.
Ingredients:
– 4 bell peppers (choose your favorite colors)
– 1 cup cooked quinoa
– 2 cups fresh spinach, chopped
– 1 cup feta cheese, crumbled
– 2 tablespoons olive oil
– Salt and pepper to taste
Instructions:
1. Preheat your oven to 375°F (190°C). Cut the tops off the bell peppers and scoop out the seeds.
2. In a skillet, heat the olive oil over medium heat. Add the chopped spinach and cook until it wilts down.
3. In a mixing bowl, combine the cooked quinoa, wilted spinach, crumbled feta, and season with salt and pepper.
4. Stuff each pepper with the delicious mixture and place them in a baking dish. Cover the dish and bake for 25-30 minutes.
5. Allow them to cool before storing in meal prep containers.
Tips: Sprinkle fresh herbs on top for an extra burst of flavor!
FAQs: Can I freeze these? Absolutely! They freeze well, making them a convenient option for future meals.
These stuffed peppers not only taste amazing, but they also support your health goals. You can feel good about what you’re eating while enjoying every bite!
Spinach and Feta Stuffed Peppers
Editor’s Choice
50 Pack (100-Piece) 32 oz Meal Prep Containers Reusable with Lids 3-Comp…
BetterBody Foods Organic Quinoa, Vegan, Gluten Free, Low Glycemic Rice R…

Pompeian USDA Organic Robust Extra Virgin Olive Oil, Contains Polyphenol…
5. Zucchini Noodles with Marinara Sauce

Say hello to a tasty and healthy meal option: zucchini noodles with marinara sauce! If you’re looking to cut back on carbs without sacrificing flavor, this dish is your answer. Zucchini noodles, or “zoodles,” offer a fresh twist on traditional pasta, keeping your blood sugar levels steady while satisfying your cravings.
Imagine twirling those spiralized zucchini on your fork, drenched in a rich homemade marinara. Made with juicy tomatoes, fragrant garlic, and aromatic basil, this sauce is both comforting and nutritious. You’ll love how it feels light yet hearty all at once!
Recipe Overview: 4 servings, Prep Time: 10 minutes, Cook Time: 20 minutes, Total Time: 30 minutes, Calories: 150 per serving.
Nutrition Information: 6g protein, 4g fiber, 22g carbs, 5g fat.
Ingredients:
– 4 medium zucchinis
– 2 cups fresh tomatoes, diced
– 3 garlic cloves, minced
– 2 tablespoons olive oil
– 1/4 cup fresh basil, chopped
– Salt and pepper to taste
Instructions:
1. First, spiralize the zucchinis into noodles using a spiralizer. Set them aside for later.
2. Next, heat olive oil in a skillet over medium heat. Add minced garlic and sauté until fragrant.
3. Toss in the diced tomatoes and cook until they soften, about 5-7 minutes.
4. Season the sauce with salt, pepper, and chopped basil. Let it simmer for about 10 minutes to blend the flavors.
5. Finally, add the zucchini noodles to the skillet and cook for 3-4 minutes until they are just tender. Serve right away, or store in meal prep containers for a quick meal later!
Tips: Want to add some extra flavor? Garnish your dish with a sprinkle of Parmesan cheese!
FAQs: Can I use store-bought marinara? Yes, but make sure to check the sugar content for a healthier choice!
Enjoy this delightful meal that not only tastes great but also fits perfectly into your diabetic-friendly meal prep plan!
Zucchini Noodles with Marinara Sauce
Editor’s Choice
Pompeian Robust Extra Virgin Olive Oil, Contains Polyphenols, First Cold…
6. Cauliflower Fried Rice

Looking for a delicious way to enjoy fried rice without the carbs? This Cauliflower Fried Rice is your answer! It swaps out traditional rice for cauliflower, giving you a tasty dish that’s low in calories but packed with flavor. Imagine the crunch of fresh veggies like peas, carrots, and green onions dancing on your palate, all while keeping your blood sugar in check.
This recipe is not only healthy but also super versatile. You can add your favorite protein—like shrimp, chicken, or tofu—to make it your own. It’s perfect for meal prepping since you can whip up a big batch and enjoy it throughout the week.
Recipe Overview:
– Servings: 4
– Prep Time: 10 minutes
– Cook Time: 15 minutes
– Total Time: 25 minutes
– Calories: 120 per serving
Nutrition Information:
– Protein: 5g
– Fiber: 4g
– Carbs: 20g
– Fat: 3g
Ingredients:
– 1 head of cauliflower, riced
– 1 cup mixed vegetables (peas, carrots, etc.)
– 2 eggs, beaten
– 2 tablespoons low-sodium soy sauce
– 2 tablespoons sesame oil
– 2 green onions, chopped
– Salt and pepper to taste
Instructions:
1. Start by ricing the cauliflower with a food processor or a box grater.
2. Heat the sesame oil in a skillet over medium heat. Add the mixed vegetables; cook until tender.
3. Push the veggies to one side of the skillet. Pour in the beaten eggs and scramble until fully cooked.
4. Stir in the cauliflower rice, soy sauce, salt, and pepper. Cook for about 5 minutes, until the cauliflower is tender.
5. Serve hot or portion into meal prep containers for easy lunches.
Tips: Want to make it vegan? Just skip the eggs or use tofu instead! This dish is perfect for busy weeknights and helps you stay on track with your health goals.
With this Cauliflower Fried Rice, you’ll never miss traditional fried rice again. Enjoy the crunch, the color, and the satisfaction of a meal that’s as healthy as it is hearty!
Cauliflower Fried Rice
Editor’s Choice

Hamilton Beach Food Processor & Vegetable Chopper for Slicing, Shredding…

Bentgo Prep – 20-Piece 3-Compartment Reusable Meal Prep Containers with …

7. Egg Muffins with Spinach and Feta

Start your day off right with these delightful Egg Muffins packed with spinach and feta. They’re the perfect grab-and-go breakfast, designed for those busy mornings when you need something quick yet nutritious. Each muffin is a bite-sized powerhouse, combining the goodness of fresh spinach with the rich flavor of feta cheese, ensuring you feel satisfied and energized.
These mini frittatas are simple to whip up. You can prepare them ahead of time, making them a smart choice for meal prep. Baked in muffin tins, they offer easy portion control, which is essential for maintaining balanced blood sugar levels. Plus, with only 90 calories per muffin, they fit seamlessly into a diabetes-friendly diet.
Recipe Overview: 12 muffins, Prep Time: 10 mins, Cook Time: 20 mins, Total Time: 30 mins, Calories: 90 per muffin.
Nutrition Information: 7g protein, 1g carbs, 6g fat.
Ingredients:
– 6 eggs
– 1 cup fresh spinach, chopped
– 1/2 cup feta cheese, crumbled
– 1/4 cup milk (or unsweetened almond milk)
– Salt and pepper to taste
Instructions:
1. Preheat your oven to 350°F (175°C) and grease a muffin tin.
2. In a mixing bowl, whisk together the eggs, milk, salt, and pepper until well blended.
3. Fold in the chopped spinach and crumbled feta, ensuring even distribution.
4. Pour the egg mixture into the muffin cups, filling them about three-quarters full.
5. Bake for 20 minutes or until the muffins are set and lightly golden on top. Allow them to cool before storing in the fridge for a quick breakfast option.
Tips: Feel free to add diced bell peppers or mushrooms for extra flavor and nutrients!
FAQs: How long do these muffins last? They can be stored in the fridge for up to 5 days, making them a fantastic meal prep option for the week ahead.
Egg Muffins with Spinach and Feta
Editor’s Choice

Amazon Basics Nonstick Round Muffin Baking Pan, 12 Cups, Set of 2, Gray,…

Rubbermaid Brilliance Food Storage Containers BPA Free Airtight Lids Ide…
8. Turkey and Vegetable Stir-Fry

Get ready to enjoy a delicious and healthy meal with this turkey and vegetable stir-fry! This recipe not only comes together in a flash, but it also packs a punch of flavor and nutrition. With vibrant vegetables and lean ground turkey, you’ll find this dish both satisfying and guilt-free. It’s the ideal meal prep choice for your busy week.
Imagine tender turkey mingling with crisp bell peppers, bright broccoli, and sweet snap peas. Each bite bursts with freshness and essential nutrients, making it a perfect low-carb option. Serving it over cauliflower rice adds a delightful twist, keeping your meal light yet filling.
Recipe Overview: Servings: 4, Prep Time: 10 mins, Cook Time: 15 mins, Total Time: 25 mins, Calories: 250 per serving.
Nutrition Information: 30g protein, 4g fiber, 12g carbs, 10g fat.
Ingredients:
– 1 lb ground turkey
– 2 cups mixed vegetables (bell peppers, broccoli, snap peas)
– 2 tablespoons soy sauce (or tamari for gluten-free)
– 1 tablespoon minced ginger
– 2 cloves minced garlic
– 1 tablespoon sesame oil
Instructions:
1. Heat sesame oil in a large skillet over medium heat. Add ground turkey and cook until browned, stirring often.
2. Add minced garlic and ginger, cooking for an additional minute until fragrant.
3. Toss in your mixed vegetables and soy sauce. Stir-fry for about 5-7 minutes until the veggies are tender-crisp.
4. Let the stir-fry cool before placing it in meal prep containers. Serve over cauliflower rice for a complete meal.
Tips:
– Feel free to swap in any veggies you have on hand. Think carrots, zucchini, or even spinach!
– For extra flavor, try adding a splash of lime juice before serving.
FAQs:
– Can I use chicken instead of turkey? Absolutely! Chicken is a great alternative and works wonderfully in this recipe.
This stir-fry not only satisfies your cravings but also fits seamlessly into your meal prep routine. Enjoy the vibrant flavors while keeping your health goals on track!
Turkey and Vegetable Stir-Fry
Editor’s Choice
Bentgo Prep – 20-Piece 3-Compartment Reusable Meal Prep Containers with …

365 by Whole Foods Market, Toasted Sesame Seed Oil, 8.4 Fl Oz
9. Greek Yogurt Parfaits

Start your day with these delightful Greek yogurt parfaits. They offer a perfect blend of protein and deliciousness, making them an ideal choice for breakfast or a quick snack—especially for those managing blood sugar levels. With layers of creamy Greek yogurt, vibrant fresh berries, and a crunchy sprinkle of nuts, these parfaits are as beautiful as they are tasty. Plus, they’re super easy to prepare, and you can switch up the ingredients to keep things interesting.
Let’s break down how to make this simple recipe:
Recipe Overview: Yields 4 servings, Prep Time: 10 mins, Total Time: 10 mins, Calories: 150 per serving.
Nutrition Information: 14g protein, 12g carbs, 7g fat.
Ingredients:
– 2 cups Greek yogurt (choose unsweetened for less sugar)
– 1 cup mixed berries (like strawberries, blueberries, and raspberries)
– 1/4 cup nuts or seeds (try almonds, walnuts, or chia seeds)
Instructions:
1. Grab a cup or bowl and start with a layer of Greek yogurt at the bottom.
2. Next, add a colorful layer of mixed berries.
3. Top that with a layer of nuts or seeds for crunch.
4. Repeat these layers until you’ve used all your ingredients, finishing with more berries on top.
5. Store your parfaits in the fridge for up to 4 days for a grab-and-go option.
Tips: Feel free to experiment! Use different fruits or nuts to keep your parfaits fresh and exciting.
FAQs: Can I use flavored yogurt? Make sure to check for added sugars to keep it diabetic-friendly.
These parfaits not only look great but also provide a satisfying way to start your day. They can help keep your blood sugar stable while tasting amazing. Enjoy these healthy layers of goodness!
Did you know Greek yogurt parfaits can boost protein by 15–20 g per serving, helping balance blood sugar for diabetics type 2? Layer berries for fiber and nuts for healthy fats—meal prep for diabetics type 2 recipes that taste amazing, every morning.
Greek Yogurt Parfaits
Editor’s Choice


365 by Whole Foods Market, Organic Berry Blend, 32 Ounce

Roastery Coast – Daily Nuts Original Mixed Nuts | Mixed Nuts Packs | Ind…
10. Baked Eggplant Parmesan

Discover a delightful twist on a classic favorite with this Baked Eggplant Parmesan! This dish offers all the comforting flavors you love without the extra carbs. By using almond flour instead of traditional breadcrumbs, you can enjoy a crispy texture while keeping it diabetic-friendly. Imagine layers of tender roasted eggplant smothered in rich marinara sauce and gooey mozzarella cheese—comfort food at its finest!
Here’s how to whip up this tasty dish. You’ll spend just 20 minutes prepping and 30 minutes cooking, making it a perfect weeknight meal. With only 280 calories per serving, this recipe is nutritious and satisfying, hitting the sweet spot for your cravings.
Recipe Overview:
4 servings
Prep Time: 20 minutes
Cook Time: 30 minutes
Total Time: 50 minutes
Calories: 280 per serving
Nutrition Information:
15g protein
6g fiber
22g carbs
16g fat
Ingredients:
– 2 medium eggplants, sliced
– 2 cups sugar-free marinara sauce
– 1 cup shredded mozzarella cheese
– 1/2 cup almond flour
– 1/4 cup grated Parmesan cheese
– 2 tablespoons olive oil
– Salt and pepper to taste
Instructions:
1. Preheat your oven to 375°F (190°C). Sprinkle salt on the eggplant slices and let them sit for 15 minutes to draw out moisture.
2. Rinse the eggplant and pat it dry. Then dip each slice in olive oil and coat with almond flour.
3. Place the slices on a baking sheet and roast them for 20 minutes until they turn golden brown.
4. In a baking dish, layer the roasted eggplant, marinara sauce, and mozzarella cheese. Repeat until you run out of ingredients, finishing with a layer of cheese on top.
5. Bake for another 10 minutes until the cheese is bubbly. Allow it to cool slightly before slicing and serving.
Tips:
Add fresh basil on top before serving for a burst of flavor!
FAQs:
Can I use zucchini instead? Yes, zucchini makes a great substitute if you want a different flavor!
Enjoy this delicious Baked Eggplant Parmesan as a hearty meal that’s perfect for your dietary needs and taste buds alike! It’s not just food; it’s a comforting hug on a plate.
Baked Eggplant Parmesan
Editor’s Choice

Blue Diamond Almonds Almond Flour, Gluten Free, Blanched, Finely Sifted,…

Yo Mama’s Foods Keto Marinara Pasta and Pizza Sauce – Pack of (1) – No S…

Nordic Ware Naturals Half Sheet – USA Made Aluminum Commercial Quality S…
11. Lentil Soup

Imagine cozying up with a warm bowl of lentil soup that not only satisfies your hunger but also keeps your blood sugar in check. This delightful dish is a perfect meal prep option for those managing Type 2 diabetes. Lentils are packed with fiber and protein, ensuring you feel full and energized without the sugar spikes. Plus, the blend of spices and vegetables creates a flavor explosion in every spoonful.
Making a big batch is easy. You can freeze portions for busy days, making it a practical choice for your weeknight dinners. Let’s get started on this nourishing recipe!
Recipe Overview: 6 servings, Prep Time: 10 mins, Cook Time: 30 mins, Total Time: 40 mins, Calories: 180 per serving.
Nutrition Information: 12g protein, 10g fiber, 30g carbs, 4g fat.
Ingredients:
– 1 cup lentils, rinsed
– 1 onion, chopped
– 2 carrots, diced
– 2 celery stalks, diced
– 3 garlic cloves, minced
– 4 cups vegetable broth (low sodium)
– 1 teaspoon cumin
– Salt and pepper to taste
Instructions:
1. In a large pot, heat a little olive oil over medium heat. Sauté the onion, carrots, and celery until they soften, about 5 minutes.
2. Stir in the garlic and cumin, cooking for an additional minute until fragrant.
3. Add the rinsed lentils and vegetable broth. Bring the mixture to a boil, then reduce the heat and let it simmer for 25-30 minutes until the lentils are tender.
4. Season with salt and pepper to your liking. Serve hot, and if you have leftovers, store them in the fridge for up to a week.
Tips: Want a creamier texture? Blend a portion of the soup before serving!
FAQs: Can you add meat? Absolutely! Shredded chicken or turkey works wonders in this soup, adding protein and flavor.
This lentil soup is not just a meal; it’s a warm hug in a bowl. Perfect for meal prepping, it makes your week easier and healthier. Enjoy every flavorful bite!
Fun fact: One cup of cooked lentils delivers about 15 grams of fiber and 18 grams of protein. That combo helps steady blood sugar and curb cravings, making meal prep for diabetics type 2 recipes simpler. Freeze portions for busy days and savor cozy, low-GI soup without the sugar spikes.
Lentil Soup
Editor’s Choice

KitchenAid Variable Speed Corded Hand Blender KHBV53, Contour Silver
12. Coconut Curry Chicken

Craving a dish that’s not only delicious but also diabetic-friendly? Look no further than this Coconut Curry Chicken! Bursting with flavor, this meal is both satisfying and easy to prepare. The creamy coconut milk brings a delightful richness to the chicken and vegetables, while the spices offer a warm, aromatic experience. It’s comfort food at its best, and you’ll love the way it pairs with cauliflower rice for a low-carb option.
Ready to whip this up? Here’s everything you need to know! This recipe serves four, making it perfect for meal prep. Spend just 15 minutes prepping and 25 minutes cooking, and you’ll have a hearty meal ready to enjoy throughout the week.
Recipe Overview:
– Servings: 4
– Prep Time: 15 mins
– Cook Time: 25 mins
– Total Time: 40 mins
– Calories: 300 per serving
Nutrition Information:
– Protein: 25g
– Fiber: 2g
– Carbs: 15g
– Fat: 20g
Ingredients:
– 1 lb chicken breast, cubed
– 1 can (13.5 oz) coconut milk
– 2 tablespoons red curry paste
– 2 cups mixed vegetables (like bell peppers and broccoli)
– 1 tablespoon olive oil
– Salt and pepper to taste
Instructions:
1. Heat olive oil in a large skillet over medium-high heat. Add the chicken and cook until it’s browned, about 5-7 minutes.
2. Stir in the red curry paste and mixed vegetables, cooking for an additional 5 minutes until the veggies soften slightly.
3. Pour in the coconut milk and bring to a gentle simmer. Let it cook for about 15 minutes, ensuring the chicken is cooked through and the flavors meld together.
4. Taste and adjust the seasoning with salt and pepper if needed. Once done, portion into meal prep containers and serve with cauliflower rice.
Tips:
– Add fresh cilantro on top for a burst of freshness!
– Want to make it vegetarian? Swap the chicken for chickpeas or tofu for a protein-rich alternative.
With this Coconut Curry Chicken, you’ll enjoy a delicious meal that fits perfectly into your diabetic meal plan. Enjoy the flavors and the ease of meal prepping this delightful dish!
Coconut Curry Chicken
Editor’s Choice

Thai Kitchen Gluten Free Unsweetened Coconut Milk, 13.66 fl oz (Pack of 12)

13. Broccoli and Cheese Stuffed Chicken

Satisfy your cravings with a delicious twist on chicken that’s perfect for your meal prep needs! This broccoli and cheese stuffed chicken is not just a feast for your taste buds; it’s a fantastic low-carb option that leaves you feeling energized, not heavy. Imagine tender chicken breasts filled with creamy, cheesy goodness and fresh broccoli. Every bite feels like a special treat. Pair it with a crisp side salad, and you’ve got a complete, healthy meal!
Here’s how to whip up this tasty dish in no time:
Recipe Overview: Serves 4, Prep Time: 15 mins, Cook Time: 30 mins, Total Time: 45 mins, Calories: 350 per serving.
Nutrition Information: 40g protein, 3g fiber, 6g carbs, 18g fat.
Ingredients:
– 4 boneless, skinless chicken breasts
– 1 cup broccoli, steamed and chopped
– 1 cup shredded cheese (your choice: cheddar or mozzarella)
– 1/4 cup cream cheese
– Salt and pepper to taste
Instructions:
1. Preheat your oven to 375°F (190°C). Carefully cut a pocket into each chicken breast.
2. In a bowl, combine the steamed broccoli, shredded cheese, cream cheese, salt, and pepper until well mixed.
3. Gently stuff each chicken breast pocket with the broccoli-cheese mixture. Secure with toothpicks if needed to keep it closed.
4. Place the stuffed chicken in a baking dish and bake for 25-30 minutes, or until the chicken is fully cooked.
5. Allow the chicken to cool for a few minutes before slicing to serve.
Tips: For an extra nutrient boost, serve this dish with a side of roasted vegetables like carrots or zucchini!
FAQs:
– Can I use frozen broccoli? Absolutely! Just make sure to thaw and drain any excess moisture before mixing.
This delightful dish not only satisfies your hunger but also supports your dietary needs. Enjoy the flavors and the simplicity of this meal prep recipe!
Broccoli and Cheese Stuffed Chicken
Editor’s Choice
50 Pack (100-Piece) 32 oz Meal Prep Containers Reusable with Lids 3-Comp…
Etekcity Food Kitchen Scale, Digital Grams and Ounces for Weight Loss, B…

Silicone Baking Mat, 3 Pack Reusable Baking Mat, Non-Stick, Food Safe Si…
14. Spaghetti Squash with Pesto

Craving a comforting dish that doesn’t spike your blood sugar? Try this delightful spaghetti squash with pesto. It gives you that satisfying pasta vibe without the hefty carbs. Roasting the squash creates tender strands that serve as a perfect base, making your meal both delicious and nutritious.
The bright, fresh flavors of basil and garlic from the pesto elevate this dish. You can easily whip up your own pesto or grab a jar from the store. Either way, you’ll enjoy a meal rich in vitamins and low in carbs, making it a smart choice for meal prep.
Recipe Overview: 4 servings, Prep Time: 15 mins, Cook Time: 30 mins, Total Time: 45 mins, Calories: 220 per serving.
Nutrition Information: 6g protein, 4g fiber, 18g carbs, 12g fat.
Ingredients:
– 1 spaghetti squash
– 1/2 cup pesto (store-bought or homemade)
– Salt and pepper to taste
– Cherry tomatoes for garnish (optional)
Instructions:
1. Preheat your oven to 400°F (200°C). Slice the spaghetti squash in half and scoop out the seeds.
2. Place the squash halves cut-side down on a baking sheet and roast for 30 minutes until soft.
3. After baking, let it cool slightly. Then, use a fork to scrape out the strands.
4. Toss the strands with pesto, adding salt and pepper to taste. If you like, sprinkle on some cherry tomatoes for a pop of color.
5. Portion into meal prep containers for easy grab-and-go meals throughout the week!
Tips: Want a protein boost? Add grilled chicken or chickpeas for added nutrition!
FAQs: Can I swap in regular pasta? While this dish is designed to be low-carb, you can certainly use traditional pasta if that’s your preference.
This spaghetti squash with pesto is not just a meal; it’s a way to enjoy your favorite flavors while staying healthy. Perfect for busy weeks, it’s sure to become a staple in your meal prep rotation!
Spaghetti squash with pesto is a clever win for meal prep for diabetics type 2 recipes. It satisfies comfort-food cravings without spiking sugar. Roast the squash, toss with fresh pesto, and you’ve got a tasty, low-carb base for weeknights.
Spaghetti Squash with Pesto
Editor’s Choice


Filippo Berio Pesto, Organic Classic Basil, 6.7 Ounce Glass Jar, Gluten …
Bentgo Prep – 20-Piece 3-Compartment Reusable Meal Prep Containers with …
15. Chia Seed Pudding

Craving a sweet yet healthy dessert? Chia seed pudding is your answer! This delightful treat is rich in omega-3 fatty acids and packed with fiber, making it a perfect choice to keep you feeling full and satisfied. Plus, it’s incredibly easy to whip up in advance, allowing you to customize it with your favorite flavors and toppings, like fresh berries, crunchy nuts, or a touch of honey if you like a little sweetness.
Imagine starting your day with this creamy pudding or enjoying it as a wholesome snack. It’s flexible, fun, and full of nutrients!
Recipe Overview: 4 servings, Prep Time: 5 minutes, Total Time: 5 minutes (plus chilling), Calories: 150 per serving.
Nutrition Information: 6g protein, 12g carbs, 9g fat.
Ingredients:
– 1/2 cup chia seeds
– 2 cups unsweetened almond milk
– 1 teaspoon vanilla extract
– Sweetener of your choice (optional)
Instructions:
1. In a mixing bowl, combine the chia seeds, almond milk, vanilla extract, and sweetener.
2. Stir the mixture well and let it sit for about 5 minutes. This step helps prevent clumping.
3. Give it another stir, cover the bowl, and refrigerate for at least 2 hours or overnight to let it thicken.
4. When ready to serve, top with your choice of fresh fruit, nuts, or seeds for added flavor and texture.
Tips: Want a chocolate twist? Just add a tablespoon of cocoa powder!
FAQs: How long does it last? Chia pudding can be stored in the fridge for up to 5 days, making it a great meal prep option.
With this simple recipe, you’ll have a delicious, nutritious snack on hand whenever you need it!
Chia Seed Pudding
Editor’s Choice

BetterBody Foods Organic Chia Seeds 2 lbs, 32 Oz, with Omega-3, Non-GMO,…

365 by Whole Foods Market, Organic Unsweetened Almond Milk, 32 Fl Oz (Pa…
16. Shrimp and Avocado Salad

Get ready to enjoy a delightful Shrimp and Avocado Salad that’s not just tasty but also great for managing your blood sugar. This refreshing dish combines succulent shrimp with creamy avocado and crunchy cucumber, making it a perfect option for lunch or dinner. The zesty lime dressing adds an extra layer of flavor that brightens up every bite. Plus, it’s quick to prepare, taking only about 25 minutes from start to finish!
Recipe Overview:
– Servings: 4
– Prep Time: 15 mins
– Cook Time: 10 mins
– Total Time: 25 mins
– Calories: 220 per serving
Nutrition Information:
– Protein: 20g
– Fat: 12g
– Carbs: 10g
Ingredients:
– 1 lb shrimp, peeled and deveined
– 2 ripe avocados, diced
– 1 cucumber, diced
– Juice of 2 limes
– 2 tablespoons olive oil
– Salt and pepper to taste
Instructions:
1. Heat olive oil in a skillet over medium heat. Cook the shrimp until they turn pink and opaque, about 3-4 minutes.
2. In a large bowl, combine the cooked shrimp, diced avocado, cucumber, lime juice, salt, and pepper.
3. Toss everything gently to mix, then serve immediately. If you prefer, chill it in the fridge for a refreshing option later.
Tips:
This salad tastes best fresh but can be stored in the fridge for up to 2 days. For a twist, add cherry tomatoes or a sprinkle of cilantro for extra flavor.
FAQs:
– Can I use canned shrimp? Yes, while fresh shrimp is ideal, canned shrimp works in a pinch! Just rinse and drain before using.
This salad not only satisfies your hunger but also supports your health goals. It’s a perfect meal prep option that keeps well and tastes fantastic. Enjoy it on its own or pair it with whole grain crackers for a complete meal!
Shrimp and Avocado Salad
Editor’s Choice
50 Pack (100-Piece) 32 oz Meal Prep Containers Reusable with Lids 3-Comp…

YARRAMATE 16oz/470ml Glass Olive Oil Sprayer for Cooking with Stickers, …

Elite Gourmet ETS740 BPA-Free Electric Citrus Juicer with 2 Cones, Compa…
17. Mediterranean Chickpea Salad

Dive into the deliciousness of a Mediterranean Chickpea Salad! This salad is not only vibrant but also packed with nutrients that can help you stay energized throughout the day. It’s perfect as a light lunch or a colorful side dish at dinner. Plus, it travels well, making it an ideal option for your meal prep.
Imagine sinking your fork into a mix of chickpeas, crisp cucumbers, juicy tomatoes, briny olives, and creamy feta cheese, all drizzled with a zesty lemon-olive oil dressing. It’s a taste of the Mediterranean that brightens up your mealtime. With its high fiber and protein content, this salad helps you feel full longer while keeping your blood sugar in check.
Recipe Overview: 4 servings, Prep Time: 10 mins, Total Time: 10 mins, Calories: 180 per serving.
Nutrition Information: 8g protein, 12g carbs, 10g fat.
Ingredients:
– 1 can (15 oz) chickpeas, rinsed and drained
– 1 cucumber, diced
– 1 cup cherry tomatoes, halved
– 1/4 cup olives, sliced
– 1/4 cup feta cheese, crumbled
– Juice of 1 lemon
– 2 tablespoons olive oil
– Salt and pepper to taste
Instructions:
1. In a large bowl, mix together chickpeas, cucumber, tomatoes, olives, and feta cheese.
2. In a separate small bowl, whisk together the lemon juice, olive oil, salt, and pepper until combined.
3. Pour the dressing over the salad and toss until everything is well-coated.
4. Divide into meal prep containers for easy grab-and-go options.
Tips: To elevate the flavor, add fresh herbs like parsley or mint!
FAQs: Want to add some protein? Grilled chicken or shrimp make excellent additions to this salad!
With this Mediterranean Chickpea Salad, you’re not just eating healthy—you’re treating yourself to a burst of flavor that you’ll look forward to. Enjoy every bite!
Mediterranean Chickpea Salad
Editor’s Choice
Bentgo Prep – 20-Piece 3-Compartment Reusable Meal Prep Containers with …

AOZITA 17oz Glass Olive Oil Bottle Dispenser – 500ml Green Oil and Vineg…

Amazon Grocery, Canned Garbanzo Beans, 15.5 Oz (Previously Amazon Fresh,…
18. Roasted Brussels Sprouts with Balsamic Glaze

Roasted Brussels sprouts with a balsamic glaze are a delightful addition to your meal prep. Not only are they simple to make, but they also bring a sweet and tangy flavor that pairs perfectly with any main dish. Roasting these little green gems enhances their natural sweetness, while the balsamic glaze adds a zesty punch you’ll love.
This dish is ideal for diabetics since it is low in carbs and packed with essential vitamins. It’s a nutritious choice that keeps you satisfied without sacrificing flavor. You’ll find that prepping these Brussels sprouts ahead of time makes your week’s meals much easier and more enjoyable.
Recipe Overview: 4 servings, Prep Time: 10 mins, Cook Time: 25 mins, Total Time: 35 mins, Calories: 90 per serving.
Nutrition Information: 4g protein, 8g carbs, 6g fat.
Ingredients:
– 1 lb Brussels sprouts, halved
– 2 tablespoons olive oil
– 2 tablespoons balsamic vinegar
– Salt and pepper to taste
Instructions:
1. Preheat your oven to 400°F (200°C).
2. In a bowl, toss the Brussels sprouts with olive oil, balsamic vinegar, salt, and pepper until well coated.
3. Spread them out in a single layer on a baking sheet.
4. Roast for 20-25 minutes, or until they are tender and caramelized.
5. Allow them to cool before placing them in meal prep containers.
Tips: Enjoy these sprouts warm as a side dish or cold as a salad topping!
FAQs: Can I add cheese? Absolutely! A sprinkle of Parmesan cheese before roasting can elevate the flavor even more!
With this delicious recipe, you can create a satisfying, healthy meal that fits seamlessly into your diet. The combination of flavors and textures will keep you coming back for more, making your meal prep a breeze!
Roasted Brussels Sprouts with Balsamic Glaze
Editor’s Choice
50 Pack (100-Piece) 32 oz Meal Prep Containers Reusable with Lids 3-Comp…
AOZITA 17oz Glass Olive Oil Bottle Dispenser – 500ml Green Oil and Vineg…

365 by Whole Foods Market, Balsamic Vinegar Of Modena, 16.9 Fl Oz
19. Grilled Salmon Salad

Enjoy a delicious grilled salmon salad that not only tastes fantastic but also supports your health. This dish is loaded with omega-3 fatty acids, which are great for your heart and overall well-being. Imagine the smoky flavor of perfectly grilled salmon mingling with crisp, fresh greens. It’s an ideal choice for lunch or dinner.
Drizzled with a tangy lemon vinaigrette, this salad is as satisfying as it is beautiful. Its vibrant colors make it a show-stopper on your table. Plus, it’s quick to prepare, making it a perfect option for busy weeknights.
Recipe Overview:
– 4 servings
– Prep Time: 10 minutes
– Cook Time: 10 minutes
– Total Time: 20 minutes
– Calories: 350 per serving
Nutrition Information:
– Protein: 30g
– Carbs: 5g
– Fat: 22g
Ingredients:
– 4 salmon fillets
– 5 cups mixed greens (like spinach and arugula)
– 1/4 cup olive oil
– Juice of 1 lemon
– Salt and pepper to taste
Instructions:
1. Preheat your grill or a pan over medium-high heat. Season the salmon fillets with salt and pepper.
2. Grill the salmon for 4-5 minutes on each side until it’s cooked through and flaky.
3. While the salmon cooks, combine mixed greens in a large bowl. Add olive oil and lemon juice, tossing to coat well.
4. Once the salmon is ready, flake it over the salad and serve immediately.
Tips:
– For an extra crunch, add your favorite nuts or seeds on top!
– Feel free to use canned salmon in a pinch, but fresh will give you the best flavor.
This grilled salmon salad is perfect for meal prep. You can make it ahead of time and store it in the fridge for a quick meal later in the week. Enjoy a tasty, healthy dish that makes eating well easy and enjoyable!
Grilled Salmon Salad
Editor’s Choice
SENSARTE Nonstick Grill Pan for Stove Tops, Versatile Griddle with Pour …

OXO Good Grips Salad Spinner | Lettuce Spinner | Fruit Washer | Fruit Wa…

Olive Oil Dispenser Bottle, 2 Pcs Glass Olive Oil Dispenser and Vinegar …
20. Peanut Butter Energy Balls

Snack time can be a challenge, especially when you’re looking to maintain a healthy lifestyle. These delightful Peanut Butter Energy Balls offer a quick, satisfying way to curb your cravings without derailing your diet. Packed with protein and healthy fats, they provide the perfect energy lift whenever you need it.
Made with wholesome oats, creamy peanut butter, and a touch of honey, these bites strike the ideal balance between sweet and nutritious. They’re easy to prepare in advance, making them a fabulous addition to your meal prep routine. Plus, they serve as a fantastic post-workout snack, fueling your body and keeping you satisfied.
Recipe Overview: 12 balls, Prep Time: 10 mins, Total Time: 10 mins, Calories: 150 per ball.
Nutrition Information: 6g protein, 15g carbs, 8g fat.
Ingredients:
– 1 cup rolled oats
– 1/2 cup peanut butter
– 1/3 cup honey (or maple syrup)
– 1/4 cup ground flaxseed (optional)
– 1/4 cup chocolate chips (optional)
Instructions:
1. In a mixing bowl, combine all ingredients. Stir until everything is well blended.
2. Use your hands to roll the mixture into small balls, about 1 inch in diameter.
3. Place the balls on a baking sheet lined with parchment paper.
4. Refrigerate for 30 minutes to let them firm up.
5. Store in an airtight container in the fridge for up to a week.
Tips: Want to change things up? Swap peanut butter for almond butter for a different flavor!
FAQs: Can I use natural peanut butter? Absolutely! Just make sure it’s the kind that doesn’t need stirring for the best texture.
These energy balls are not just for snacking; they fit perfectly into your busy life! You can grab one before heading to the gym or enjoy them as a midday pick-me-up. Keep a batch ready in your fridge, and you’ll have a delicious, nutritious treat whenever you need it. Enjoy your healthy snacking!
Peanut Butter Energy Balls
Editor’s Choice

SKIPPY Natural Creamy Peanut Butter Spread Twin Pack 2-Pack, 5 LB
50 Pack (100-Piece) 32 oz Meal Prep Containers Reusable with Lids 3-Comp…
21. Beef and Broccoli Stir-Fry

Are you looking for a quick, tasty meal that fits into your diabetic-friendly meal prep? Look no further than this delightful Beef and Broccoli Stir-Fry! It’s a classic dish that combines tender, lean beef with crisp broccoli in a savory sauce. Perfect for those busy weeknights when you need something nutritious and satisfying.
Imagine the aroma of garlic and sesame oil wafting through your kitchen as you prepare this dish. In just 25 minutes, you can have a colorful plate that’s low in carbs and high in protein. Pair it with cauliflower rice for a complete meal that feels indulgent without the guilt!
Recipe Overview: 4 servings, Prep Time: 10 mins, Cook Time: 15 mins, Total Time: 25 mins, Calories: 280 per serving.
Nutrition Information: 30g protein, 5g fiber, 14g carbs, 13g fat.
Ingredients:
– 1 lb lean beef, thinly sliced
– 4 cups broccoli florets
– 2 tablespoons low-sodium soy sauce
– 1 tablespoon sesame oil
– 2 cloves garlic, minced
– Salt and pepper to taste
Instructions:
1. Heat sesame oil in a large skillet over medium-high heat.
2. Add the sliced beef and cook until browned, about 5-7 minutes.
3. Stir in minced garlic and broccoli, cooking until the broccoli is bright green and tender-crisp, about 3-4 minutes.
4. Pour in the soy sauce and cook for another 2-3 minutes, stirring gently.
5. Serve hot on its own or over cauliflower rice for a delicious, low-carb twist. Store leftovers in meal prep containers for a quick lunch or dinner later in the week!
Tips: Want a pop of color? Add sliced bell peppers or carrots to the stir-fry for extra nutrition and crunch!
FAQs:
– Can I make this ahead? Absolutely! This dish keeps well in the fridge for up to 3 days, making it a great option for meal prep.
Get ready to enjoy a meal that not only fills you up but also brings joy to your table. Give this Beef and Broccoli Stir-Fry a try, and you’ll see just how easy and delicious healthy eating can be!
Beef and Broccoli Stir-Fry
Editor’s Choice
Bentgo Prep – 20-Piece 3-Compartment Reusable Meal Prep Containers with …

Kitchen & Love Organic Riced Cauliflower 8 oz (6 Pack) | Low Carb, Low C…

22. Vegetable Soup

Warm up your evenings with a delightful bowl of vegetable soup. This dish is not just comforting; it’s a fantastic way to pack in your daily servings of veggies. You can easily customize it with whatever fresh produce you have at home, making it a flexible and fun recipe to whip up.
Imagine vibrant carrots, crisp celery, and tender zucchini all mingling in a rich broth. This soup is low in calories but high in nutrition, making it an excellent option for meal prepping. You can freeze portions and simply reheat them whenever hunger strikes.
Recipe Overview: Serves 6, Prep Time: 10 mins, Cook Time: 30 mins, Total Time: 40 mins, Calories: 150 per serving.
Nutrition Information: 5g protein, 8g fiber, 22g carbs, 3g fat.
Ingredients:
– 4 cups low-sodium vegetable broth
– 2 cups mixed vegetables (like carrots, celery, and zucchini)
– 1 can (14 oz) diced tomatoes
– 1 onion, chopped
– 2 cloves garlic, minced
– Salt and pepper to taste
Instructions:
1. In a large pot, heat a splash of olive oil and sauté the onion and garlic until fragrant.
2. Add in your mixed vegetables and cook for about 5 minutes until they start to soften.
3. Pour in the diced tomatoes and vegetable broth. Bring the mixture to a boil, then lower the heat and let it simmer for 20-25 minutes.
4. Season with salt and pepper to taste before serving hot.
Tips: For an extra flavor boost, sprinkle in some dried thyme or fresh basil just before serving!
FAQs:
Can I add protein? Absolutely! Toss in some canned beans or lentils for a hearty twist that also boosts the protein content. This soup is your canvas—get creative and enjoy each spoonful!
Vegetable Soup
Editor’s Choice
50 Pack (100-Piece) 32 oz Meal Prep Containers Reusable with Lids 3-Comp…

365 by Whole Foods Market, Organic Low Sodium Vegetable Broth, 32 Fl Oz

The Spice Lab Complete Organic Spices and Seasonings Set – 30 Jar Spice …
23. Pesto Chicken Skewers

Get ready for a flavor-packed experience with these Pesto Chicken Skewers! Perfect for meal prep, these skewers are not only delicious but also healthy. Marinated in vibrant pesto, the chicken becomes juicy and aromatic, making every bite a delight. Whether you serve them as a main course or as a fun appetizer, they are sure to impress. Pair these skewers with a fresh side salad or roasted veggies for a complete meal that fits your dietary needs.
Recipe Overview: 4 servings, Prep Time: 15 mins, Cook Time: 15 mins, Total Time: 30 mins, Calories: 250 per serving.
Nutrition Information: 30g protein, 3g carbs, 14g fat.
Ingredients:
– 1 lb chicken breast, cut into bite-sized cubes
– 1/2 cup pesto (you can use store-bought or make your own)
– Salt and pepper to taste
– Skewers (if using wood, soak them in water for 30 minutes)
Instructions:
1. Start by placing the chicken cubes in a bowl. Pour in the pesto and season with salt and pepper. Mix well to ensure every piece is coated.
2. Take your skewers and thread the marinated chicken onto them. Leave a little space between each piece for even cooking.
3. Preheat your grill to medium-high heat. Grill the skewers for about 10-15 minutes, turning occasionally. Cook until the chicken is no longer pink and has nice grill marks.
4. You can serve them hot right off the grill or let them cool and store them in meal prep containers for later.
Tips: Want to add more color and nutrients?
Try adding bell peppers, cherry tomatoes, or zucchini to the skewers before grilling. They’ll not only look great but also taste amazing!
FAQs: Can I bake these instead? Yes, simply bake them at 400°F (200°C) for about 20 minutes.
Enjoy these skewers as a delicious and healthy grab-and-go option during your busy week!
Pesto Chicken Skewers
Editor’s Choice

OXO Good Grips Grilling Tools, Stainless Steel Grilling Skewers – Set of 6
50 Pack (100-Piece) 32 oz Meal Prep Containers Reusable with Lids 3-Comp…

24. Almond Flour Pancakes

Start your morning right with these delightful almond flour pancakes. They’re not just tasty; they’re a smart choice for anyone managing type 2 diabetes. With low carbs and healthy fats, these pancakes keep your blood sugar steady while satisfying your breakfast cravings. Imagine fluffy, golden pancakes topped with fresh berries or a touch of maple syrup. What a sweet way to begin your day!
Ready to whip up these pancakes? Here’s how you can do it! This recipe is budget-friendly and easy, making it perfect for busy mornings. Plus, you can customize your pancakes with your favorite add-ins, like blueberries or even a sprinkle of cinnamon, for extra flavor. Enjoy a breakfast that’s not only healthy but also makes you feel good inside!
Recipe Overview:
– Servings: 4
– Prep Time: 10 mins
– Cook Time: 15 mins
– Total Time: 25 mins
– Calories: 250 per serving
Nutrition Information:
– Protein: 8g
– Carbs: 8g
– Fat: 18g
Ingredients:
– 1 cup almond flour
– 2 large eggs
– 1/2 cup unsweetened almond milk
– 1 teaspoon baking powder
– 1 teaspoon vanilla extract
Instructions:
1. In a mixing bowl, combine almond flour, eggs, almond milk, baking powder, and vanilla. Stir until everything is well mixed.
2. Heat a non-stick skillet over medium heat. Pour 1/4 cup of the batter for each pancake onto the skillet.
3. Cook until bubbles appear on the surface, then flip and cook until golden brown on the other side.
4. Serve warm with fresh berries or a drizzle of sugar-free syrup.
Tips:
– Add blueberries or dark chocolate chips for a fun twist!
– Keep leftovers in the fridge and reheat for a quick breakfast.
FAQs:
– Can I use regular flour?
– Almond flour is great for keeping carbs low and adds a nutty flavor.
These almond flour pancakes are a simple way to enjoy a delicious breakfast that’s friendly for your health goals. Enjoy every bite!
Almond Flour Pancakes
Editor’s Choice

CAROTE Nonstick Frying Pan Skillet,Non Stick Granite Fry Pan Egg Pan Ome…
25. Cabbage and Sausage Skillet

Imagine a meal that wraps you in warmth and comfort, all while being healthy and diabetic-friendly. The Cabbage and Sausage Skillet does just that! This dish is a delightful one-pan wonder, perfect for a busy weeknight or meal prepping for those hectic days. Packed with flavor and nutrients, it combines tender cabbage with savory sausage, creating a satisfying meal that you can enjoy any time.
This recipe is incredibly easy to make and can be tailored to fit your taste. You can adjust the spices and seasonings to match your preferences. Whether you like it spicy or mild, this dish welcomes your creativity.
Let’s dive into the recipe details to get you started!
Recipe Overview: 4 servings, Prep Time: 10 mins, Cook Time: 20 mins, Total Time: 30 mins, Calories: 250 per serving.
Nutrition Information: 20g protein, 5g fiber, 18g carbs, 14g fat.
Ingredients:
– 1 lb sausage (choose turkey or chicken for a lighter option)
– 1/2 head cabbage, sliced into strips
– 1 onion, chopped
– 2 tablespoons olive oil
– Salt and pepper to taste
Instructions:
1. Heat the olive oil in a large skillet over medium heat. Add the sausage and cook until it’s nicely browned and cooked through.
2. Toss in the chopped onion and sliced cabbage. Stir everything together and cook until the cabbage becomes tender, which should take about 10 minutes.
3. Season the mixture with salt and pepper according to your taste.
4. Allow the skillet to cool, then portion out your meal into containers for easy lunches throughout the week.
Tips: This dish reheats beautifully, making it perfect for quick meals!
FAQs: Can I use a different type of meat? Absolutely! Feel free to swap in any sausage that you prefer. Enjoy this flavorful dish and make it your own!
Cabbage and Sausage Skillet
Editor’s Choice
50 Pack (100-Piece) 32 oz Meal Prep Containers Reusable with Lids 3-Comp…
Olive Oil Dispenser Bottle, 2 Pcs Glass Olive Oil Dispenser and Vinegar …

EDELHAUS® Square Spice Jars with Bamboo Wooden Lid (Pack of 24) Spice Ja…
Conclusion

With these 25 meal prep recipes, managing Type 2 diabetes becomes a delicious adventure! Each dish packs in nutrients without sacrificing flavor, proving healthy eating can be enjoyable.
Meal prepping not only saves you time but also helps you stay on track with your dietary goals. Embrace these recipes and bring a variety of tastes and textures to your meals. Happy cooking! Remember, health doesn’t have to be boring.
Note: We aim to provide accurate product links, but some may occasionally expire or become unavailable. If this happens, please search directly on Amazon for the product or a suitable alternative.
This post contains Amazon affiliate links, meaning I may earn a small commission if you purchase through my links, at no extra cost to you.
Frequently Asked Questions
What are some easy meal prep ideas for diabetics type 2?
Meal prepping doesn’t have to be complicated! You can start with easy meal prep ideas like overnight oats with chia seeds, or grilled chicken salads packed with low-glycemic veggies. These meals are not only quick to prepare but also nutritious and diabetic-friendly, making them perfect for busy weekdays!
How can I incorporate low-carb meals into my meal prep for diabetics type 2 recipes?
Incorporating low-carb meals into your meal prep is a fantastic way to manage your blood sugar levels. Try swapping out rice for cauliflower rice or using zucchini noodles instead of pasta. You can also focus on protein-rich options like lean meats, fish, and legumes that keep you feeling satisfied without spiking your glucose!
Are there any meal prep recipes that are both healthy and delicious for diabetics type 2?
Absolutely! Many meal prep recipes are both healthy and full of flavor. Think spicy roasted chickpeas or herb-infused grilled salmon served with a side of steamed broccoli. These meals are packed with nutrients and flavor, ensuring that eating healthy is an enjoyable experience for diabetics type 2.
What are the benefits of meal prepping for diabetics type 2?
Meal prepping offers fantastic benefits for diabetics type 2! It helps you control portion sizes, reduces the likelihood of impulsive eating, and ensures you always have diabetic-friendly meals ready to go. Plus, it saves you time during the week and makes staying on track with your healthy meal prep goals much easier!
How can I make sure my meal prep is diabetic-friendly?
To ensure your meal prep is diabetic-friendly, focus on using low-glycemic ingredients like whole grains, non-starchy vegetables, and lean proteins. Be mindful of added sugars and opt for natural sweeteners instead. Planning your meals in advance allows you to balance macros and keep your meals both nutritious and enjoyable!
Related Topics
meal prep for diabetics
healthy meal prep
diabetic-friendly recipes
low-carb meals
easy meal prep
nutritious cooking
quick diabetic meals
low glycemic recipes
meal prep ideas
family-friendly meals
5-ingredient recipes
weeknight dinners