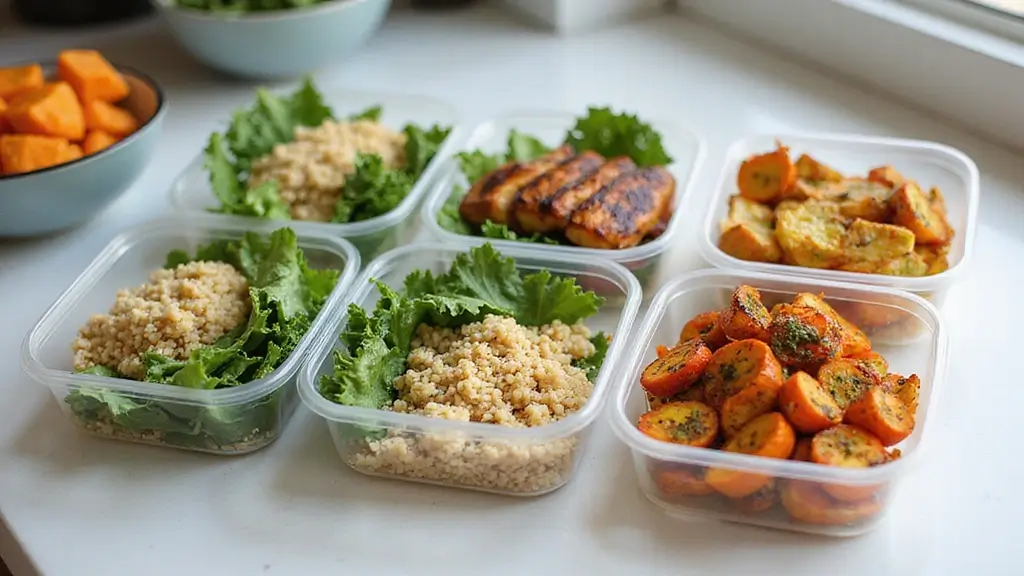
Eating clean can feel like a balancing act, especially if you have dietary restrictions. You might be searching for meals that fit your gluten-free and dairy-free lifestyle without sacrificing flavor or variety. That’s why I created this post. I wanted to take the guesswork out of meal prep and give you a collection of delicious ideas that are easy to prepare and perfect for your busy week ahead.
If you’re someone who is embracing a gluten-free, dairy-free diet, this is for you. Maybe you’re dealing with food sensitivities, or perhaps you’re simply trying to eat healthier. Whatever your reason, you deserve meals that not only meet your dietary needs but also excite your taste buds. Trust me, finding suitable recipes can often feel overwhelming.
In this post, you’ll discover 27 gluten-free dairy-free meal prep recipes that are simple, tasty, and perfect for clean eating. Each recipe is designed with you in mind, making it easier to stock your fridge with nutritious options that will keep you satisfied throughout the week. You’ll learn how to whip up vibrant salads, hearty mains, and even snacks that will make your meal prep a breeze.
So, roll up your sleeves and get ready to dive into these recipes. You’ll find meals that are not just healthy but also bursting with flavor. Say goodbye to boring meals and hello to satisfying dishes that fit your diet and lifestyle. Let’s make clean eating fun and fulfilling together!
1. Quinoa & Black Bean Salad
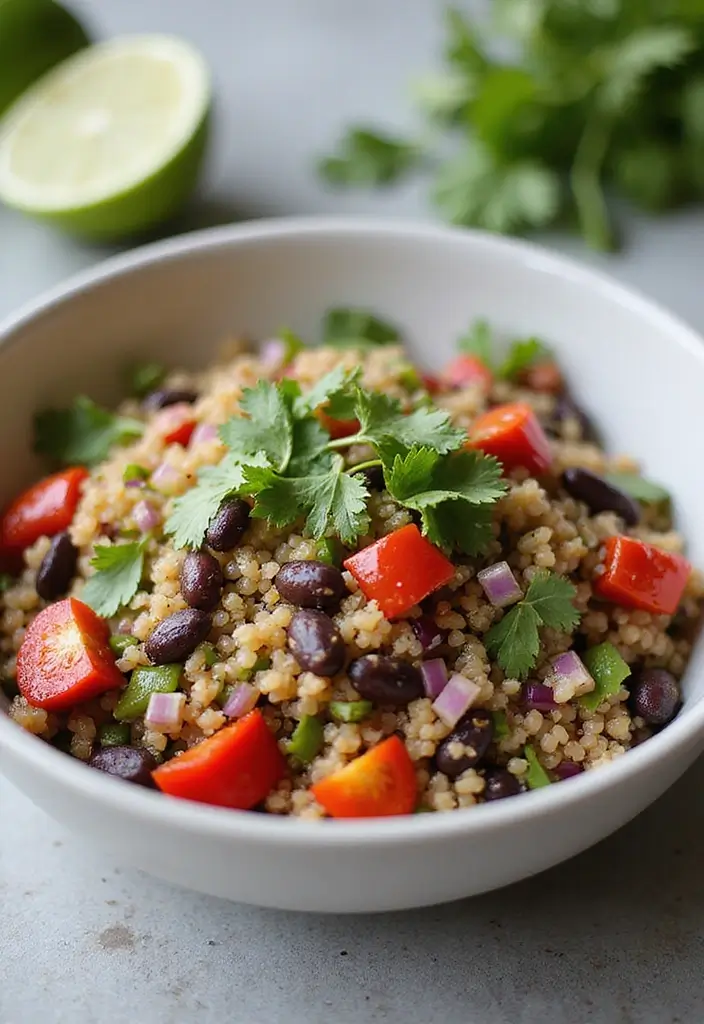
Craving a nutritious and satisfying meal that’s easy to prep? Try this vibrant Quinoa & Black Bean Salad! It’s packed with protein and fiber, perfect for keeping your energy up during busy days. The colorful mix of bell peppers, red onion, and fresh cilantro isn’t just tasty—it’s a visual delight too. Whether you’re at home or on the go, this salad is your go-to solution for clean eating.
Making this salad is a breeze. Start by cooking quinoa according to the package instructions. While that simmers, rinse and drain a can of black beans. Then, chop up some bell peppers and red onion, and toss in a handful of fresh cilantro. Finally, dress it all up with lime juice, olive oil, salt, and pepper. Simple, right?
Recipe Overview:
– Servings: 4
– Prep Time: 15 mins
– Cook Time: 15 mins
– Total Time: 30 mins
– Calories: 350 per serving
Nutrition Information:
– Protein: 12g
– Carbohydrates: 60g
– Fats: 9g
Ingredients:
– 1 cup quinoa
– 1 can black beans
– 1 red bell pepper, diced
– 1/2 red onion, chopped
– 1/4 cup fresh cilantro, chopped
– Juice of 1 lime
– 2 tbsp olive oil
– Salt and pepper to taste
Instructions:
1. Rinse quinoa under cold water to remove bitterness.
2. Cook quinoa as directed on the package.
3. In a large bowl, mix the cooked quinoa, black beans, diced bell pepper, chopped onion, and cilantro.
4. Drizzle with lime juice and olive oil, then season with salt and pepper. Stir well to combine.
5. Store in airtight containers for up to 5 days.
Feel free to toss in any leftover veggies you have for an extra crunch!
FAQs:
Can I make this ahead of time? Yes! This salad actually tastes better the next day as the flavors blend together. Enjoy this quick, healthy meal prep option that’s both delicious and visually appealing!
Did you know quinoa-based bowls like this deliver about 15g protein and 7g fiber per serving? That gluten free dairy free recipes meal prep win keeps busy professionals energized, satisfied, and ready to crush the day—without sacrificing flavor or texture.
Quinoa & Black Bean Salad
Editor’s Choice

HOMBERKING 10 Pack Borosilicate Glass Meal Prep Containers with Locking …
 Amazon$30.99
BetterBody Foods Organic Quinoa, Vegan, Gluten Free, Low Glycemic Rice R…
 Amazon$11.49
Pompeian Robust Extra Virgin Olive Oil, Contains Polyphenols, First Cold…
 Amazon$15.64
2. Sweet Potato & Chickpea Buddha Bowl
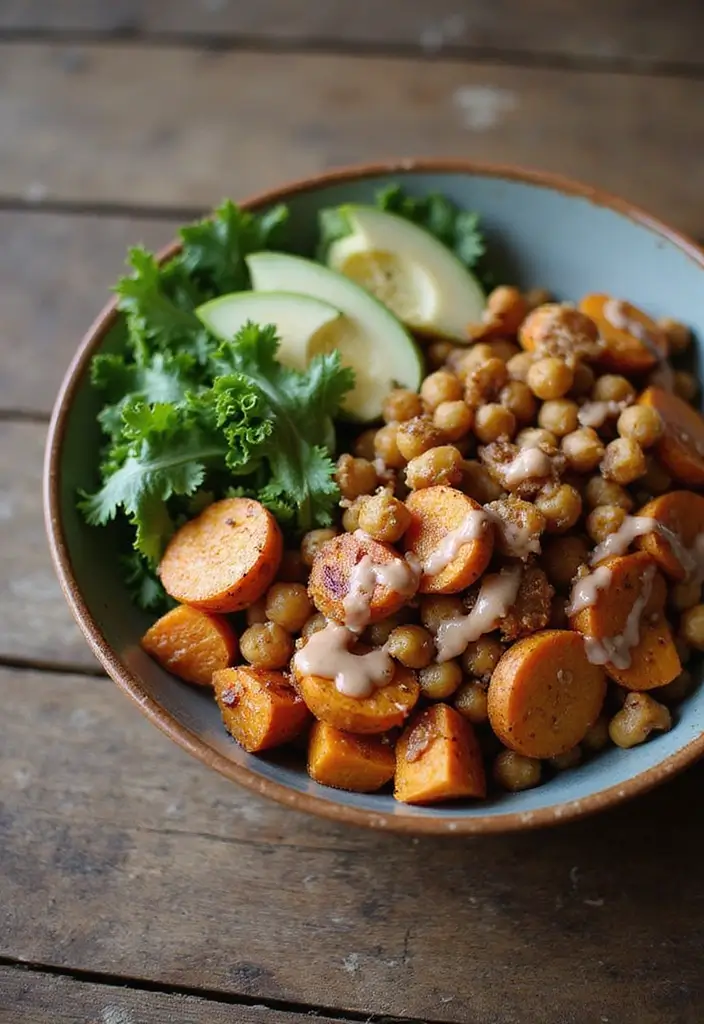
Imagine a warm, cozy bowl filled with roasted sweet potatoes and crispy chickpeas. This Sweet Potato & Chickpea Buddha Bowl is not only delicious but also packed with nutrients. The natural sweetness of roasted sweet potatoes pairs beautifully with protein-rich chickpeas, making this meal both satisfying and comforting.
Ready to whip this up? Start by preheating your oven to 400°F (200°C). Cube two medium sweet potatoes and toss them in a bowl with olive oil, paprika, salt, and pepper. Spread them evenly on a baking sheet. While those roast for 25 minutes, rinse and drain a can of chickpeas. In another bowl, mix the chickpeas with olive oil, cumin, and garlic powder. When the sweet potatoes have about 10 minutes left, add the chickpeas to the baking sheet for a quick roast.
This bowl serves four and takes about 45 minutes total—10 minutes of prep and 35 minutes of cooking. Each serving is around 400 calories, with 15 grams of protein, 75 grams of carbohydrates, and 10 grams of fat.
Here’s what you need:
Ingredients:
– 2 medium sweet potatoes, cubed
– 1 can chickpeas, drained and rinsed
– 2 tbsp olive oil
– 1 tsp paprika
– 1 tsp cumin
– Garlic powder to taste
– Salt and pepper to taste
Instructions:
1. Preheat your oven to 400°F (200°C).
2. In a bowl, combine sweet potato cubes with olive oil, paprika, salt, and pepper. Spread them out on a baking sheet.
3. Roast sweet potatoes for 25 minutes.
4. While they roast, mix chickpeas with olive oil, cumin, and garlic powder in a separate bowl.
5. After 25 minutes, add chickpeas to the baking sheet. Roast everything together for an additional 10 minutes.
6. Serve in bowls over greens or grains.
For an extra touch, add sliced avocado or a drizzle of tahini dressing!
FAQs:
Can I use other beans? Absolutely! Feel free to swap in your favorites for variety.
This bowl is perfect for meal prep and can be stored in the fridge for several days. Enjoy a nourishing meal that not only meets your dietary needs but also delights your taste buds!
Sweet Potato & Chickpea Buddha Bowl
Editor’s Choice

HOMBERKING 10 Pack Borosilicate Glass Meal Prep Containers with Locking …
 Amazon$30.99
Pompeian Robust Extra Virgin Olive Oil, Contains Polyphenols, First Cold…
 Amazon$15.64
3. Zucchini Noodles with Tomato & Basil
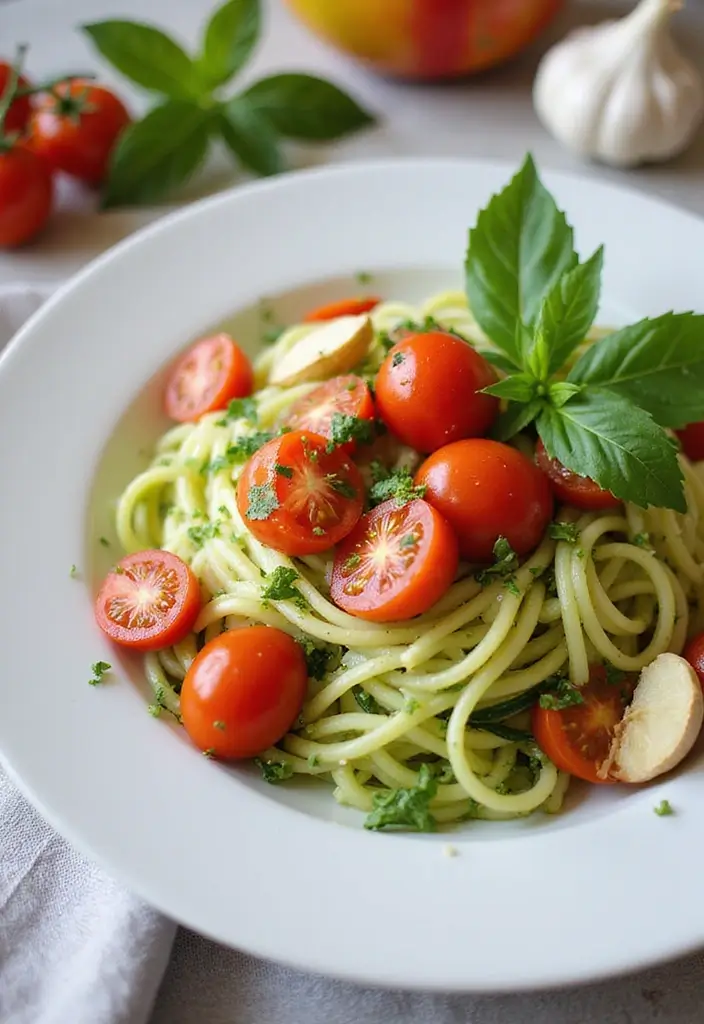
Zucchini noodles are your new favorite weeknight meal! They’re a delicious, low-carb substitute for traditional pasta. When you combine them with fresh tomatoes and fragrant basil, you create a dish that’s not just healthy but also bursting with flavor. This simple recipe takes only 20 minutes from start to finish, making it perfect for meal prep or a quick dinner.
To get started, spiralize two medium zucchinis into noodle shapes. Then, heat some olive oil in a pan and sauté minced garlic until it’s golden. Add the zucchini noodles and diced tomatoes, seasoning with a pinch of salt and red pepper flakes. Finish off by tossing in freshly chopped basil for that aromatic touch.
Recipe Overview:
– Servings: 2
– Prep Time: 10 mins
– Cook Time: 10 mins
– Total Time: 20 mins
– Calories: 250 per serving
Nutrition Information:
– Protein: 6g
– Carbohydrates: 18g
– Fats: 15g
Ingredients:
– 2 medium zucchinis
– 1 cup cherry tomatoes, halved
– 2 cloves garlic, minced
– 2 tbsp olive oil
– Fresh basil, chopped
– Salt and red pepper flakes to taste
Instructions:
1. Spiralize the zucchinis into noodles.
2. Heat olive oil in a pan over medium heat, add garlic and sauté for 1 minute.
3. Add the zucchini noodles and cherry tomatoes; cook until just tender.
4. Season with salt and red pepper flakes, then toss in the fresh basil.
5. Serve warm or store in meal prep containers for quick meals.
This dish is also great with grilled chicken or shrimp for extra protein!
FAQs:
Can I make this ahead of time? Yes, you can! But for the best taste, enjoy it fresh. If you need to reheat, do so gently to keep the noodles from getting mushy.
Zucchini Noodles with Tomato & Basil
Editor’s Choice

Brieftons 5-Blade Vegetable Spiralizer: Strongest-Heaviest Spiral Slicer…
 Amazon$31.99
4. Cauliflower Fried Rice
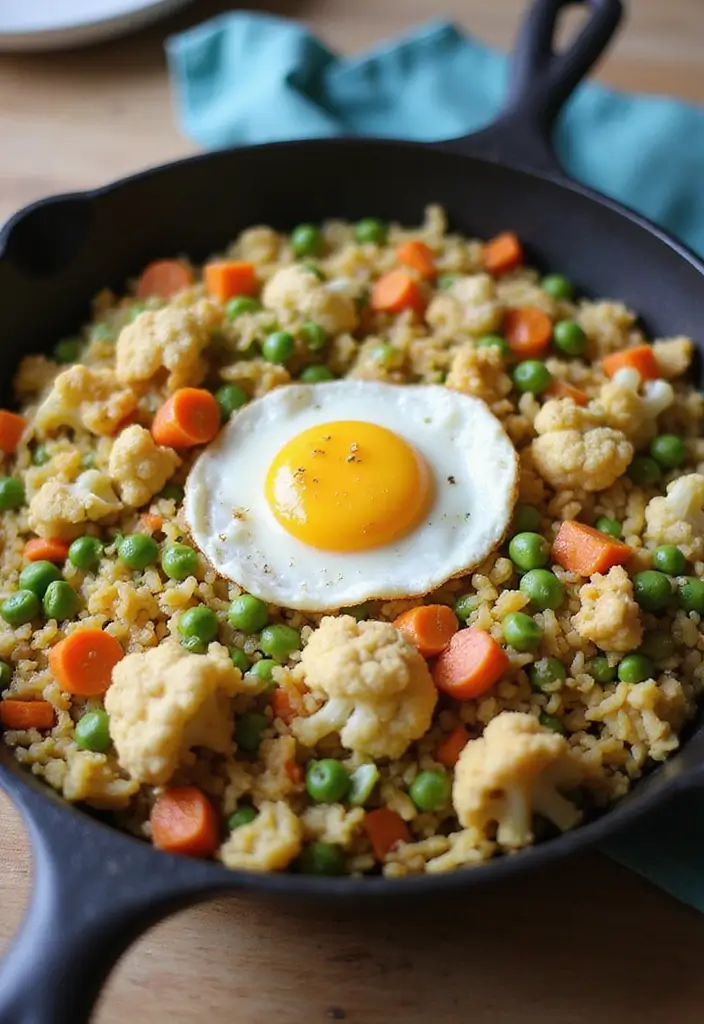
Cauliflower fried rice is your go-to for a healthy spin on a classic dish. This delightful meal swaps out traditional rice for grated cauliflower, making it both gluten-free and low-carb. You’ll pack in a rainbow of veggies, too! Imagine the crunch of fresh carrots, the sweetness of peas, and the savory aroma of sesame oil wafting through your kitchen. It’s comfort food that won’t weigh you down and is perfect for meal prepping.
Start with a head of cauliflower. Grate it using a box grater or food processor until it resembles rice. In a pan, heat sesame oil and sauté some chopped onions, carrots, and peas until they soften. Then, toss in the cauliflower rice and stir-fry for about five more minutes. To amp up the flavor, drizzle in tamari sauce for a gluten-free kick and mix in scrambled eggs or crumbled tofu for added protein.
Here’s the complete recipe at a glance:
Recipe Overview:
– Servings: 4
– Prep Time: 15 mins
– Cook Time: 15 mins
– Total Time: 30 mins
– Calories: 200 per serving
Nutrition Information:
– Protein: 10g
– Carbohydrates: 25g
– Fats: 8g
Ingredients:
– 1 head of cauliflower
– 1/2 cup peas
– 1 carrot, diced
– 1/2 onion, diced
– 2 tbsp sesame oil
– 2 tbsp tamari sauce
– 2 eggs or 1/2 cup tofu, crumbled (optional)
Instructions:
1. Grate the cauliflower into rice-sized pieces.
2. Heat sesame oil in a large pan over medium heat, then sauté onions, carrots, and peas until tender.
3. Stir in the grated cauliflower and stir-fry for about 5-7 minutes until cooked through.
4. Add tamari sauce and incorporate eggs or tofu, mixing until everything is heated and eggs are cooked.
5. Serve immediately and enjoy the fresh flavors!
Feel free to toss in any additional veggies you have on hand. It’s a versatile recipe that adapts to your taste!
FAQs:
Is this recipe freezer-friendly? Yes, you can portion it out and freeze for later!
Cauliflower Fried Rice
Editor’s Choice

Hamilton Beach Food Processor & Vegetable Chopper for Slicing, Shredding…
 AmazonGBP 35.24

365 by Whole Foods Market, Toasted Sesame Seed Oil, 8.4 Fl Oz
 AmazonCheck Price
5. Stuffed Bell Peppers
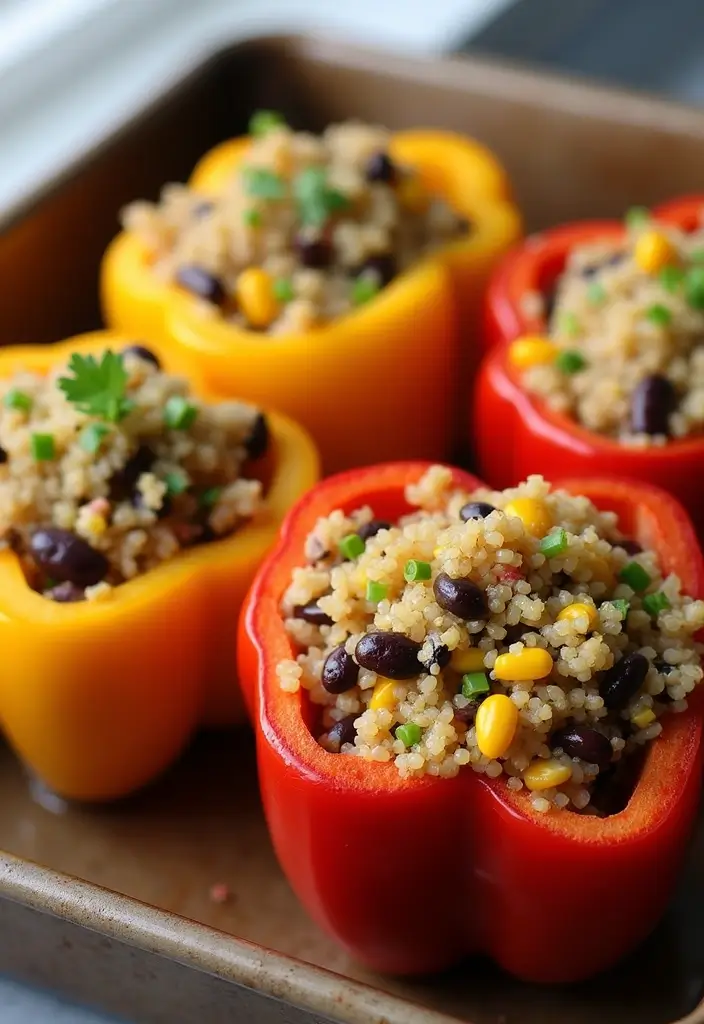
Stuffed bell peppers are not just delicious; they’re also a canvas for your creativity! You can fill them with whatever ingredients you have on hand, and they’re perfect for meal prep. This recipe offers a delightful southwestern twist with quinoa, black beans, and corn that will make your taste buds dance.
Imagine cutting the tops off bright red, yellow, or green bell peppers, ready to be filled with a hearty mix. The aroma of cumin and chili powder wafts through your kitchen as you prepare this colorful dish. This meal is not only nutritious but also visually appealing, making it a feast for the eyes as well as the stomach.
Let’s dive into how to make these tasty stuffed peppers.
Ingredients:
– 4 bell peppers (any color)
– 1 cup cooked quinoa
– 1 can black beans, drained and rinsed
– 1 cup corn (fresh or frozen)
– 1 can diced tomatoes, drained
– 1 tsp cumin
– 1 tsp chili powder
– Avocado slices for topping
Instructions:
1. Preheat your oven to 375°F (190°C).
2. Cut the tops off the bell peppers and scoop out the seeds.
3. In a large bowl, mix the cooked quinoa, black beans, corn, diced tomatoes, cumin, and chili powder until well combined.
4. Stuff each pepper with the quinoa mixture. Place them upright in a baking dish.
5. Cover with foil and bake for 25 minutes. Remove the foil and bake for another 5 minutes to lightly brown the tops.
6. Serve hot, topped with fresh avocado slices.
You can also freeze any leftovers for a quick meal later. Just pop them in the microwave, and you’ll have a healthy dinner ready in minutes!
Enjoy these stuffed bell peppers as a wholesome meal that packs flavor and nutrition. They’re perfect for busy weeknights or as a healthy lunch option. Plus, they’re gluten-free and dairy-free, fitting perfectly into your clean eating plan!
Recipe Overview:
– Servings: 4
– Prep Time: 15 mins
– Cook Time: 30 mins
– Total Time: 45 mins
– Calories: 350 per serving
Nutrition Information:
– Protein: 12g
– Carbohydrates: 55g
– Fats: 7g
You’ll love how easy and fun it is to customize these peppers. Get creative with your fillings—add spices, veggies, or even some cooked meat if you like! Happy cooking!
Stuffed Bell Peppers
Editor’s Choice

50 Pack (100-Piece) 32 oz Meal Prep Containers Reusable with Lids 3-Comp…
 Amazon$21.99
BetterBody Foods Organic Quinoa, Vegan, Gluten Free, Low Glycemic Rice R…
 Amazon$11.49
6. Lentil Curry
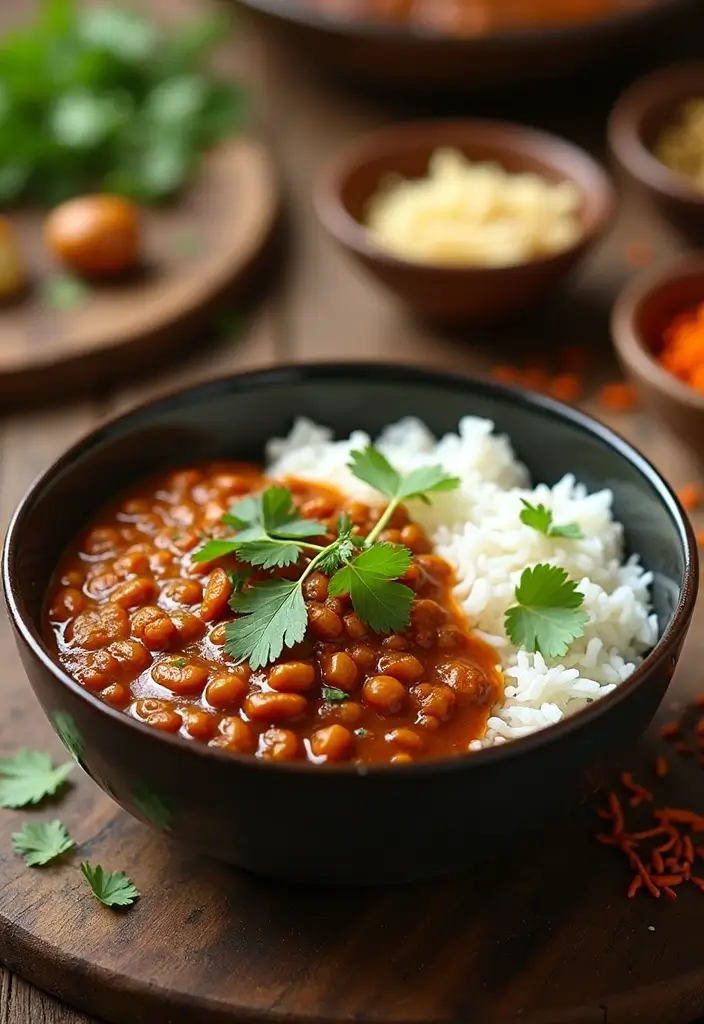
Imagine coming home after a long day and diving into a bowl of warm, flavorful lentil curry. This dish doesn’t just satisfy your hunger; it also fills you up with protein and fiber. Plus, it gets even tastier the longer it sits, making it a perfect choice for your meal prep routine.
To start, heat a pot and sauté chopped onions, garlic, and ginger. The aroma will fill your kitchen and make your mouth water. Next, add spices like cumin, coriander, and turmeric. These spices create a deliciously aromatic base that you won’t forget. Toss in dried lentils and vegetable broth, then let it simmer until the lentils are tender. For a creamy finish, stir in coconut milk. Serve this delightful curry over rice or quinoa, and enjoy a hearty meal that’s both nutritious and comforting.
Here’s how to make it:
Recipe Overview:
– Servings: 4
– Prep Time: 10 mins
– Cook Time: 30 mins
– Total Time: 40 mins
– Calories: 300 per serving
Nutrition Information:
– Protein: 16g
– Carbohydrates: 45g
– Fats: 10g
Ingredients:
– 1 cup dried lentils
– 1 onion, chopped
– 2 cloves garlic, minced
– 1 inch fresh ginger, grated
– 2 cups vegetable broth
– 1 can coconut milk
– 1 tsp cumin
– 1 tsp coriander
– 1 tsp turmeric
Instructions:
1. Sauté the onion, garlic, and ginger in a pot until fragrant.
2. Add the lentils, broth, and spices; bring to a boil.
3. Reduce heat and let it simmer until the lentils are tender, about 20 minutes.
4. Stir in the coconut milk for creaminess and serve over rice or quinoa.
To finish, add a sprinkle of fresh cilantro on top for a burst of flavor.
FAQs:
– Can I use canned lentils? Yes! Just reduce the cooking time since they’re already cooked.
This lentil curry is not just a meal; it’s a warm hug in a bowl. Perfect for busy days, it’s a dish that brings comfort and nourishment to your table. Try it out, and you might find it becoming a staple in your meal prep rotation!
Lentil Curry
Editor’s Choice

Amazon Basics Electric Coffee Grinder, Coffee Bean and Spice Grinder, Wi…
 Amazon$17.95
Thai Kitchen Gluten Free Unsweetened Coconut Milk, 13.66 fl oz (Pack of 12)
 Amazon$10.62
7. Coconut Chia Pudding
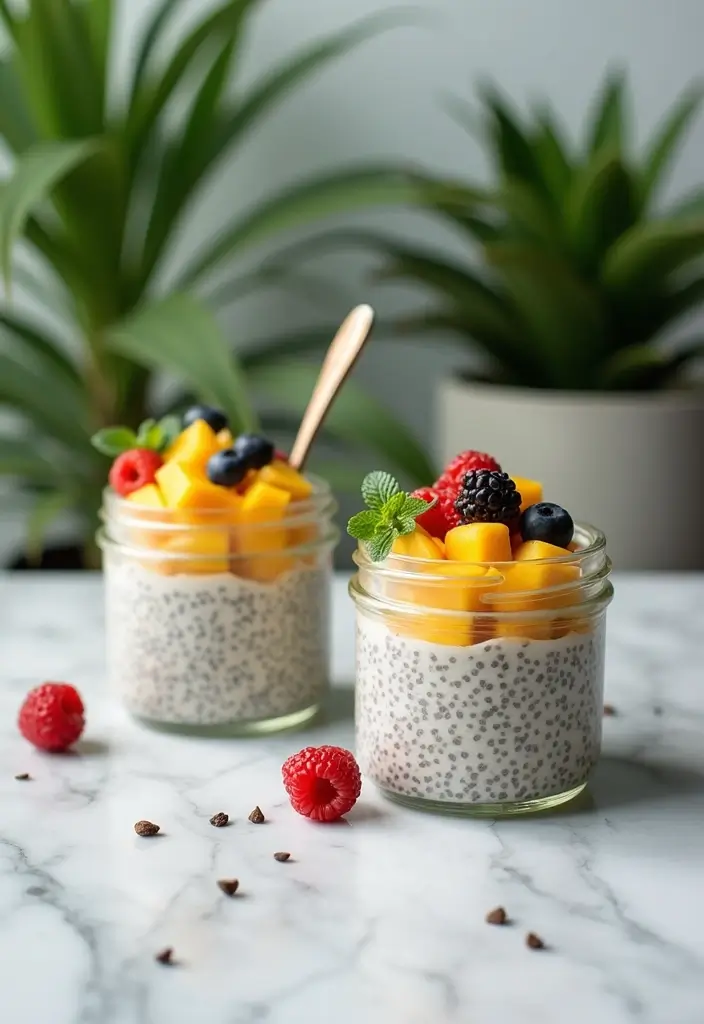
Discover the joy of coconut chia pudding! This creamy delight is not just a treat; it’s an easy and nutritious way to kickstart your day or enjoy a satisfying snack. You can whip it up in just a few minutes, and it gets better as it chills overnight.
Picture this: velvety coconut milk mixed with tiny, nutrient-packed chia seeds. The combination creates a pudding that feels indulgent but is good for you. You can personalize it with fresh fruits like juicy mangoes or tart berries. Pinterest is buzzing with ideas for toppings, so feel free to get creative!
Here’s how to make your own coconut chia pudding. This recipe is budget-friendly and can easily fit into your clean-eating journey. Plus, it stays fresh for up to four days, making it perfect for meal prep. Your mornings will be easier and tastier!
Ingredients:
– 1/4 cup chia seeds
– 1 cup coconut milk
– 1 tsp vanilla extract
– 1 tbsp maple syrup
– Fresh fruits for topping (like mango, berries, or nuts)
Instructions:
1. Grab a jar and mix the chia seeds, coconut milk, vanilla extract, and maple syrup together.
2. Stir well and let it sit for 10 minutes. Then, give it another good stir.
3. Cover the jar and place it in the fridge overnight.
4. When you’re ready to enjoy, top your pudding with your favorite fresh fruits!
Feeling adventurous? Try adding a scoop of nut butter for an extra layer of flavor. This pudding is versatile and can easily adapt to your taste.
Now, you might wonder how long this pudding lasts. It’s simple! Store it in the fridge, and it will stay fresh for up to four days. Enjoy your delicious, healthy coconut chia pudding anytime you need a boost!
Coconut Chia Pudding
Editor’s Choice

BetterBody Foods Organic Chia Seeds 2 lbs, 32 Oz, with Omega-3, Non-GMO,…
 Amazon$11.97
50 Pack (100-Piece) 32 oz Meal Prep Containers Reusable with Lids 3-Comp…
 AmazonEUR 19.01
8. Turkey & Vegetable Lettuce Wraps
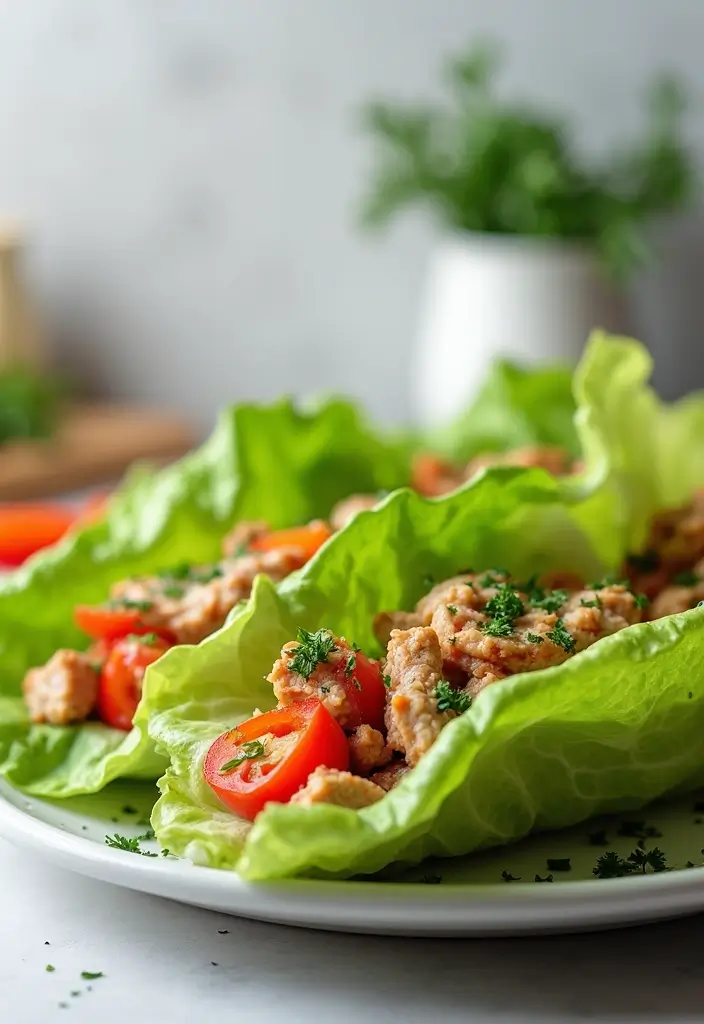
Turkey and vegetable lettuce wraps are not just a meal; they’re an experience! These wraps combine crunch and flavor, making them an excellent choice for a healthy lunch or dinner. Plus, you can mix and match your favorite ingredients to create a personal touch.
Imagine sautéing ground turkey with colorful veggies like carrots and bell peppers, seasoned just right with soy sauce or tamari. Once everything is cooked and fragrant, you’ll spoon this tasty mixture into crisp lettuce leaves. Top it off with fresh herbs and creamy avocado for that satisfying crunch and a burst of flavor.
This recipe is perfect for meal prep. You can whip it up in no time and enjoy it throughout the week!
Recipe Overview:
– Servings: 4
– Prep Time: 15 mins
– Cook Time: 10 mins
– Total Time: 25 mins
– Calories: 250 per serving
Nutrition Information:
– Protein: 20g
– Carbohydrates: 10g
– Fats: 15g
Ingredients:
– 1 lb ground turkey
– 1 cup diced vegetables (carrots, bell peppers, etc.)
– 1/4 cup soy sauce or tamari
– 1 head of lettuce (butter or romaine)
– Fresh herbs for garnish
– 1 avocado, sliced (optional)
– Lime wedges (for serving)
Instructions:
1. In a skillet, cook the ground turkey over medium heat until browned.
2. Add the diced vegetables and soy sauce. Stir until the veggies are tender, about 5 minutes.
3. Spoon the turkey mixture into the lettuce leaves and garnish with fresh herbs and avocado slices.
4. Serve with lime wedges for an extra zing!
5. Store any leftovers in separate containers for easy meal prep throughout the week.
Feel free to swap ground turkey for chicken or another protein if you prefer. The beauty of this recipe is its flexibility!
Quick Tips:
– Use lettuce like butter or romaine for the best wraps.
– Choose colorful vegetables for added nutrients.
– Pack the filling tightly for a satisfying bite.
– Add a drizzle of hot sauce for spice lovers!
These wraps not only taste great but also make eating healthy easy and fun.
Turkey & Vegetable Lettuce Wraps
Editor’s Choice

50 Pack (100-Piece) 32 oz Meal Prep Containers Reusable with Lids 3-Comp…
 Amazon$21.99
9. Apple Cinnamon Overnight Oats
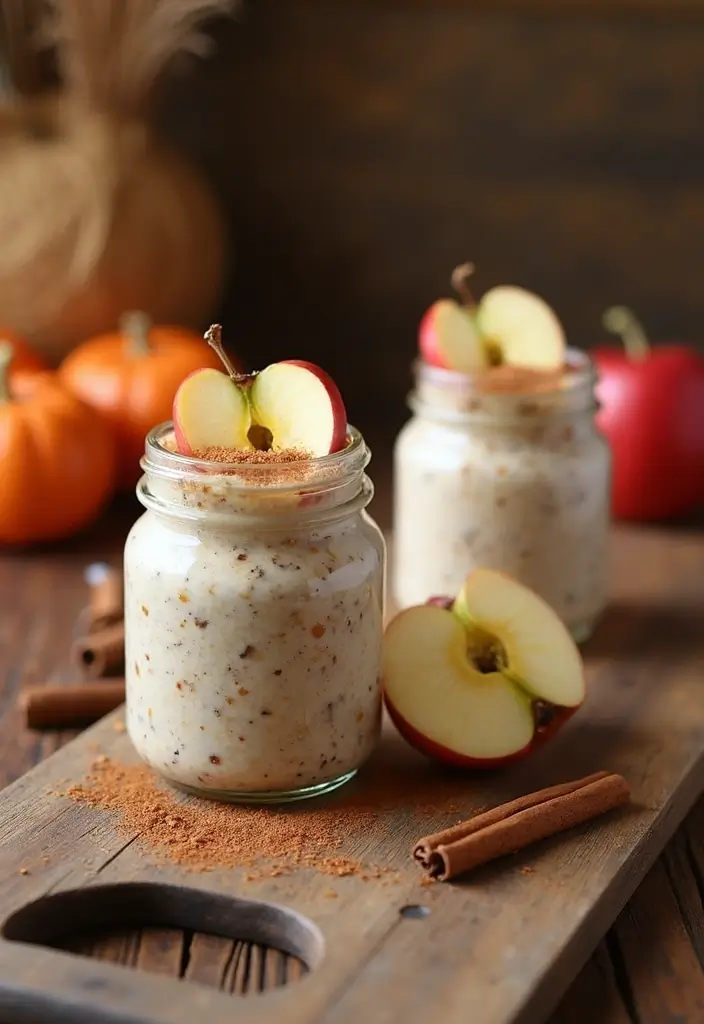
Start your day right with a delicious bowl of Apple Cinnamon Overnight Oats. These oats are not only a breeze to prepare but are also packed with nutrients, making them an ideal choice for busy mornings. Imagine waking up to a creamy blend of apple, cinnamon, and just a hint of sweetness that warms your soul. While this recipe shines in the fall, it’s truly delightful any time of the year.
To make these oats, simply mix rolled oats with almond milk, diced apples, cinnamon, and a drizzle of maple syrup. Shake everything together in a jar, then let it chill overnight in the fridge. When you wake up, breakfast is ready! Just add some extra apple slices or a handful of nuts for an added crunch and flavor boost.
Recipe Overview:
– Servings: 2
– Prep Time: 5 mins
– Total Time: 5 mins + overnight chilling
– Calories: 220 per serving
Nutrition Information:
– Protein: 6g
– Carbohydrates: 40g
– Fats: 5g
Ingredients:
– 1 cup rolled oats
– 2 cups almond milk
– 1 apple, diced
– 1 tsp cinnamon
– 1 tbsp maple syrup (optional)
Instructions:
1. In a jar, combine the rolled oats, almond milk, diced apple, cinnamon, and maple syrup.
2. Stir the mixture well to ensure everything is evenly distributed.
3. Seal the jar and place it in the refrigerator overnight.
4. In the morning, serve cold, topped with extra apple slices and nuts if you like.
For an extra protein kick, feel free to add a scoop of your favorite protein powder.
FAQs:
– How long do they last in the fridge? Enjoy these oats for up to 5 days.
With just a few minutes of prep, you can enjoy a wholesome breakfast that fuels your day. This simple recipe is perfect for meal prepping and will keep you satisfied until lunchtime. So, grab your ingredients, and start your morning off on the right foot!
Apple Cinnamon Overnight Oats
Editor’s Choice

Califia Farms – Organic Unsweetened Almond Milk, 48 Oz, Dairy Free, Keto…
 AmazonCheck Price
10. Thai Peanut Sweet Potato Noodles
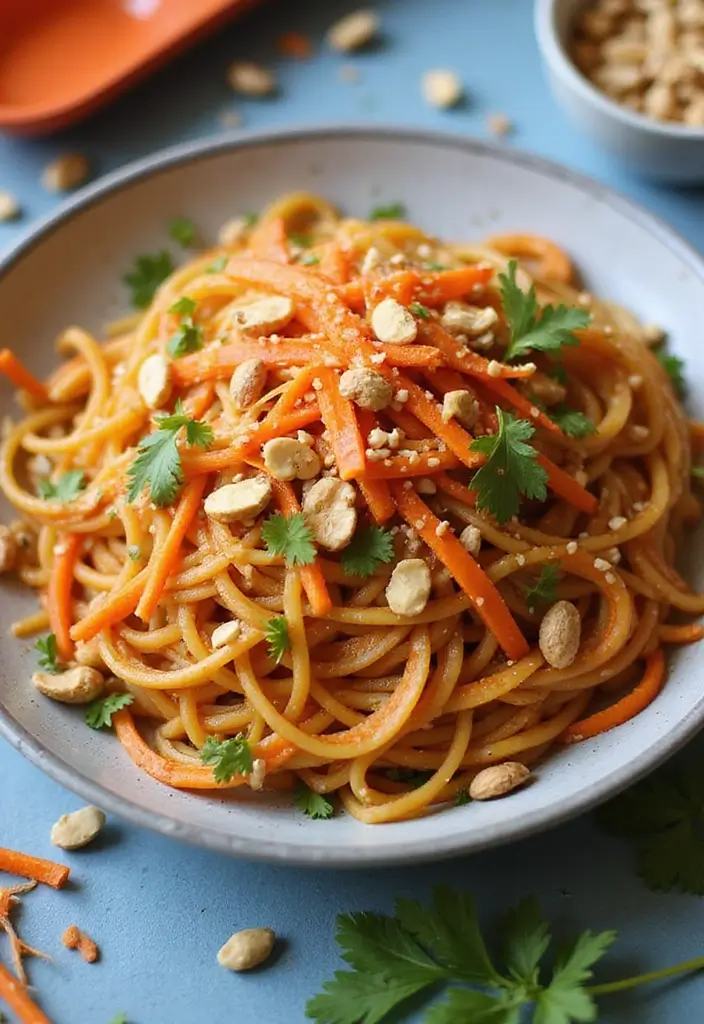
Indulge in a delightful twist on traditional pasta with these Thai Peanut Sweet Potato Noodles. This dish combines the natural sweetness of spiralized sweet potatoes and a rich, creamy peanut sauce, making it not only delicious but also a wholesome choice for your meal prep. You’ll be amazed at how easy this hearty dish is to whip up, whether you’re cooking for yourself or a crowd.
Start by spiralizing two medium sweet potatoes. This fun technique creates noodles that soak up the sauce beautifully. Sauté them for about 5-7 minutes until they become tender. Meanwhile, prepare a simple yet flavorful sauce by whisking together peanut butter, tamari, lime juice, and a hint of honey. Toss the cooked sweet potato noodles with this irresistible sauce, and don’t forget to add shredded carrots and chopped peanuts for an extra crunch!
Here’s how to make this scrumptious dish:
Ingredients:
– 2 medium sweet potatoes
– 1/4 cup peanut butter
– 2 tablespoons tamari
– Juice of 1 lime
– 1 tablespoon honey
– 1 carrot, shredded
– Chopped peanuts for garnish
Instructions:
1. Spiralize the sweet potatoes into noodle shapes.
2. In a skillet, sauté the noodles over medium heat until tender (about 5-7 minutes). Stir occasionally.
3. In a separate bowl, mix the peanut butter, tamari, lime juice, and honey until smooth.
4. Combine the sweet potato noodles with the sauce, adding in the shredded carrots.
5. Serve topped with chopped peanuts for added flavor and texture.
This dish is not only gluten-free and dairy-free, but it also packs a punch of nutrition. Each serving contains around 380 calories, with 10g of protein, 50g of carbohydrates, and 15g of healthy fats. You can even swap peanut butter for almond butter if you’re looking to switch things up!
FAQs:
– Can I use regular noodles? Yes, any noodle can work in this recipe, but sweet potatoes offer a unique flavor and texture!
Try this vibrant dish for your next meal prep, and enjoy a taste of Thailand right at home!
Fun fact: Spiralizing two medium sweet potatoes yields noodle-like strands perfect for Thai Peanut Sweet Potato Noodles. Batch 4 servings in under 30 minutes for easy gluten-free, dairy-free meal prep that still feels indulgent.
Thai Peanut Sweet Potato Noodles
Editor’s Choice

Brieftons 5-Blade Vegetable Spiralizer: Strongest-Heaviest Spiral Slicer…
 Amazon$31.99
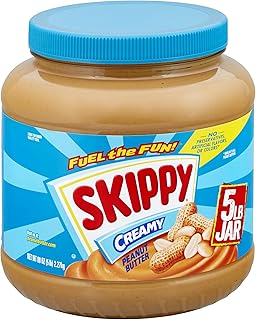

Kikkoman Naturally Brewed Tamari Soy Sauce 10 Fl oz – No Artificial Pres…
 Amazon$8.02
11. Spinach & Mushroom Frittata
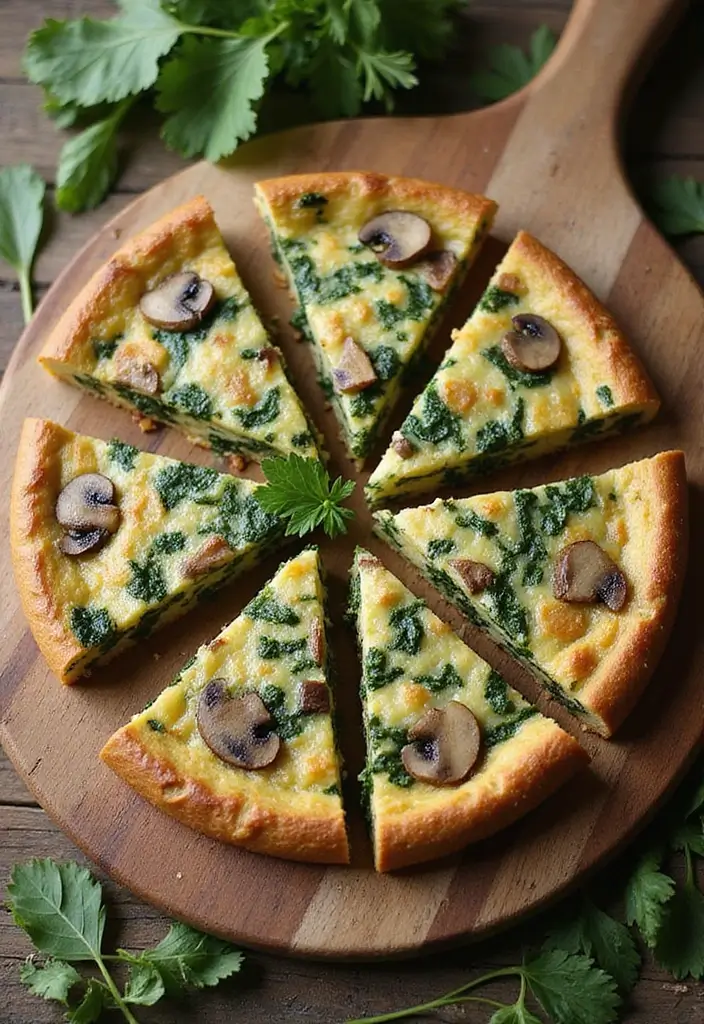
A spinach and mushroom frittata is a delicious and healthy choice that fits any meal of the day. Whether you need a quick breakfast, a light lunch, or a satisfying dinner, this dish has you covered. It’s packed with protein and bursting with veggies, making it an excellent option for clean eating. Plus, it’s gluten-free and dairy-free, so it suits various dietary needs.
Imagine whisking together fresh eggs with a splash of almond milk. As the rich aroma of sautéing onions, mushrooms, and spinach fills your kitchen, your appetite will surely grow. Pour the egg mixture over the colorful veggies, cooking until the edges are perfectly set. A quick trip under the broiler gives the frittata a golden finish. Slice it up, and you have a nutritious meal ready to enjoy all week!
Here’s how to make it:
Recipe Overview:
– Servings: 4
– Prep Time: 10 mins
– Cook Time: 20 mins
– Total Time: 30 mins
– Calories: 250 per serving
Nutritional Information:
– Protein: 15g
– Carbohydrates: 8g
– Fats: 18g
Ingredients:
– 6 eggs
– 1/4 cup almond milk
– 1 cup spinach, chopped
– 1 cup mushrooms, sliced
– 1/2 onion, chopped
– Salt and pepper to taste
Instructions:
1. Preheat your broiler to high.
2. In a bowl, whisk the eggs and almond milk together until smooth.
3. Heat an oven-safe skillet over medium heat and sauté the onions, mushrooms, and spinach until they soften, about 5 minutes.
4. Pour the egg mixture over the sautéed veggies. Cook until the edges begin to set, about 5-7 minutes.
5. Carefully transfer the skillet under the broiler. Broil until the top is golden and puffed, about 3-4 minutes.
6. Remove from the oven, let cool slightly, then slice and store in meal prep containers for the week ahead!
Feel free to mix in your favorite vegetables or herbs to keep things exciting.
FAQs:
– Can I freeze the frittata? Yes, it freezes well for up to 3 months. Just make sure to wrap it tightly!
Spinach & Mushroom Frittata
Editor’s Choice

Amazon Basics Silicone Rectangular Baking Mat, Non-Stick Reusable Oven B…
 Amazon$16.79
HOMBERKING 10 Pack Borosilicate Glass Meal Prep Containers with Locking …
 Amazon$30.99
Silk Shelf-Stable Almond Milk, Unsweetened Vanilla, Dairy-Free, Vegan, N…
 Amazon$11.27
12. Mediterranean Quinoa Bowl
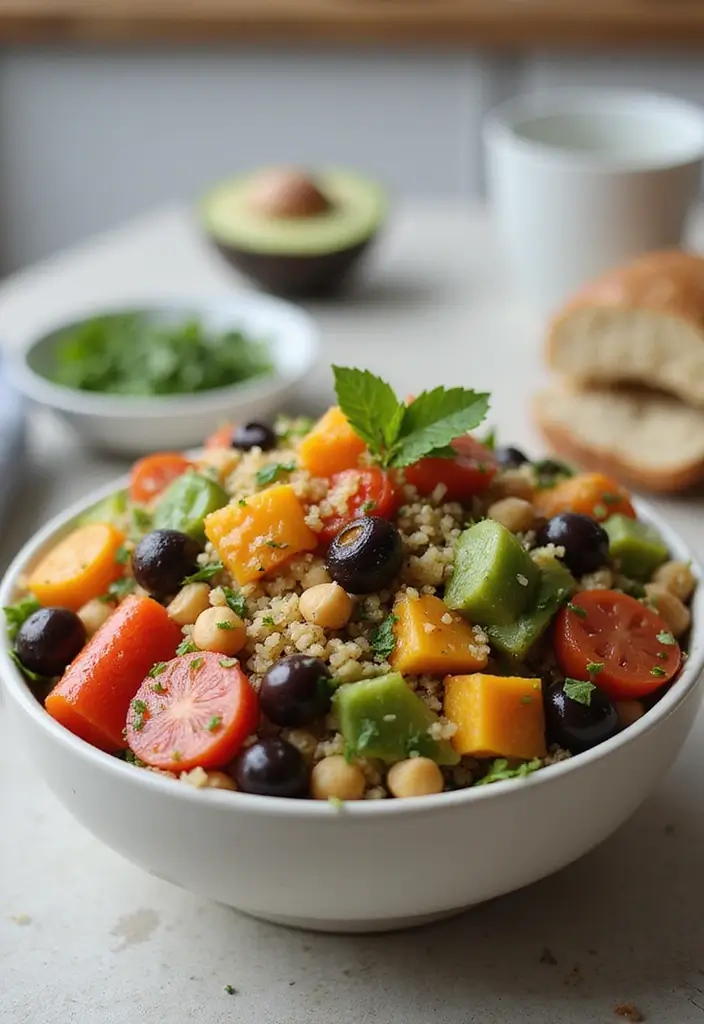
Dive into the flavors of the Mediterranean with this delightful quinoa bowl! It’s not only a healthy choice but also a vibrant and satisfying meal prep option. Packed with protein-rich quinoa, crunchy cucumbers, hearty chickpeas, and briny olives, this dish bursts with taste. A zesty dressing made from olive oil and lemon brings everything together, making each bite a refreshing experience.
Cooking quinoa is easy—just follow the package instructions. While it cooks, chop your veggies and prepare the dressing. In no time, you’ll have a colorful, nutrient-dense meal ready for the week!
Recipe Overview:
– Servings: 4
– Prep Time: 15 mins
– Cook Time: 15 mins
– Total Time: 30 mins
– Calories: 320 per serving
Nutrition Information:
– Protein: 12g
– Carbohydrates: 50g
– Fats: 10g
Ingredients:
– 1 cup quinoa
– 1 can chickpeas, rinsed and drained
– 1 cucumber, diced
– 1 cup cherry tomatoes, halved
– 1/2 cup olives, sliced
– 3 tbsp olive oil
– Juice of 1 lemon
– Salt and pepper to taste
Instructions:
1. Cook the quinoa: Prepare it according to the package directions.
2. Combine ingredients: In a large bowl, mix the cooked quinoa, chickpeas, cucumber, tomatoes, and olives.
3. Make the dressing: Whisk together olive oil, lemon juice, salt, and pepper in a small bowl.
4. Toss it all together: Pour the dressing over the salad and mix well to combine.
5. Pack for the week: Divide the mixture into meal prep containers.
If you’re not strictly dairy-free, feel free to sprinkle some feta cheese on top for an extra layer of flavor!
FAQs:
– Can I use other grains? Absolutely! Try farro, brown rice, or even bulgur for a different twist.
This Mediterranean quinoa bowl is perfect for meal prep, offering you a wholesome, delicious option that stays fresh and flavorful throughout the week. Enjoy the taste of the Mediterranean right at your table!
Mediterranean Quinoa Bowl
Editor’s Choice

HOMBERKING 10 Pack Borosilicate Glass Meal Prep Containers with Locking …
 Amazon$30.99
Aroma Housewares 6-Cup (Cooked yield ) / 1.2Qt. Select Stainless Pot-Sty…
 Amazon$39.99
13. Baked Falafel with Tahini Sauce
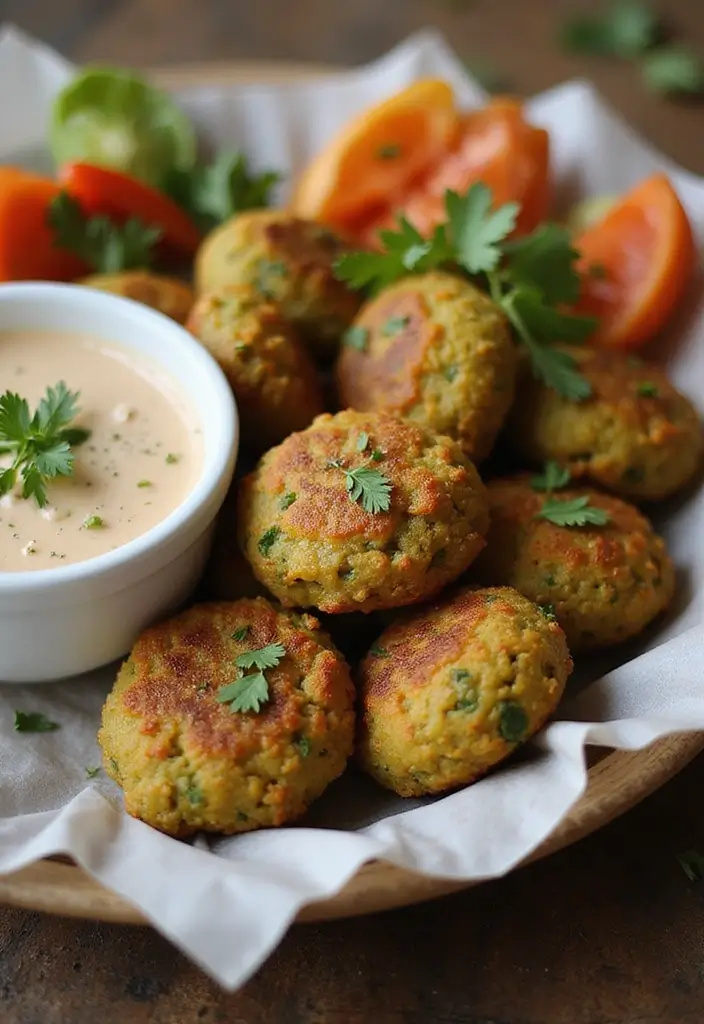
Craving a delicious, guilt-free meal? Look no further than baked falafel! This Middle Eastern classic offers a crunchy exterior with a tender middle, making it an ideal option for lunch or dinner. Pair your falafel with a creamy tahini sauce, and you have a dish that not only satisfies but also aligns with your clean eating goals.
To get started, grab a can of chickpeas and some fresh herbs. Blend chickpeas, garlic, onion, parsley, cumin, and coriander in your food processor. Aim for a mix that’s well combined but still has some texture. Shape the mixture into small balls and bake until they turn golden brown and crispy. For the tahini sauce, simply whisk together tahini, water, lemon juice, and garlic. It’s that easy!
Here’s a quick overview of the recipe for your convenience:
Recipe Overview:
– Servings: 4
– Prep Time: 15 minutes
– Cook Time: 25 minutes
– Total Time: 40 minutes
– Calories: 300 per serving
Nutritional Information:
– Protein: 13g
– Carbohydrates: 40g
– Fats: 10g
Ingredients:
– 1 can chickpeas
– 1/2 onion, chopped
– 2 cloves garlic, minced
– 1/4 cup fresh parsley, chopped
– 1 tsp ground cumin
– 1 tsp ground coriander
– Salt and pepper, to taste
– 1/4 cup tahini
– Water, to thin the sauce
Instructions:
1. Preheat your oven to 400°F (200°C).
2. In a food processor, combine chickpeas, onion, garlic, parsley, cumin, and coriander. Pulse until everything is mixed but not pureed.
3. Shape the mixture into small balls and place them on a baking sheet lined with parchment paper.
4. Bake for about 25 minutes, or until they are golden and crispy.
5. For the tahini sauce, mix tahini, water, lemon juice, and garlic in a bowl until smooth and creamy.
Enjoy your falafel with a side of fresh veggies for a nutritious meal that feels indulgent!
FAQs:
– Can I use dried chickpeas? Yes, just soak them overnight before blending.
With these simple steps, you’ll have a satisfying meal that not only tastes good but also aligns with your dietary preferences. Enjoy the delightful flavors and the boost of energy from this wholesome dish!
Baked Falafel with Tahini Sauce
Editor’s Choice

Electric Salt and Pepper Grinder Set Automatic Battery Pepper Mill Shake…
 Amazon$20.69
Amazon Basics Parchment Paper for Baking, Non-Stick, 90 Sq Ft Roll, 1 Pack
 Amazon$6.79
Wang Zhihe Pure Sesame Paste + Free one NineChef Spoon (1 Bottle)
 Amazon$14.99
14. Lemon Herb Grilled Chicken
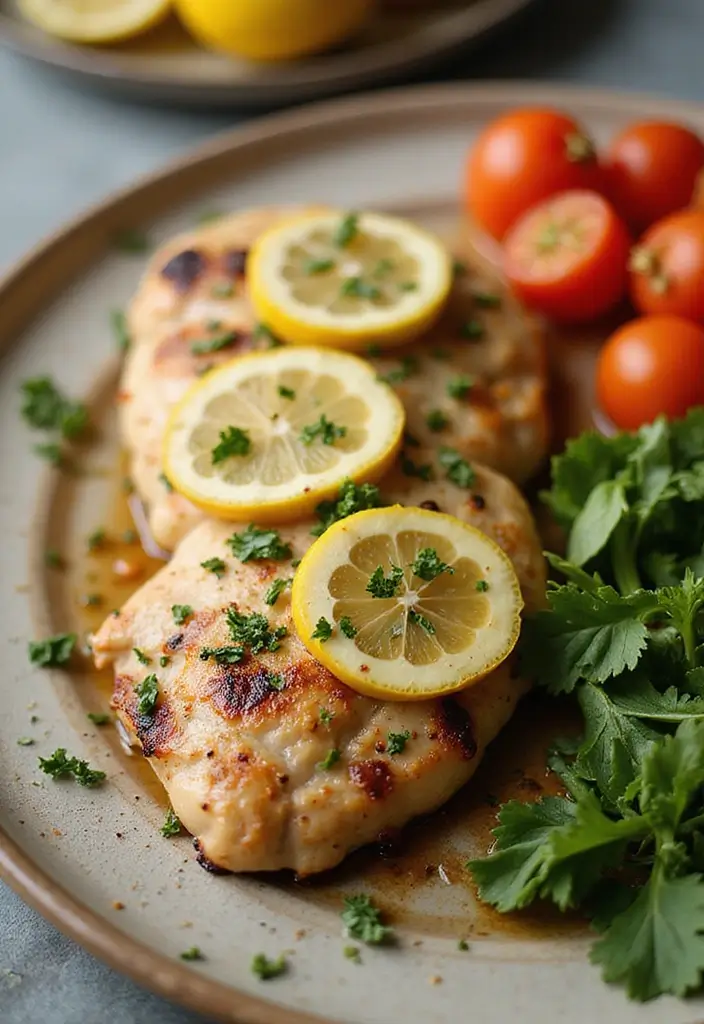
Lemon Herb Grilled Chicken is a fantastic choice for meal prep that keeps your lunches and dinners flavorful and exciting all week long. This dish is not only gluten-free and dairy-free, but it also bursts with zesty flavors that make each bite a delight. Imagine tender chicken marinated in fresh lemon juice, fragrant garlic, and aromatic herbs. The result? Juicy pieces of chicken that you’ll look forward to eating every day!
To prepare, marinate your chicken breasts in a blend of olive oil, lemon juice, minced garlic, and herbs like rosemary and thyme. Let the chicken soak in these bright flavors for at least an hour. Then, grill it until it’s perfectly cooked and no longer pink inside. Slice it up, and you’re ready to store it in meal prep containers for easy access throughout the week.
Recipe Overview:
– Servings: 4
– Prep Time: 10 mins
– Cook Time: 15 mins
– Total Time: 25 mins
– Calories: 300 per serving
Nutrition Information:
– Protein: 30g
– Carbohydrates: 5g
– Fats: 17g
Ingredients:
– 4 chicken breasts
– 1/4 cup olive oil
– Juice of 2 lemons
– 3 cloves garlic, minced
– 1 tbsp fresh herbs (rosemary, thyme)
Instructions:
1. In a bowl, mix together olive oil, lemon juice, garlic, and herbs.
2. Add chicken breasts to the bowl and marinate for at least 1 hour.
3. Preheat your grill. Cook chicken for about 6-7 minutes on each side until fully cooked.
4. Let the chicken rest for a few minutes before slicing. Serve or store in meal prep containers.
This grilled chicken pairs beautifully with grains, salads, or any side you love!
FAQs:
Can I bake the chicken? Yes! Simply bake at 375°F for 20-25 minutes for a delicious alternative.
Lemon Herb Grilled Chicken
Editor’s Choice

50 Pack (100-Piece) 32 oz Meal Prep Containers Reusable with Lids 3-Comp…
 Amazon$21.99
YARRAMATE 16oz/470ml Glass Olive Oil Sprayer for Cooking with Stickers, …
 Amazon$8.99
15. Chocolate Avocado Mousse
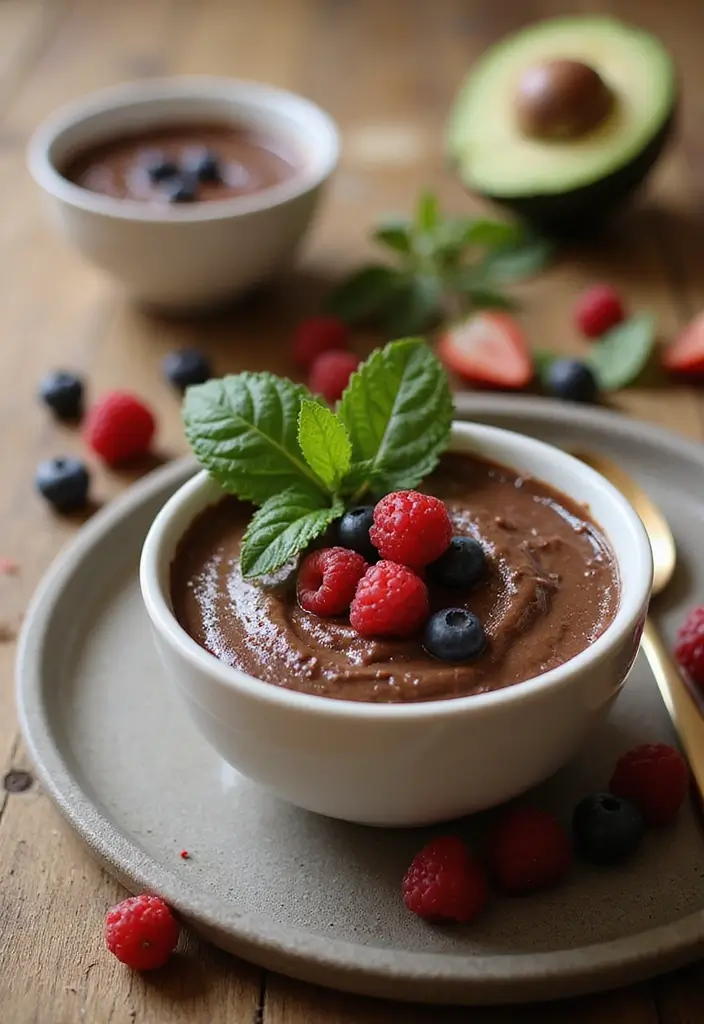
Looking for a delicious way to wrap up your meal prep? This Chocolate Avocado Mousse is your answer! It’s rich, creamy, and completely dairy-free. You’ll love how it satisfies your sweet tooth while packing in healthy fats. The best part? It’s super easy to make!
Start by blending ripe avocados with cocoa powder, maple syrup, almond milk, and a hint of vanilla. Blend until everything is smooth and creamy, then chill it in the fridge for a few hours. When you’re ready to serve, top it off with fresh berries or crunchy nuts for added texture and flavor. This mousse is a perfect guilt-free dessert!
Recipe Overview:
– Servings: 4
– Prep Time: 10 mins
– Total Time: 10 mins + chilling
– Calories: 200 per serving
Nutrition Information:
– Protein: 3g
– Carbohydrates: 15g
– Fats: 15g
Ingredients:
– 2 ripe avocados
– 1/2 cup cocoa powder
– 1/4 cup maple syrup
– 1/2 cup almond milk
– 1 tsp vanilla extract
Instructions:
1. In a blender, add the ripe avocados, cocoa powder, maple syrup, almond milk, and vanilla extract.
2. Blend until the mixture is smooth and creamy.
3. Transfer the mousse to a bowl and chill in the refrigerator for at least 2 hours.
4. When ready to serve, top with fresh berries or a sprinkle of nuts for crunch.
Tips: Use perfectly ripe avocados for the best texture. They should be soft but not overripe.
FAQs:
– How long does it last? It stays fresh for up to 3 days in the fridge.
Get ready to indulge in this healthy treat that feels like dessert but is packed with nutrients! Enjoy every bite of this delightful mousse.
Chocolate Avocado Mousse
Editor’s Choice

16. Broccoli & Cauliflower Salad
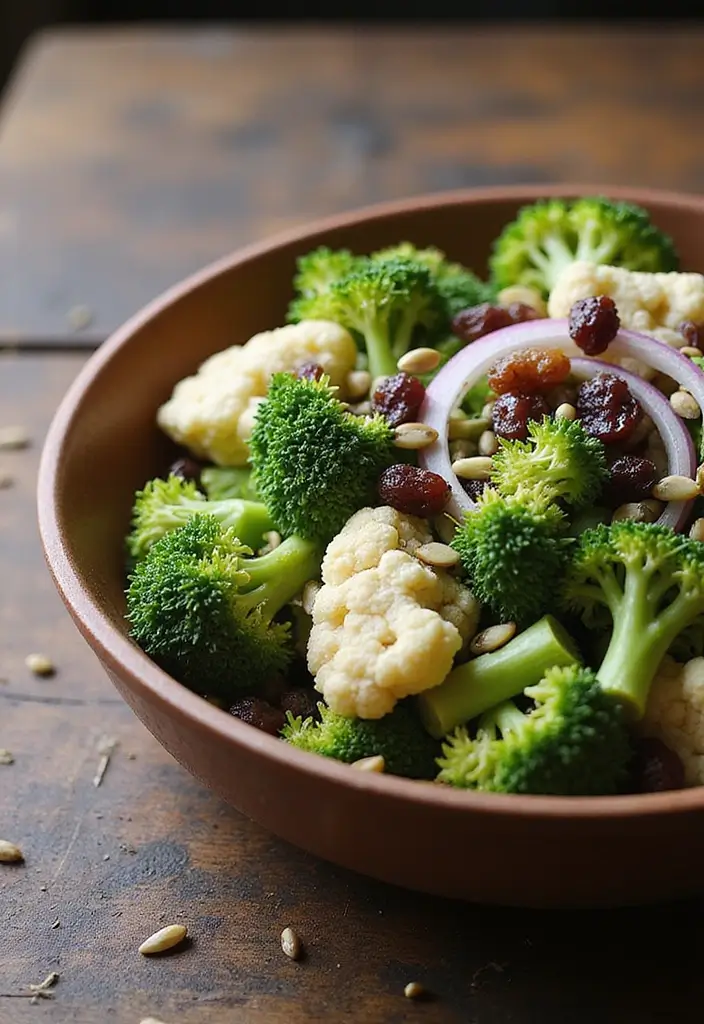
If you’re looking for a fresh, crunchy addition to your meals, this Broccoli & Cauliflower Salad is a perfect choice. Bursting with vibrant flavors and textures, it can serve as a delightful side dish or a light main course. Plus, you can prep it ahead of time, making it ideal for busy weeknights. Just dress it right before serving to keep those veggies crisp and tasty!
Start by chopping your broccoli and cauliflower into bite-sized florets. Then, toss them together in a large bowl with some sliced red onion, sweet raisins, and crunchy sunflower seeds. For the dressing, whisk together olive oil, apple cider vinegar, a hint of mustard, and a drizzle of honey. This blend gives your salad a zesty kick that you won’t want to miss!
Recipe Overview:
– Servings: 4
– Prep Time: 10 mins
– Total Time: 10 mins
– Calories: 220 per serving
Nutrition Information:
– Protein: 5g
– Carbohydrates: 15g
– Fats: 18g
Ingredients:
– 2 cups broccoli florets
– 2 cups cauliflower florets
– 1/4 cup red onion, sliced
– 1/4 cup raisins
– 1/4 cup sunflower seeds
– 1/4 cup olive oil
– 2 tbsp apple cider vinegar
– 1 tsp mustard
– 1 tbsp honey
Instructions:
1. In a large bowl, combine the broccoli, cauliflower, red onion, raisins, and sunflower seeds.
2. In a separate small bowl, whisk together the olive oil, apple cider vinegar, mustard, and honey until smooth.
3. Pour the dressing over the salad and toss gently to coat everything evenly.
4. Serve immediately for the best crunch, or store in the fridge for later.
Feel free to customize this salad! You can add more veggies or even some protein like grilled chicken or chickpeas for a heartier meal. It’s perfect for potlucks, picnics, or just to enjoy at home.
Tips for Making This Salad Your Own:
– Add more veggies like carrots or bell peppers for extra color.
– Mix in nuts such as almonds or walnuts for more crunch.
– Swap the dressing with your favorite vinaigrette for a new twist.
– Serve it chilled for a refreshing summer dish.
Enjoy creating this delicious salad that’s not only gluten-free and dairy-free but also makes clean eating tasty and fun!
Weeknights feel faster when your broccoli & cauliflower salad is already dressed and ready to go. This gluten-free dairy-free meal prep wins by staying crunchy and fresh, even when you prep ahead. Pro tip: dress just before serving to keep textures bold.
Broccoli & Cauliflower Salad
Editor’s Choice

50 Pack (100-Piece) 32 oz Meal Prep Containers Reusable with Lids 3-Comp…
 Amazon$21.99
TrendPlain 16oz/470ml Glass Olive Oil Sprayer for Cooking – 2 in 1 Olive…
 Amazon$8.99
17. Herb Roasted Potatoes
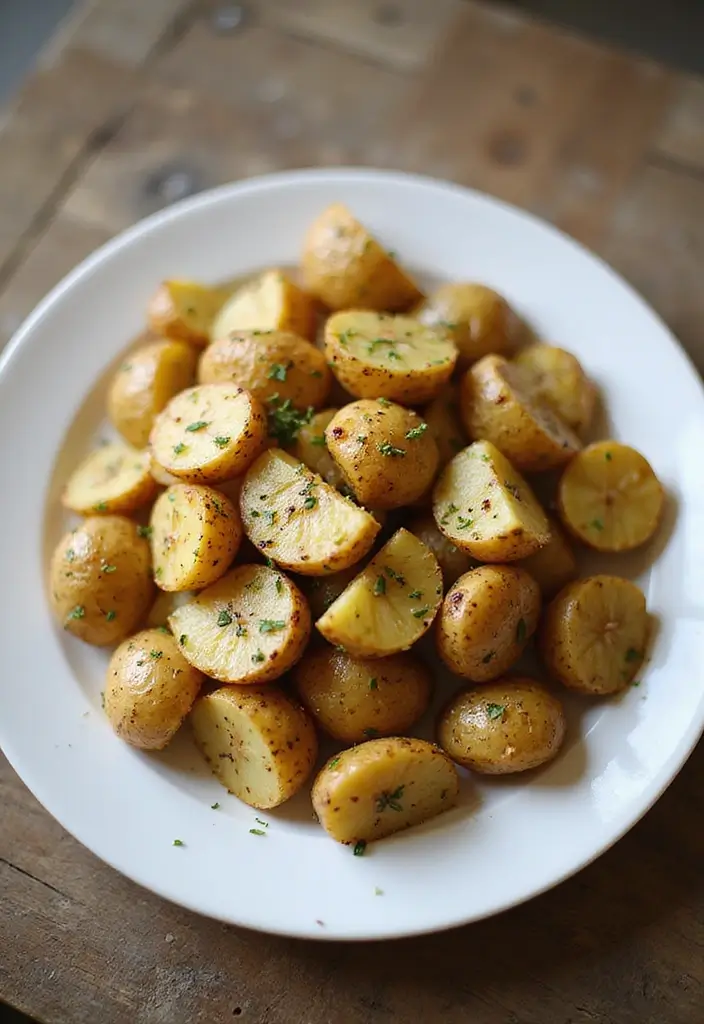
Imagine the aroma of herb-roasted potatoes wafting through your kitchen. These little golden gems make for a delightful side dish, perfect for any meal. Whether you’re serving chicken, fish, or a veggie stir-fry, these potatoes add a satisfying crunch and a burst of flavor to your plate.
To make them, start with baby potatoes. Their tender skin and creamy inside make them an excellent choice. Just cut them in half and toss them in a mix of olive oil, minced garlic, fresh rosemary, and thyme. After seasoning with salt and pepper, spread them on a baking sheet. Roast them until they’re crispy on the outside and tender on the inside.
These herb-roasted potatoes are not just tasty; they are also easy to meal prep. You can store leftovers in the fridge and reheat them for quick meals throughout the week!
Recipe Overview:
– Servings: 4
– Prep Time: 10 mins
– Cook Time: 30 mins
– Total Time: 40 mins
– Calories: 200 per serving
Nutrition Information:
– Protein: 4g
– Carbohydrates: 36g
– Fats: 7g
Ingredients:
– 2 lbs baby potatoes
– 3 tbsp olive oil
– 3 cloves garlic, minced
– 1 tbsp fresh rosemary, chopped
– 1 tbsp fresh thyme, chopped
– Salt and pepper to taste
Instructions:
1. Preheat your oven to 400°F.
2. In a large bowl, toss the halved baby potatoes with olive oil, minced garlic, chopped rosemary, and thyme. Add salt and pepper to taste.
3. Spread the seasoned potatoes evenly on a baking sheet.
4. Roast for 25-30 minutes, or until they are golden brown and crispy.
5. Serve them hot and enjoy the deliciousness!
FAQs:
– Can I use other types of potatoes? Yes, any potatoes will work, but baby potatoes are a crowd favorite for their texture!
– How do I store leftovers? Keep them in an airtight container in the fridge for up to four days.
These herb-roasted potatoes are a fantastic addition to your meal prep rotation. Enjoy their crispy goodness and the ease of having a delicious side dish ready to go!
Herb Roasted Potatoes
Editor’s Choice

HOMBERKING 10 Pack Borosilicate Glass Meal Prep Containers with Locking …
 Amazon$30.99
AOZITA 17oz Glass Olive Oil Bottle Dispenser – 500ml Green Oil and Vineg…
 Amazon$9.99
Cole & Mason Fresh Herb Keeper – Acrylic Storage Container for Refrigera…
 Amazon$24.95
18. Cinnamon Quinoa Breakfast Bowl
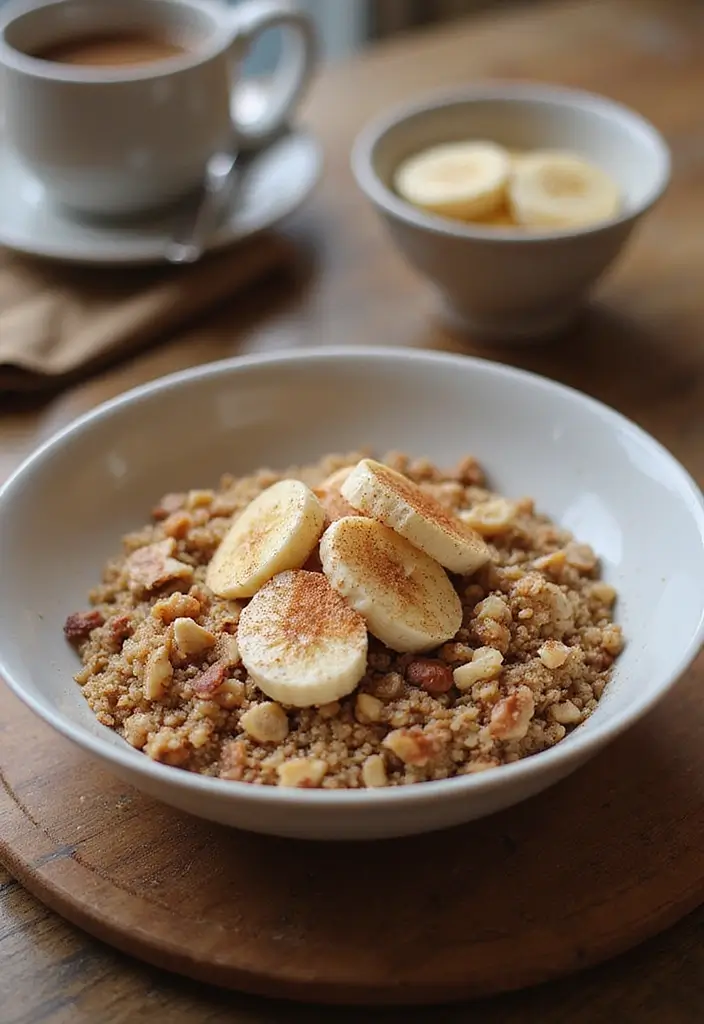
Start your mornings on a nourishing note with a delightful Cinnamon Quinoa Breakfast Bowl. It’s a warm, cozy dish that’s not only gluten-free and dairy-free but also packed with nutrients to kickstart your day.
Imagine this: fluffy quinoa cooked in creamy almond milk, infused with aromatic cinnamon, and sweetened with a drizzle of maple syrup. Top it off with fresh banana slices and your favorite nuts for a satisfying crunch. This breakfast is simple to prepare ahead of time, making it perfect for those busy mornings when you need a quick, healthy meal.
Here’s how to make it:
Recipe Overview:
– Servings: 2
– Prep Time: 5 mins
– Cook Time: 15 mins
– Total Time: 20 mins
– Calories: 350 per serving
Nutrition Information:
– Protein: 10g
– Carbohydrates: 60g
– Fats: 10g
Ingredients:
– 1 cup quinoa
– 2 cups almond milk
– 1 tsp cinnamon
– 1 tbsp maple syrup
– 1 banana, sliced
– Nuts for topping (almonds, walnuts, or pecans work well)
Instructions:
1. Rinse the quinoa under cold water to remove bitterness.
2. In a pot, combine quinoa and almond milk. Bring to a boil, then reduce heat and simmer until quinoa is fluffy, about 15 minutes.
3. Stir in the cinnamon and maple syrup, mixing well.
4. Serve warm, topped with banana slices and a sprinkle of nuts for added texture and flavor.
For an extra layer of flavor, consider adding a splash of vanilla extract!
FAQs:
How long does this breakfast bowl last?
You can keep it in the fridge for up to 4 days, making it a great option for meal prep!
This breakfast bowl is not just a meal; it’s a warm hug in a bowl, perfect for fueling your day ahead!
Cinnamon Quinoa Breakfast Bowl
Editor’s Choice

HOMBERKING 10 Pack Borosilicate Glass Meal Prep Containers with Locking …
 AmazonEUR 26.79
19. Spicy Chickpea Tacos
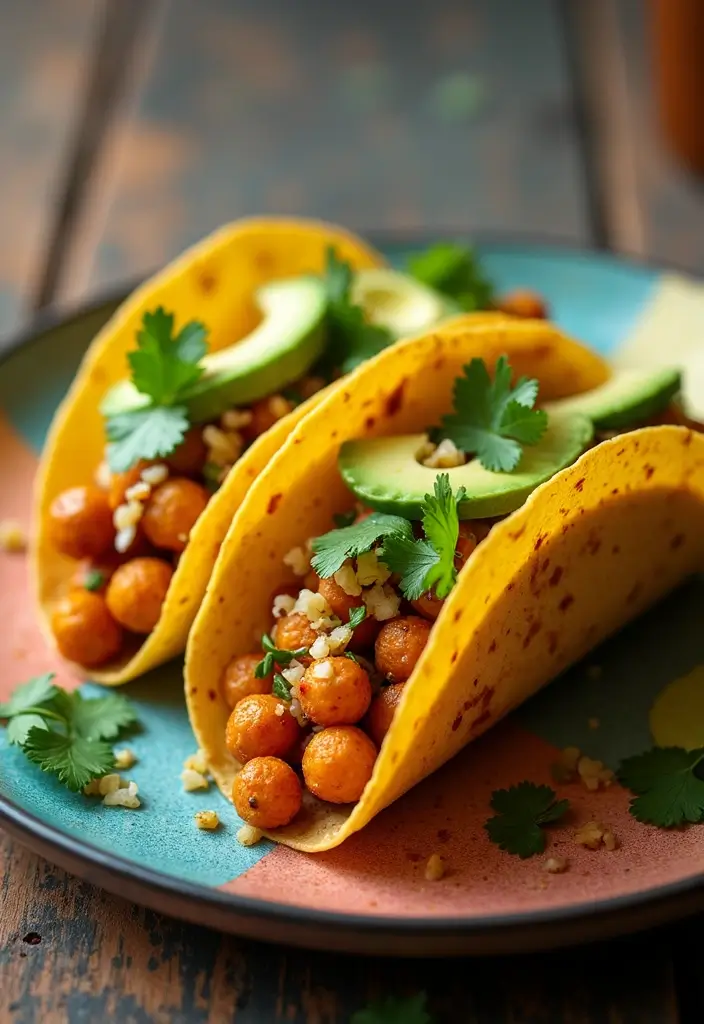
Spicy chickpea tacos are your go-to solution for a quick, delicious meal that satisfies your cravings. These tacos are not just flavorful; they’re also packed with protein, making them a perfect choice for lunch or dinner. Imagine sinking your teeth into a warm taco filled with spicy, savory chickpeas, fresh vegetables, and a zesty lime squeeze. It’s a meal that will leave you feeling good and energized.
To make these tasty tacos, start by sautéing canned chickpeas with taco seasoning, diced tomatoes, and jalapeños. Heat them until everything is warm and inviting. Then, spoon this vibrant mix into corn tortillas and top with creamy avocado, fresh cilantro, and a spritz of lime for that refreshing kick. Easy, right?
Here’s a quick look at the recipe details:
Recipe Overview:
– Servings: 4
– Prep Time: 10 mins
– Cook Time: 15 mins
– Total Time: 25 mins
– Calories: 300 per serving
Nutrition Information:
– Protein: 14g
– Carbohydrates: 45g
– Fats: 10g
Ingredients:
– 1 can chickpeas
– 1 can diced tomatoes
– 1 tbsp taco seasoning
– 1 jalapeño, diced
– Corn tortillas
– Avocado for topping
– Fresh cilantro
Instructions:
1. In a skillet, heat the chickpeas, diced tomatoes, jalapeño, and taco seasoning together until warm.
2. In a separate pan, warm the corn tortillas until soft.
3. Assemble your tacos by adding the chickpea mixture and topping with avocado and cilantro.
Feel free to add a dollop of dairy-free sour cream for extra creaminess!
FAQs:
Can I use different beans? Yes! Any beans you love can easily replace chickpeas.
These spicy chickpea tacos not only fit your gluten-free and dairy-free needs, but they also bring a burst of flavor to your meal prep. Enjoy this delightful dish that’s easy to make and even easier to love!
Spicy Chickpea Tacos
Editor’s Choice

McCormick Gluten Free Taco Seasoning Mix, 1.25 oz (Pack of 12)
 Amazon$18.36
Guerrero White Corn Tortillas, Gluten Free, Trans Fat Free, Small Soft T…
 Amazon$2.79
Forager Project, Organic Dairy-Free Sour Cream Alternative, 12 Ounce
 Amazon$5.99
20. Roasted Beet & Arugula Salad
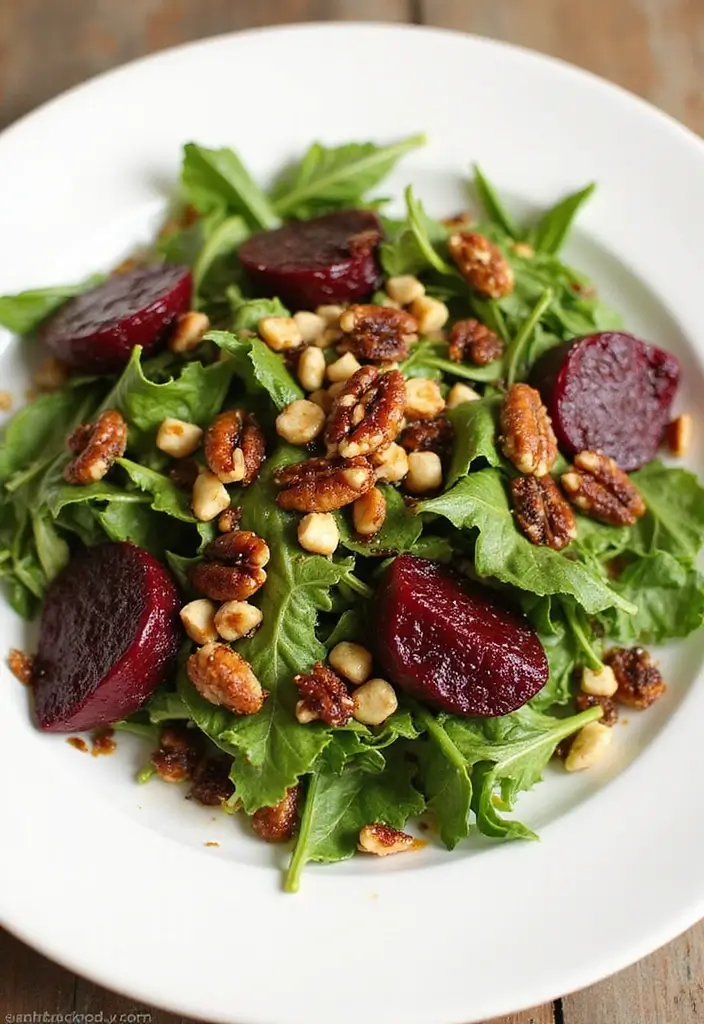
Looking for a refreshing salad that’s as easy to make as it is delicious? This Roasted Beet & Arugula Salad checks all the boxes. The sweetness of roasted beets pairs beautifully with the peppery bite of arugula, creating a colorful and nutritious meal prep option you’ll love. Plus, the tangy dressing adds just the right kick to elevate the flavors.
Start by roasting your beets until they are tender. Once they cool, mix them with fresh arugula and a handful of crunchy candied nuts. Drizzle a simple dressing made with balsamic vinegar and olive oil over the top. Enjoy it chilled or at room temperature—perfect for busy days when you need a quick, healthy meal.
Ready to whip this up? Here’s all you need to know:
Recipe Overview:
– Servings: 4
– Prep Time: 15 mins
– Cook Time: 30 mins
– Total Time: 45 mins
– Calories: 220 per serving
Nutrition Information:
– Protein: 5g
– Carbohydrates: 15g
– Fats: 15g
Ingredients:
– 2 medium beets, diced
– 4 cups arugula
– 1/4 cup nuts (walnuts or pecans work well)
– 3 tbsp balsamic vinegar
– 2 tbsp olive oil
– Salt and pepper to taste
Instructions:
1. Preheat your oven to 400°F (200°C). Spread the diced beets on a baking sheet and roast for about 30 minutes, or until they’re tender.
2. Let the roasted beets cool to room temperature.
3. In a large mixing bowl, combine the arugula, cooled beets, and nuts.
4. In a small bowl, whisk together the balsamic vinegar, olive oil, salt, and pepper. Pour this dressing over the salad.
5. Toss everything together gently to combine and serve immediately or store in the fridge.
Tip: If dairy is not a concern, adding crumbled feta cheese can enhance the flavor even more!
FAQs:
– How long does this salad last? It stays fresh in the fridge for up to 4 days, making it a great option for meal prepping.
Enjoy this vibrant salad as a light lunch or a side dish at dinner. It’s a delightful way to nourish your body and please your taste buds!
Roasted Beet & Arugula Salad
Editor’s Choice

HOMBERKING 10 Pack Borosilicate Glass Meal Prep Containers with Locking …
 Amazon$30.99

Organic Extra Virgin Olive Oil – Premium Single-Source Greek EVOO with C…
 AmazonCheck Price
21. Green Smoothie Packs
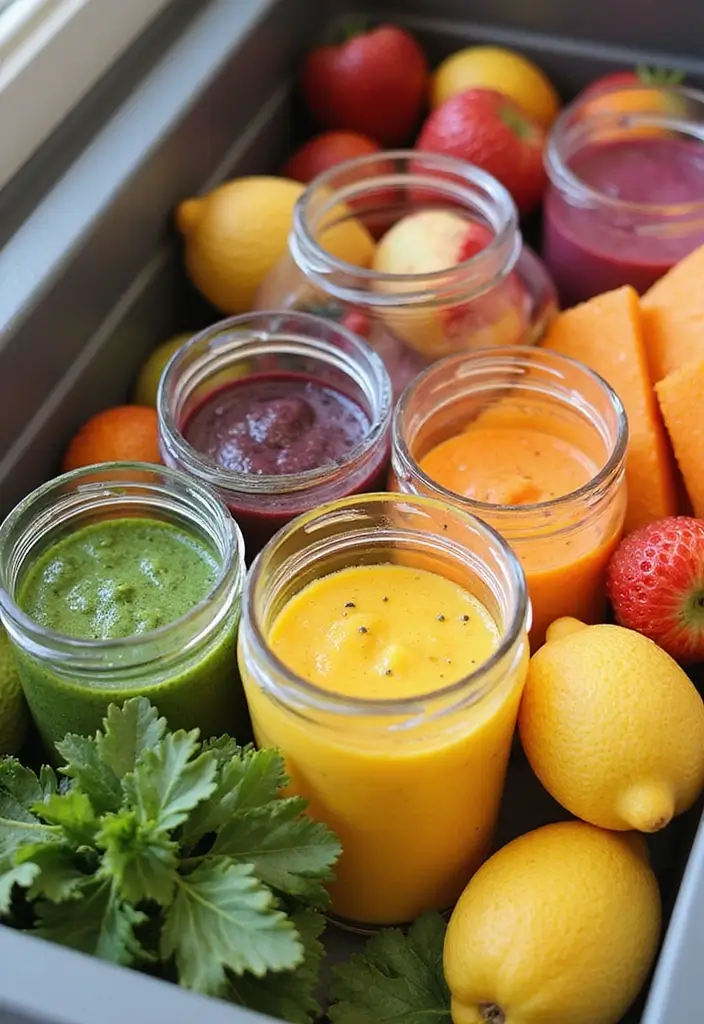
Green smoothie packs are your secret weapon for quick meals packed with nutrients. They’re simple to prepare and make adding greens to your diet a breeze. Imagine waking up to a delicious smoothie ready to blend—no fuss, just fresh goodness.
To create these packs, grab some freezer bags. Fill them with vibrant spinach or kale, a couple of ripe bananas, and sweet pineapple chunks. When you’re ready to enjoy, toss everything into your blender with almond milk or coconut water. You’ll have a refreshing drink that energizes your day.
Here’s a quick overview to get started:
Recipe Overview:
– Servings: 4
– Prep Time: 10 minutes
– Total Time: 10 minutes + freezing
– Calories: 150 per serving
Nutrition Information:
– Protein: 3g
– Carbohydrates: 30g
– Fats: 0g
Ingredients:
– 2 cups spinach or kale
– 2 bananas
– 1 cup pineapple chunks
– 1 cup almond milk or coconut water
Instructions:
1. In a freezer bag, combine spinach, bananas, and pineapple chunks.
2. Seal and freeze until you’re ready to blend.
3. When you want a smoothie, blend the frozen mix with almond milk or coconut water until smooth.
Want extra nutrition? Add chia seeds to the mix before you freeze! They boost fiber and omega-3s, making your smoothie even better.
FAQs:
– Can I use other greens? Absolutely! Feel free to switch it up with any leafy green you enjoy.
These packs make clean eating so easy. They’re budget-friendly, and perfect for busy mornings or when you’re craving a healthy snack. Give them a try, and you’ll have a tasty, nutritious drink at your fingertips!
Green Smoothie Packs
Editor’s Choice

Amazon Basics Reclosable Freezer Quart Bags, BPA Free, 120 Count (Previo…
 Amazon$7.46
nutribullet Personal Blender, Shakes, Smoothies, Food Prep, and Frozen B…
 Amazon$47.49
Garden of Life Chia Seeds 100% Organic for Smoothies, Pudding – Raw Orga…
 AmazonCheck Price
22. Vegan Chili
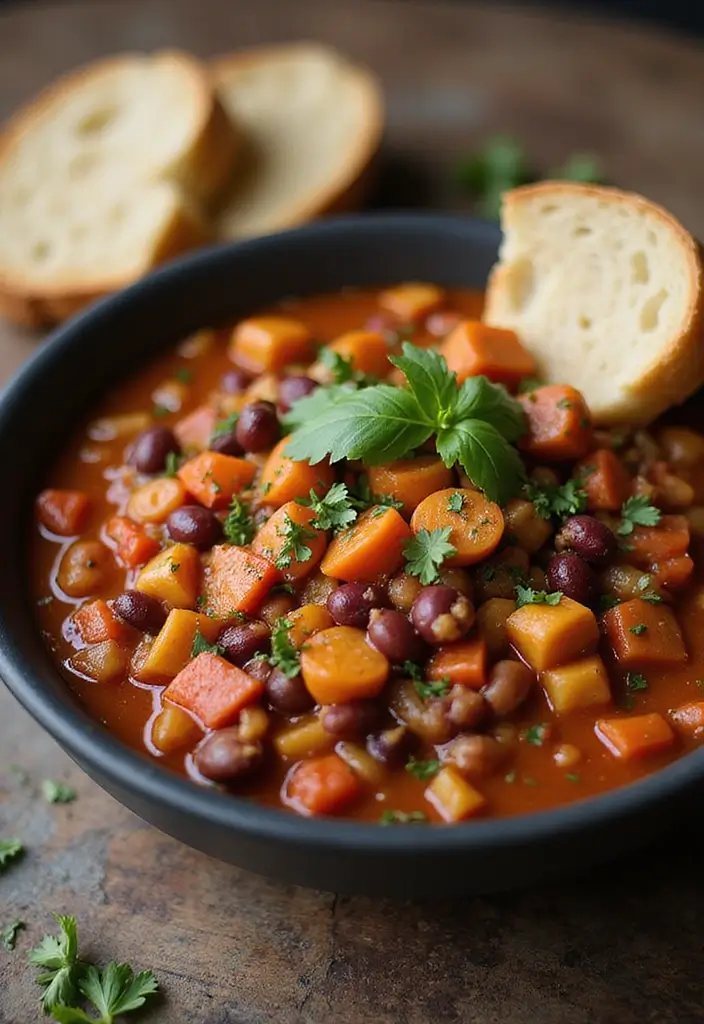
Imagine a warm bowl of vegan chili, bubbling with flavors and nutrients. This cozy dish is an ideal choice for meal prep. It’s not just gluten-free and dairy-free; it’s also packed with protein and hearty ingredients. Perfect for chilly evenings, this chili will comfort you while keeping your meals clean and healthy.
Start by gathering your ingredients. You’ll need fresh vegetables, canned beans, and spices. The magic begins when you sauté onions, garlic, and bell peppers in a pot. Their aromas will fill your kitchen, making your mouth water. Next, stir in canned tomatoes, beans, corn, and chili seasoning. Let it simmer, and you’ll unlock a depth of flavor that gets even better the next day!
Here’s a simple overview of this delicious recipe:
– Servings: 6
– Prep Time: 10 minutes
– Cook Time: 30 minutes
– Total Time: 40 minutes
– Calories: 280 per serving
Nutrition Information:
– Protein: 12g
– Carbohydrates: 45g
– Fats: 6g
Ingredients:
– 1 can black beans
– 1 can kidney beans
– 1 can corn
– 1 can diced tomatoes
– 1 onion, chopped
– 2 cloves garlic, minced
– 1 bell pepper, chopped
– 2 tbsp chili seasoning
Instructions:
1. In a large pot, heat a splash of oil over medium heat. Add the chopped onions, minced garlic, and bell peppers. Sauté until soft.
2. Pour in the diced tomatoes, black beans, kidney beans, corn, and chili seasoning. Stir well to combine.
3. Bring the mixture to a gentle simmer. Let it cook for about 20 minutes, stirring occasionally.
4. Serve hot in bowls. For a special touch, garnish with sliced avocado and fresh cilantro. You can also store it in meal prep containers for later!
Can you freeze chili? Absolutely! It freezes beautifully, making it a fantastic option for future meals. Just thaw and reheat when you’re ready.
Enjoy this flavorful dish as part of your clean-eating journey!
Vegan Chili
Editor’s Choice

50 Pack (100-Piece) 32 oz Meal Prep Containers Reusable with Lids 3-Comp…
 AmazonEUR 19.01
Fullstar The Original Pro Chopper – Vegetable Chopper and Spiralizer, Fo…
 Amazon$29.99
23. Grilled Veggie Skewers
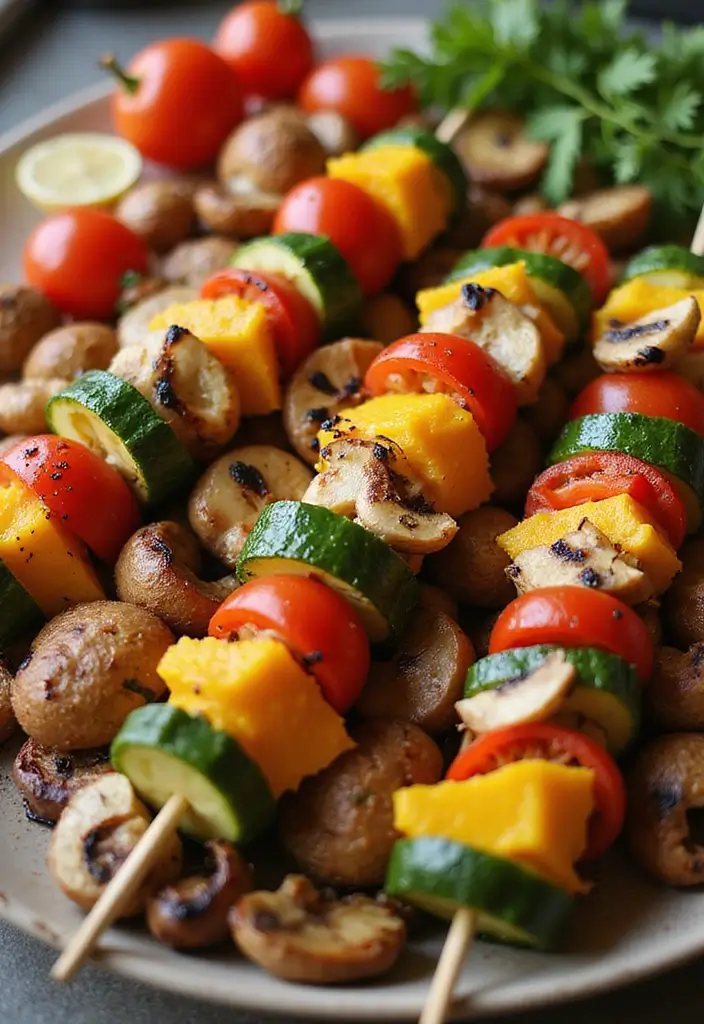
Grilled veggie skewers are a delightful way to enjoy a colorful mix of vegetables, all infused with a smoky flavor. These skewers are not only easy to prepare but also perfect for meal prep. Imagine biting into tender zucchini, juicy cherry tomatoes, and crunchy bell peppers, all bursting with fresh flavors. It’s a dish that brings joy to your table and can easily fit into your busy week.
To make your skewers, start by cutting vegetables like bell peppers, zucchini, mushrooms, and cherry tomatoes into bite-sized pieces. Marinate them in a mixture of olive oil, minced garlic, and your favorite herbs. This step brings out the best in your veggies! Then, simply thread them onto skewers and grill until they’re perfectly tender. You can enjoy these as a side dish or toss them into salads and grain bowls for added flavor and nutrition.
Here’s how to make it happen:
Recipe Overview:
– Servings: 4
– Prep Time: 15 mins
– Cook Time: 15 mins
– Total Time: 30 mins
– Calories: 150 per serving
Nutrition Information:
– Protein: 4g
– Carbohydrates: 20g
– Fats: 7g
Ingredients:
– 1 bell pepper (any color)
– 1 zucchini
– 1 cup mushrooms (button or portobello)
– 1 cup cherry tomatoes
– 2 tbsp olive oil
– 1 tsp garlic powder
– Salt and pepper to taste
Instructions:
1. Preheat your grill to medium-high heat.
2. Chop the vegetables into chunks and place them in a bowl.
3. Drizzle with olive oil, sprinkle garlic powder, salt, and pepper. Toss until evenly coated.
4. Thread the marinated veggies onto skewers, alternating for a fun look.
5. Grill the skewers for about 10-15 minutes, turning occasionally until they are tender and slightly charred.
These skewers can be made ahead and stored in the fridge, making them a fantastic option for meal prep. Just reheat them when you’re ready to eat!
FAQs:
– Can I add meat to these skewers? Yes! Chicken, shrimp, or tofu work great too. Just adjust the cooking time accordingly.
Enjoy your grilling! These skewers will add a burst of color and flavor to your meals, making clean eating a whole lot more fun.
Grilled Veggie Skewers
Editor’s Choice

HOPELF 12″ Natural Bamboo Skewers for BBQ,Appetiser,Fruit,Cocktail,Kabob…
 Amazon$6.99
YARRAMATE 16oz/470ml Glass Olive Oil Sprayer for Cooking with Stickers, …
 Amazon$8.99
Vegetable Chopper,12-in-1 Multifunctional Food Chopper,Professional Onio…
 Amazon$11.99
24. Butternut Squash Soup
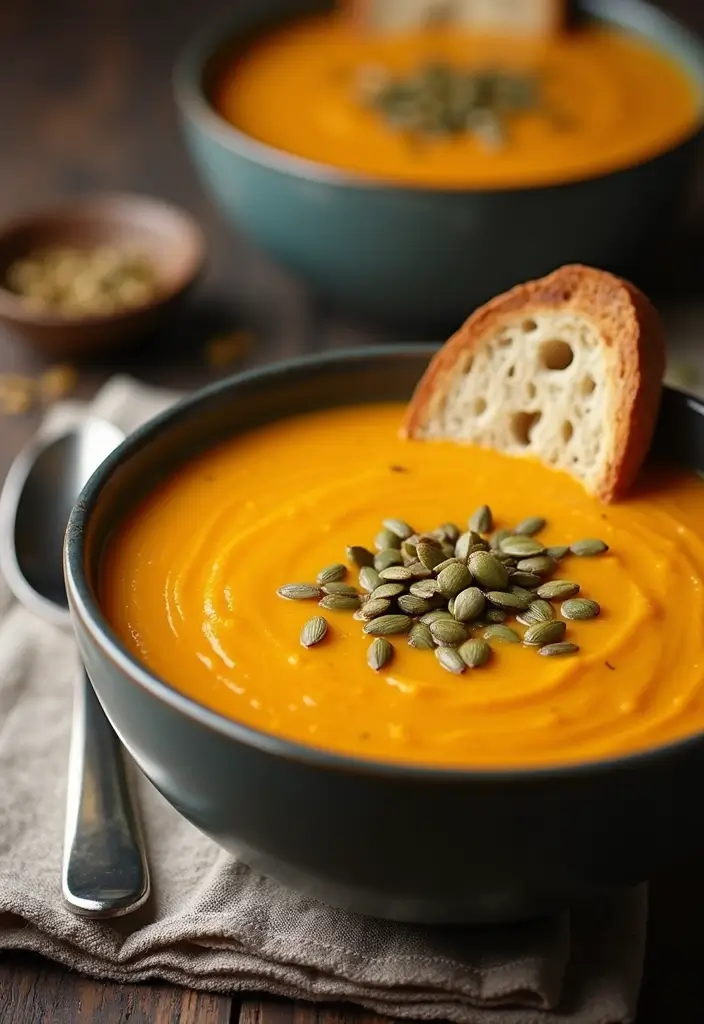
Butternut squash soup is a warm hug in a bowl. This dish shines during chilly days and is perfect for meal prep. Being both gluten-free and dairy-free, it’s an excellent choice for anyone looking to eat clean. The sweetness of the butternut squash blends beautifully with the creamy coconut milk, creating a flavor explosion that you’ll crave again and again.
To make this delightful soup, start by roasting cubed butternut squash until it’s tender and caramelized. While that’s cooking, sauté onions and garlic in a pot until they’re fragrant. Combine the roasted squash with vegetable broth and let it simmer for a few minutes. Finally, blend everything into a silky smooth texture and stir in coconut milk for that rich creaminess. You can enjoy this soup warm or let it chill in the fridge for a refreshing cold treat.
Here’s how to make it:
Recipe Overview:
– Servings: 4
– Prep Time: 15 mins
– Cook Time: 30 mins
– Total Time: 45 mins
– Calories: 250 per serving
Nutrition Information:
– Protein: 3g
– Carbohydrates: 40g
– Fats: 10g
Ingredients:
– 1 butternut squash, peeled and cubed
– 1 onion, chopped
– 2 cloves garlic, minced
– 3 cups vegetable broth
– 1 cup coconut milk
– Salt and pepper to taste
Instructions:
1. Preheat your oven to 400°F. Spread the cubed butternut squash on a baking sheet and roast for about 25 minutes until tender.
2. In a large pot, sauté the chopped onion and minced garlic over medium heat until soft and fragrant, about 5 minutes.
3. Add the roasted squash and vegetable broth to the pot. Let it simmer for 5 minutes to blend the flavors.
4. Carefully blend the soup using an immersion blender or in batches with a countertop blender until completely smooth. Stir in the coconut milk and season with salt and pepper to taste.
Serve your butternut squash soup with a sprinkle of pumpkin seeds for added crunch and a touch of color!
FAQs:
How long does it last? This soup keeps well in the fridge for up to 5 days, making it perfect for meal prep. Enjoy this comforting dish anytime you need a little warmth!
Butternut Squash Soup
Editor’s Choice

KitchenAid Variable Speed Corded Hand Blender KHBV53, Contour Silver
 AmazonCheck Price
HOMBERKING 10 Pack Borosilicate Glass Meal Prep Containers with Locking …
 Amazon$30.99
25. Fruit & Nut Energy Bites
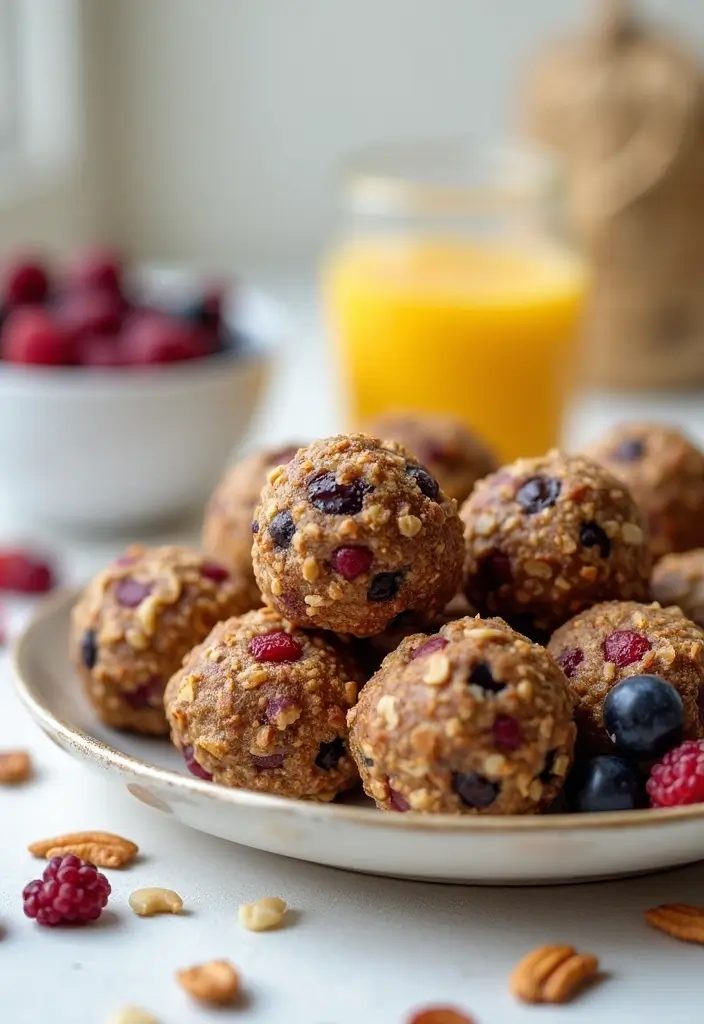
Craving a quick snack that fuels your busy day? Look no further than these delightful Fruit & Nut Energy Bites. They’re not only simple to whip up, but they also pack a powerful nutritional punch to keep your energy levels high. Imagine popping a sweet, chewy bite filled with the goodness of fruits and nuts—perfect for that afternoon slump!
To make these energy bites, grab your food processor. Toss in pitted dates, a mix of your favorite nuts, hearty oats, and a handful of dried fruits. Blend until everything sticks together. Then, roll the mixture into bite-sized balls and chill them in the fridge. This way, you’ll always have a healthy snack ready to go!
Recipe Overview:
– Servings: 10
– Prep Time: 10 mins
– Total Time: 10 mins + chilling
– Calories: 150 per serving
Nutrition Information:
– Protein: 4g
– Carbohydrates: 30g
– Fats: 6g
Ingredients:
– 1 cup pitted dates
– 1 cup mixed nuts (like almonds or cashews)
– 1/2 cup rolled oats
– 1/4 cup dried fruits (raisins or cranberries)
Instructions:
1. In your food processor, combine the pitted dates, nuts, oats, and dried fruits. Blend until the mixture is sticky and holds together.
2. Roll the mixture into small balls, about the size of a tablespoon.
3. Place the balls in the fridge and chill for at least 30 minutes until firm.
You can even *add a scoop of protein powder* for an extra boost if you like!
FAQs:
*How long do they last?* These energy bites will stay fresh for up to two weeks in the fridge. Perfect for meal prepping your snacks for the week ahead!
Now you’re ready to enjoy a tasty, energy-boosting snack that fits perfectly into your clean eating routine. Happy snacking!
Fruit & Nut Energy Bites
Editor’s Choice
Hamilton Beach Electric Vegetable Chopper & Mini Food Processor, 3-Cup, …
 Amazon$24.95
26. Cilantro Lime Rice
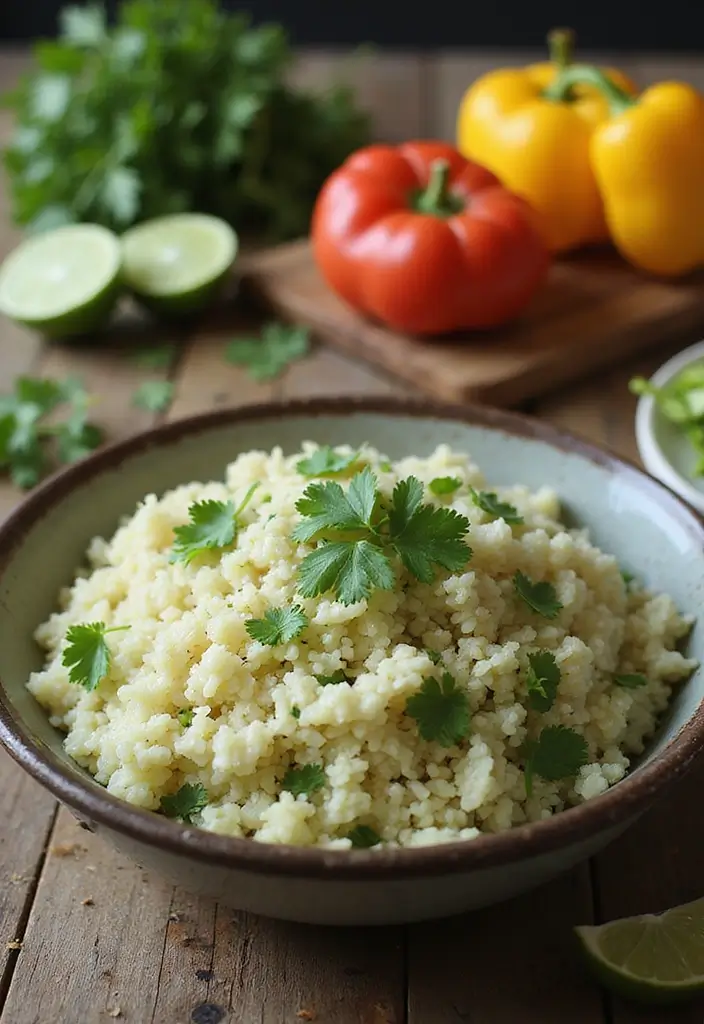
Cilantro lime rice is a zesty side dish that adds a pop of flavor to your meals. Whether you’re enjoying tacos, burrito bowls, or grilled veggies, this rice is a perfect companion. Plus, it’s incredibly easy to make in large batches for your meal prep needs. Imagine bright, fresh cilantro mingling with tangy lime juice, creating a refreshing taste that elevates any dish.
To whip up this delightful rice, you simply cook your choice of white or brown rice. Once it’s fluffy and tender, mix in lime juice, chopped cilantro, and a dash of salt for that extra zing. It’s a quick and fuss-free way to bring life to your plate.
Recipe Overview:
– Servings: 4
– Prep Time: 5 mins
– Cook Time: 20 mins
– Total Time: 25 mins
– Calories: 180 per serving
Nutrition Information:
– Protein: 4g
– Carbohydrates: 32g
– Fats: 3g
Ingredients:
– 1 cup rice (white or brown)
– 2 cups water
– Juice of 1 lime
– 1/4 cup fresh cilantro, chopped
– Salt to taste
Instructions:
1. Cook the rice according to the package instructions until it’s fluffy.
2. Use a fork to fluff the rice, then stir in lime juice, chopped cilantro, and salt.
3. Serve it warm as a side dish or mix it into your favorite bowls.
This cilantro lime rice is not only delicious but also versatile. You can even swap rice for quinoa if you’re looking for a different texture and flavor. Enjoy this simple yet vibrant dish as a staple in your meal prep routine!
• Choose white or brown rice based on your preference.
• Add lime zest for an extra zing of flavor.
• Mix in black beans for added protein and texture.
• Serve it chilled in salads for a refreshing twist.
Cilantro Lime Rice
Editor’s Choice

5-Blade Herb Cutter Scissors with Safety Cover, Cleaning Comb – Green
 Amazon$5.98
Elite Gourmet ETS740 BPA-Free Electric Citrus Juicer with 2 Cones, Compa…
 Amazon$22.31
27. Mushroom Stroganoff
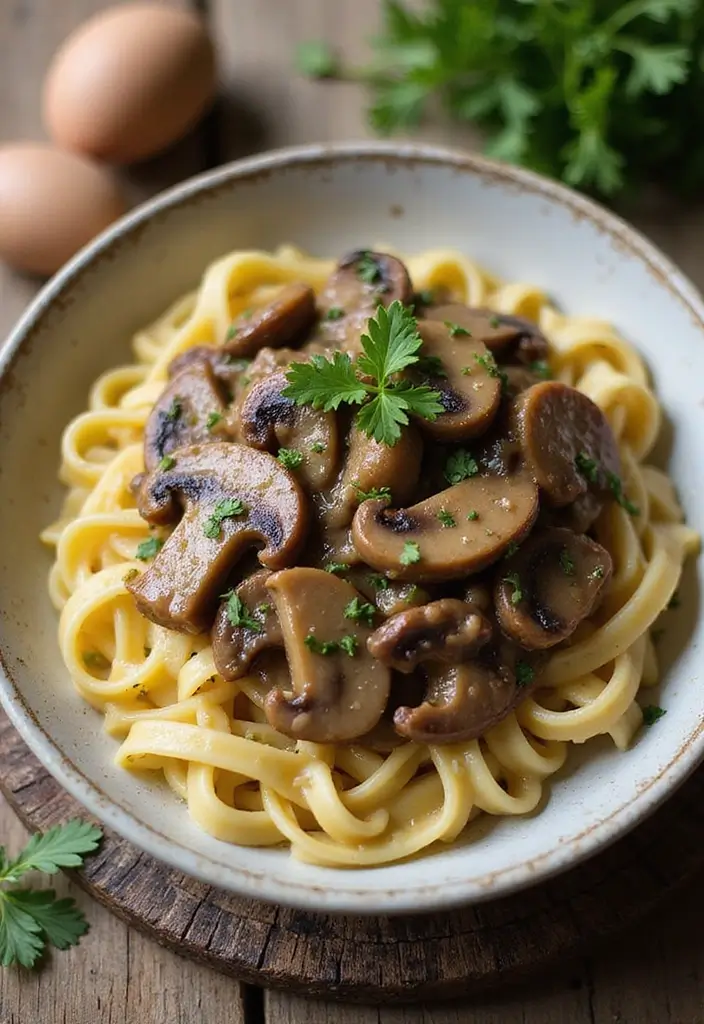
Mushroom Stroganoff is the ultimate comfort food that warms your soul. This creamy, hearty dish is entirely dairy-free, making it a perfect choice for those avoiding dairy. By using cashew cream, you create a rich sauce that beautifully clings to your favorite gluten-free pasta or even zoodles. Let’s dive into how you can whip up this delightful meal!
Start by sautéing fresh mushrooms, chopped onions, and minced garlic until they’re tender and fragrant. Then, blend soaked cashews with water to make your smooth cashew cream. Mix this with vegetable broth to create a luscious sauce. Toss it all together with your choice of gluten-free pasta or spiralized zucchini for a satisfying, nourishing dish.
Here’s what you’ll need for your Mushroom Stroganoff:
Ingredients:
– 8 oz mushrooms, sliced
– 1 onion, chopped
– 2 cloves garlic, minced
– 1 cup vegetable broth
– 1 cup cashews, soaked
– 2 cups gluten-free pasta (or zucchini noodles)
– Salt and pepper to taste
Instructions:
1. Heat a pan over medium heat. Add the sliced mushrooms, chopped onion, and minced garlic. Sauté until they are tender, about 5-7 minutes.
2. While the vegetables cook, blend the soaked cashews with water until smooth. This will create your creamy base.
3. Pour the vegetable broth and cashew cream into the pan with the sautéed veggies. Stir well and let it cook until the sauce thickens, around 5 minutes.
4. Cook your gluten-free pasta according to package instructions. If you’re using zoodles, spiralize your zucchini and add it to the sauce.
5. Combine the pasta or zoodles with the sauce. Toss until well coated.
6. Season with salt and pepper to taste. Serve warm and garnish with chopped parsley for a fresh finish!
FAQs:
– Can I substitute almond cream for cashew cream? Yes, almond cream is a great alternative!
– What if I don’t have vegetable broth? Water works too, but broth adds extra flavor!
This Mushroom Stroganoff is not only simple to make but also a delicious way to enjoy clean eating. Perfect for meal prep, it’ll keep well in the fridge for a few days, so you can enjoy it anytime you crave a hearty meal.
Mushroom Stroganoff
Editor’s Choice

8 in 1 Nut Milk Maker Blender, 32oz Homemade Soy, Almond, Oat, Coconut, …
 Amazon$59.99
BARILLA Gluten Free Spaghetti, 12 Ounce – Non-GMO Gluten Free Pasta Made…
 Amazon$2.48
Brieftons 5-Blade Vegetable Spiralizer: Strongest-Heaviest Spiral Slicer…
 Amazon$31.99
Conclusion
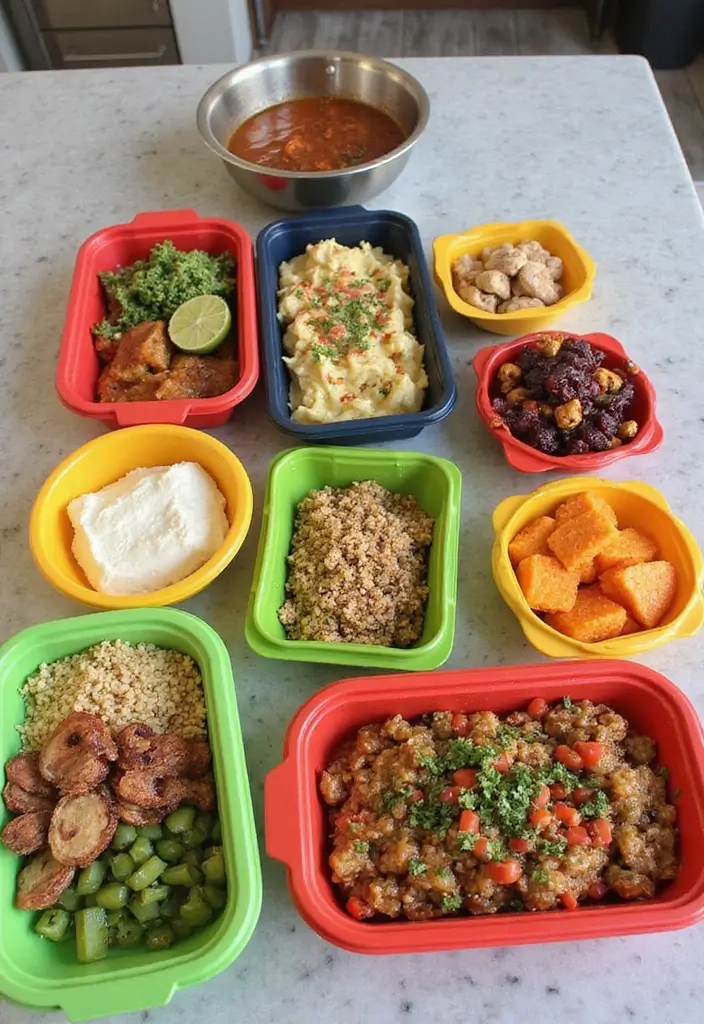
With these 27 gluten-free, dairy-free meal prep recipes, eating clean has never been easier or more delicious. Each dish is crafted to save you time while providing satisfying and nutritious options for your busy week ahead.
Whether you’re looking for hearty salads, savory bowls, or sweet treats, this collection has something for everyone. Embrace the vibrant flavors and wholesome ingredients, and enjoy the benefits of meal prep for a healthier lifestyle!
Note: We aim to provide accurate product links, but some may occasionally expire or become unavailable. If this happens, please search directly on Amazon for the product or a suitable alternative.
This post contains Amazon affiliate links, meaning I may earn a small commission if you purchase through my links, at no extra cost to you.
Frequently Asked Questions
What are some easy gluten-free dairy-free meal prep recipes for beginners?
If you’re just starting with gluten-free dairy-free meal prep, try simple recipes like quinoa salad with fresh vegetables and a lemon vinaigrette or chickpea stir-fry with your favorite spices. These meals are not only quick to prepare but also packed with nutrients, making them perfect for clean eating.
How can I ensure my meal prep is truly gluten-free and dairy-free?
To guarantee your meal prep is gluten-free and dairy-free, always read labels carefully and choose certified products when possible. Be mindful of cross-contamination, especially in shared kitchens. Incorporate whole foods like fruits, vegetables, lean proteins, and grains like quinoa or brown rice, which are naturally gluten-free.
What are some healthy meal prep ideas for busy professionals?
Busy professionals often benefit from healthy meal prep recipes like overnight oats made with almond milk, or baked sweet potatoes stuffed with black beans and avocado. Consider batch cooking grains and proteins on the weekends to mix and match throughout the week, ensuring you have quick, delicious meals ready to go!
Can I customize the gluten-free dairy-free recipes to fit my dietary preferences?
Absolutely! One of the best parts of gluten-free dairy-free meal prep is the ability to customize recipes. Swap out vegetables, proteins, or grains based on your preferences or what’s in season. Feel free to experiment with different herbs and spices to create flavors that you love while sticking to clean eating principles.
How long can I store my gluten-free dairy-free meal prep in the fridge?
Most gluten-free dairy-free meal prep dishes can be stored in the fridge for about 3-5 days. Use airtight containers to keep meals fresh. If you want to prepare in bulk, consider freezing some portions for longer storage. Just make sure to label them with dates so you can enjoy them at their best!
Related Topics
gluten free
dairy free
meal prep
clean eating
healthy recipes
easy meal prep
busy professionals
quick meals
family-friendly
meal prep ideas
nutritious meals
prepping tips
