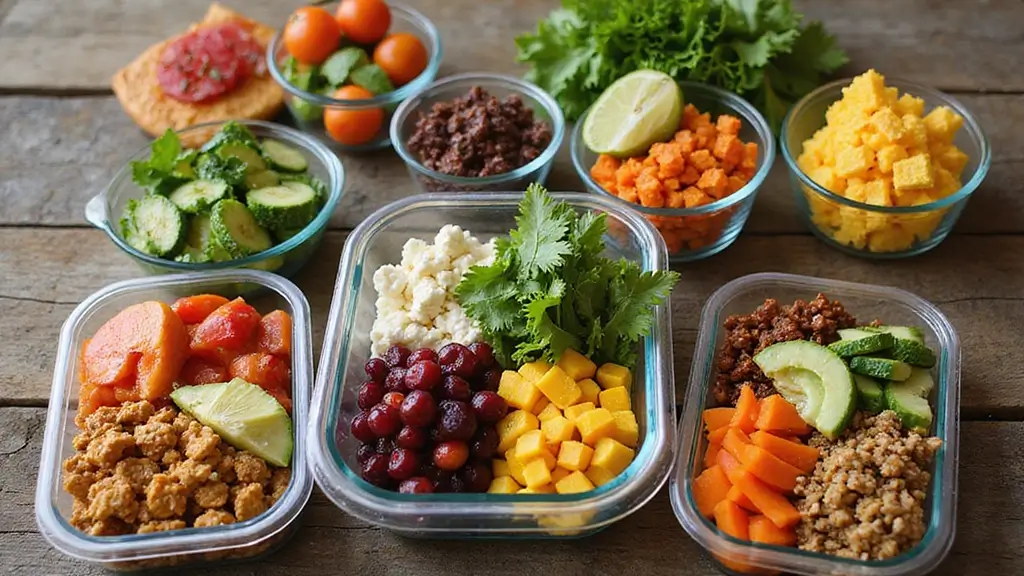
Eating healthy can sometimes feel like a daunting task, especially when you’re trying to stick to a budget. I created this post because I know how easy it is to feel overwhelmed by the choices out there. You might be wondering how to prepare meals that are both nutritious and affordable. Well, you’re in the right place!
This collection of recipes is for anyone who wants to eat clean without breaking the bank. Whether you’re a busy student, a parent juggling various schedules, or someone just looking to make healthier choices, these recipes will help you simplify your meal planning. You care about good food that fuels your body, but you also want to keep your grocery bills in check.
In this post, you’ll find over 30 healthy meal prep recipes that are tasty, easy to make, and wallet-friendly. Each recipe is designed to help you save time in the kitchen while ensuring you enjoy wholesome, delicious meals throughout the week. We’ll focus on ingredients that are not only healthy but also affordable, so you won’t have to sacrifice quality for cost.
Get ready to discover a variety of meals that will make your life easier. From colorful grain bowls to hearty soups, you’ll find options that fit every palate. These recipes are not just about eating well; they’re about making your life more manageable and enjoyable. So, roll up your sleeves, grab your apron, and let’s get cooking!
1. Quinoa & Black Bean Salad
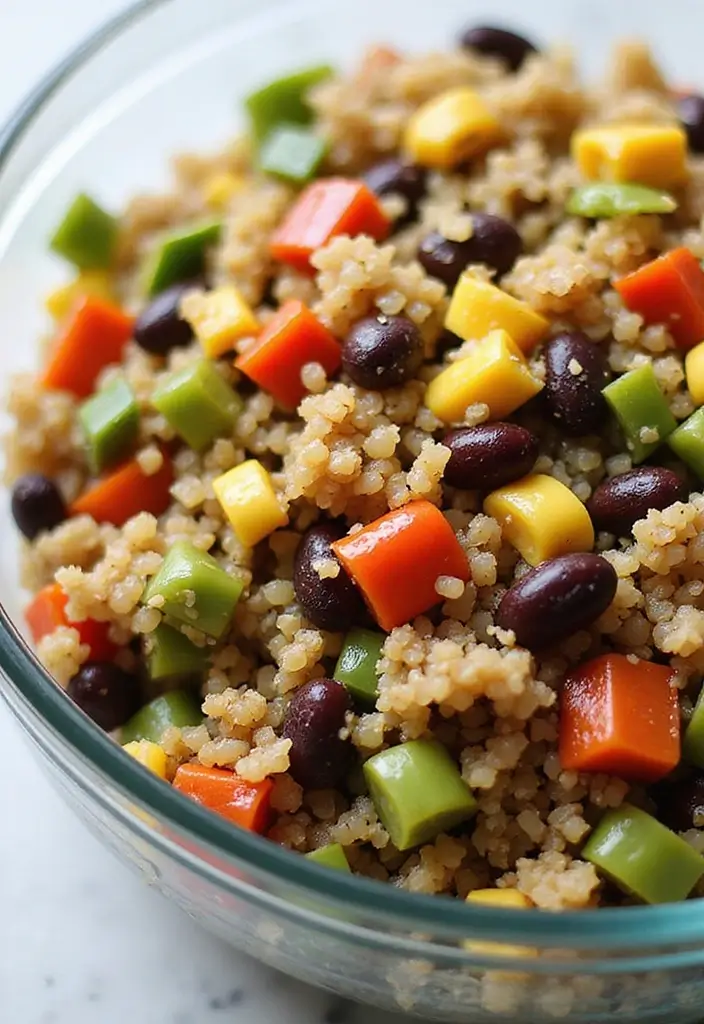
This Quinoa & Black Bean Salad is not just a meal; it’s a flavor-packed experience that fuels your body. Imagine tender quinoa, rich in protein, mingling with hearty black beans, sweet corn, and a rainbow of fresh veggies. This salad is a feast for the eyes and the stomach!
Preparation is a breeze. You simply cook the quinoa, toss in the beans and veggies, and drizzle with a refreshing lime vinaigrette. The best part? It keeps well in your fridge, making it a perfect choice for meal prep. You can enjoy it all week long without losing flavor or freshness!
Recipe Overview:
– Servings: 4
– Prep Time: 15 minutes
– Cook Time: 20 minutes
– Total Time: 35 minutes
– Calories: 300 per serving
Nutrition Information:
– Protein: 12g
– Dietary Fiber: 10g
– Total Fat: 8g
– Carbohydrates: 42g
Ingredients List:
– 1 cup quinoa
– 1 can black beans, rinsed and drained
– 1 cup corn, fresh or frozen
– 1 red bell pepper, diced
– 1 cup cherry tomatoes, halved
– 1 avocado, diced
– Juice of 2 limes
– 2 tablespoons olive oil
– Salt and pepper, to taste
Step-by-Step Instructions:
1. Cook the quinoa according to the package instructions until fluffy.
2. In a large bowl, combine cooked quinoa, black beans, corn, diced bell pepper, tomatoes, and avocado.
3. In a small bowl, whisk together lime juice, olive oil, salt, and pepper.
4. Pour the dressing over the salad and toss gently to combine.
5. Divide into meal prep containers and refrigerate for up to 5 days.
Want to boost the nutrients? Add more veggies like cucumbers or spinach. Serve it with grilled chicken for extra protein.
Frequently Asked Questions:
– Can I make this ahead of time? Yes! It lasts in the fridge for up to 5 days.
– Can I customize this recipe? Absolutely! Feel free to use any beans or veggies you have on hand.
This salad isn’t just healthy; it’s a versatile dish that suits your taste and lifestyle perfectly!
Quinoa & Black Bean Salad
Editor’s Choice

8 Pack 36oz Large Glass Meal Prep Containers with lids, Glass Food Stora…
 Amazon$30.39
BetterBody Foods Organic Quinoa, Vegan, Gluten Free, Low Glycemic Rice R…
 Amazon$11.49
Atlas 750 mL Organic Cold Press Extra Virgin Olive Oil in Glass Bottle, …
 Amazon$22.94
2. Spicy Chickpea Stew
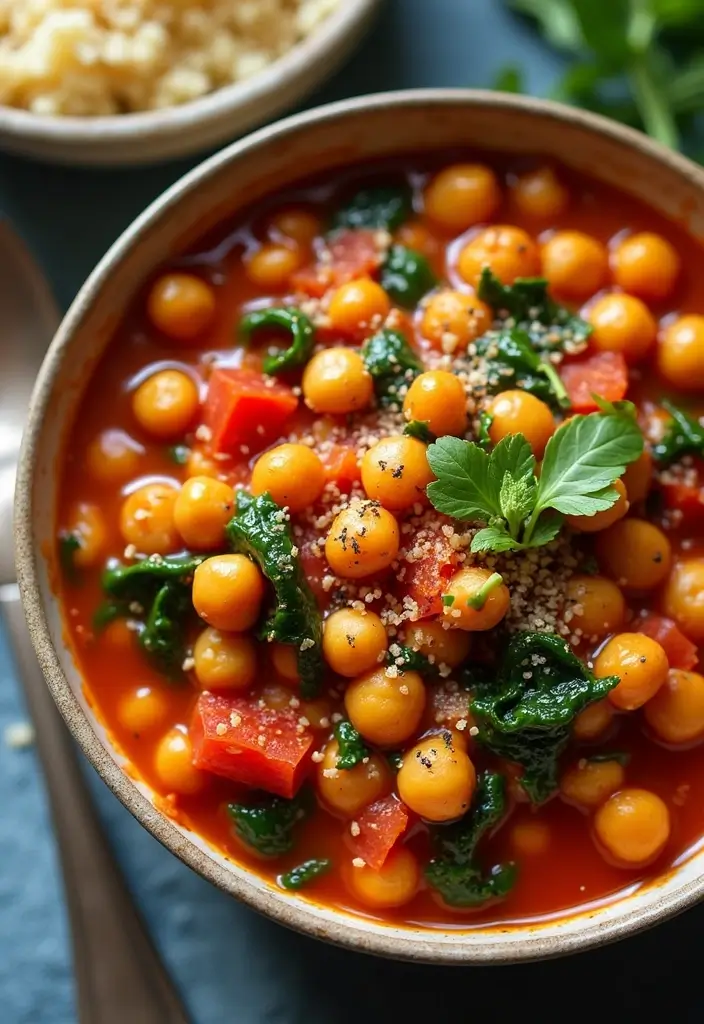
Warm up your evenings with a delightful bowl of Spicy Chickpea Stew. This hearty dish is a flavor explosion, combining tender chickpeas, ripe tomatoes, and vibrant green spinach. It’s not just tasty; it’s a one-pot meal that’s perfect for meal prep, making your busy weeknights a breeze. Plus, the spices bring a warm kick and health benefits that nourish your body with every spoonful.
Imagine taking just 30 minutes to create a comforting stew that fills your kitchen with mouthwatering aromas. This recipe yields four generous servings, making it perfect for lunches or quick dinners throughout the week. Let’s dive into the details so you can whip up this easy dish in no time!
Recipe Overview:
– Servings: 4
– Prep Time: 10 minutes
– Cook Time: 30 minutes
– Total Time: 40 minutes
– Calories: 250 per serving
Nutritional Information:
– Protein: 10g
– Dietary Fiber: 12g
– Total Fat: 5g
– Carbohydrates: 40g
Ingredients:
– 2 cans chickpeas, drained
– 1 can diced tomatoes
– 1 onion, diced
– 3 cloves garlic, minced
– 2 cups fresh spinach
– 1 tablespoon olive oil
– 1 teaspoon cumin
– 1 teaspoon chili powder
– Salt and pepper to taste
Step-by-Step Instructions:
1. Heat the olive oil in a pot over medium heat. Add the diced onion and minced garlic, sautéing until they’re soft and fragrant.
2. Stir in the chickpeas, diced tomatoes, cumin, chili powder, salt, and pepper. Mix well.
3. Let the stew simmer for about 30 minutes, allowing the flavors to meld together.
4. Just before serving, add the fresh spinach. Stir until it wilts down.
5. Portion the stew into containers, perfect for grabbing on-the-go during the week.
Want to elevate your meal? Serve it over rice or quinoa for a filling dish. If you love spice, sprinkle in some red pepper flakes for an extra kick!
Frequently Asked Questions:
– How long can I store this? It stays good in the fridge for 4-5 days.
– Can I freeze it? Yes! This stew freezes beautifully for up to 2 months.
Spicy Chickpea Stew
Editor’s Choice

50 Pack (100-Piece) 32 oz Meal Prep Containers Reusable with Lids 3-Comp…
 Amazon$21.99
Mercer Culinary M22608 Millennia Black Handle, 8-Inch, Chef’s Knife
 Amazon$18.74
3. Vegetable Stir-Fry with Brown Rice
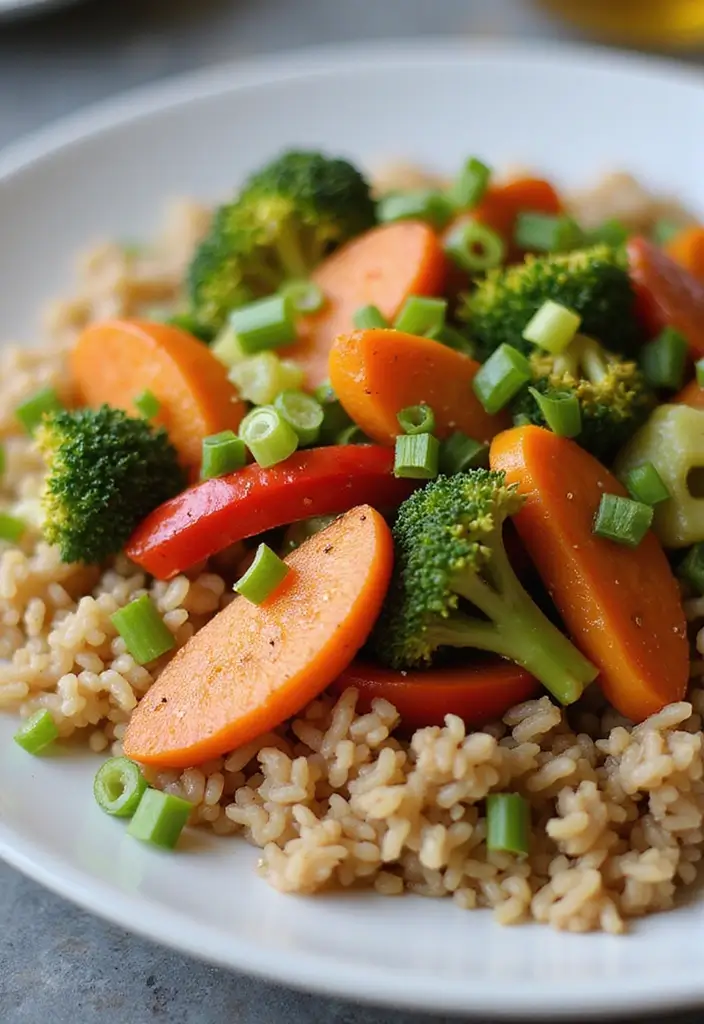
Whip up a delicious and nutritious Vegetable Stir-Fry with Brown Rice in just 25 minutes! This dish is perfect for busy weeknights and combines fresh seasonal veggies with a savory soy sauce. It’s colorful, wholesome, and can be customized to your taste using whatever vegetables you have on hand. Plus, brown rice adds a nutty flavor and a filling base, making it an ideal meal prep option.
Imagine the satisfying crunch of bell peppers and the tender bite of broccoli dancing together in a hot skillet. The aroma of garlic and ginger fills your kitchen, creating an inviting atmosphere. This stir-fry is not just a meal; it’s an experience that brings joy to your dining table!
Recipe Overview:
– Servings: 4
– Prep Time: 10 minutes
– Cook Time: 15 minutes
– Total Time: 25 minutes
– Calories: 350 per serving
Nutrition Information:
– Protein: 8g
– Dietary Fiber: 7g
– Total Fat: 4g
– Carbohydrates: 70g
Ingredients List:
– 2 cups brown rice
– 2 cups mixed vegetables (bell peppers, broccoli, carrots)
– 3 tablespoons soy sauce
– 1 tablespoon sesame oil
– 2 cloves garlic, minced
– 1 teaspoon ginger, minced
– Green onions for garnish
Step-by-Step Instructions:
1. Cook the brown rice according to package instructions.
2. Heat the sesame oil in a large skillet over medium heat.
3. Add the minced garlic and ginger, sautéing for about 1 minute until fragrant.
4. Toss in the mixed vegetables and stir-fry for 7-10 minutes until they become tender.
5. Pour in the soy sauce, mixing it well with the veggies.
6. Serve the stir-fry over the cooked brown rice and garnish with sliced green onions.
Feel free to add tofu or chicken for extra protein. Using seasonal veggies not only enhances flavor but also keeps your grocery bill low.
Frequently Asked Questions:
– Can I use white rice instead? Yes, just adjust the cooking times accordingly.
– How long does this stay fresh? It lasts about 4 days in the fridge.
This Vegetable Stir-Fry with Brown Rice is easy, budget-friendly, and packed with flavor. You’ll love how simple it is to create a healthy meal that keeps you satisfied. Enjoy your cooking adventure!
Vegetable Stir-Fry with Brown Rice
Editor’s Choice

50 Pack (100-Piece) 32 oz Meal Prep Containers Reusable with Lids 3-Comp…
 Amazon$21.99
CAROTE Nonstick Frying Pan Skillet,Non Stick Granite Fry Pan Egg Pan Ome…
 Amazon$14.99
4. Overnight Oats with Berries
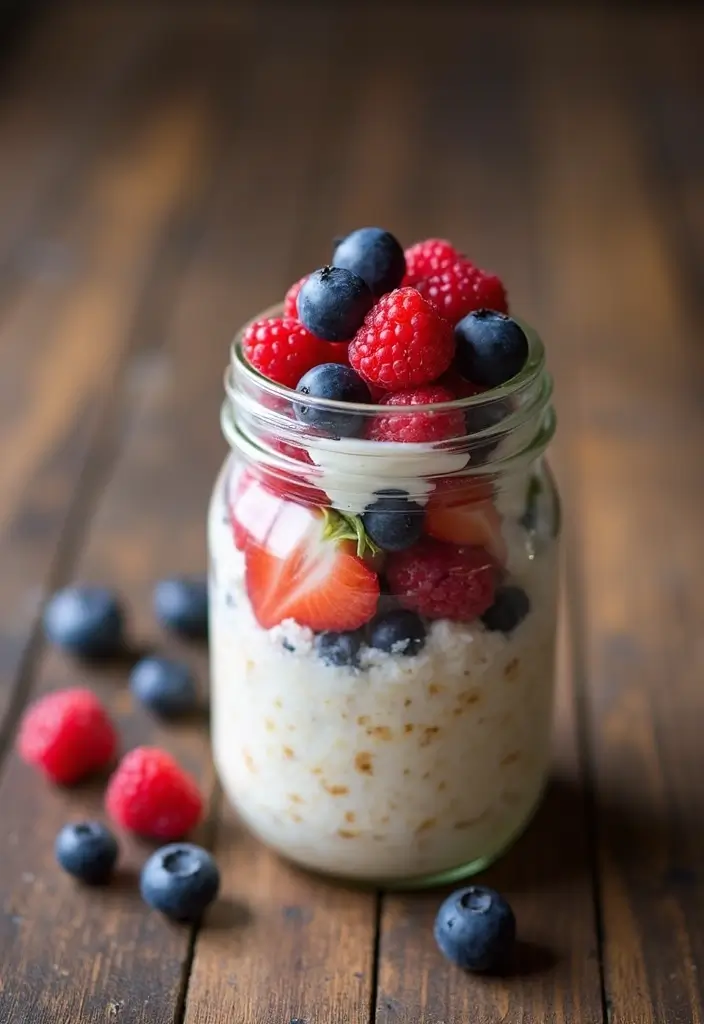
Start your morning right with a bowl of Overnight Oats with Berries! This quick and healthy breakfast is perfect for busy days. In just five minutes, you can prepare a nutritious meal that requires zero cooking. Imagine waking up to creamy oats soaked in milk, topped with colorful, juicy berries. It’s a delicious way to fuel your day!
To make this breakfast even better, the oats soak up the milk overnight, turning into a smooth and satisfying dish. Adding fresh berries not only enhances the flavor but also packs your meal with antioxidants and vitamins. You’ll love how easy it is to customize this recipe!
Recipe Overview:
– Servings: 2
– Prep Time: 5 minutes
– Cook Time: 0 minutes
– Total Time: 5 minutes
– Calories: 250 per serving
Nutrition Information:
– Protein: 8g
– Dietary Fiber: 6g
– Total Fat: 5g
– Carbohydrates: 48g
Ingredients:
– 1 cup rolled oats
– 1 cup milk (or almond milk)
– 1 tablespoon chia seeds
– 1 cup mixed berries (strawberries, blueberries, raspberries)
– 1 tablespoon honey or maple syrup
Instructions:
1. In a jar or bowl, mix rolled oats, milk, and chia seeds together.
2. Stir well, then layer the top with fresh berries and drizzle honey over it.
3. Cover and place in the refrigerator overnight.
4. In the morning, give it a good stir and enjoy your delicious breakfast!
Tips for Customization:
– Add cinnamon for extra flavor.
– Swap berries with banana slices or nut butter for variety.
Frequently Asked Questions:
– Can I make these vegan? Yes, just use non-dairy milk and maple syrup.
– How long do they last? Best enjoyed within 2-3 days for optimal freshness.
With this simple recipe, you’ll have a nutritious breakfast ready for busy mornings. Enjoy the benefits of clean eating without breaking the bank!
Fun fact: Overnight Oats with Berries can cut morning prep time by about 5 minutes and still fit clean eating on a budget. Just soak, top with berries, and you’re ready to fuel a busy day with healthy meal prep on a budget and simple recipes.
Overnight Oats with Berries
Editor’s Choice

50 Pack (100-Piece) 32 oz Meal Prep Containers Reusable with Lids 3-Comp…
 Amazon$21.99
BetterBody Foods Organic Chia Seeds 2 lbs, 32 Oz, with Omega-3, Non-GMO,…
 Amazon$11.97
5. Lentil Soup
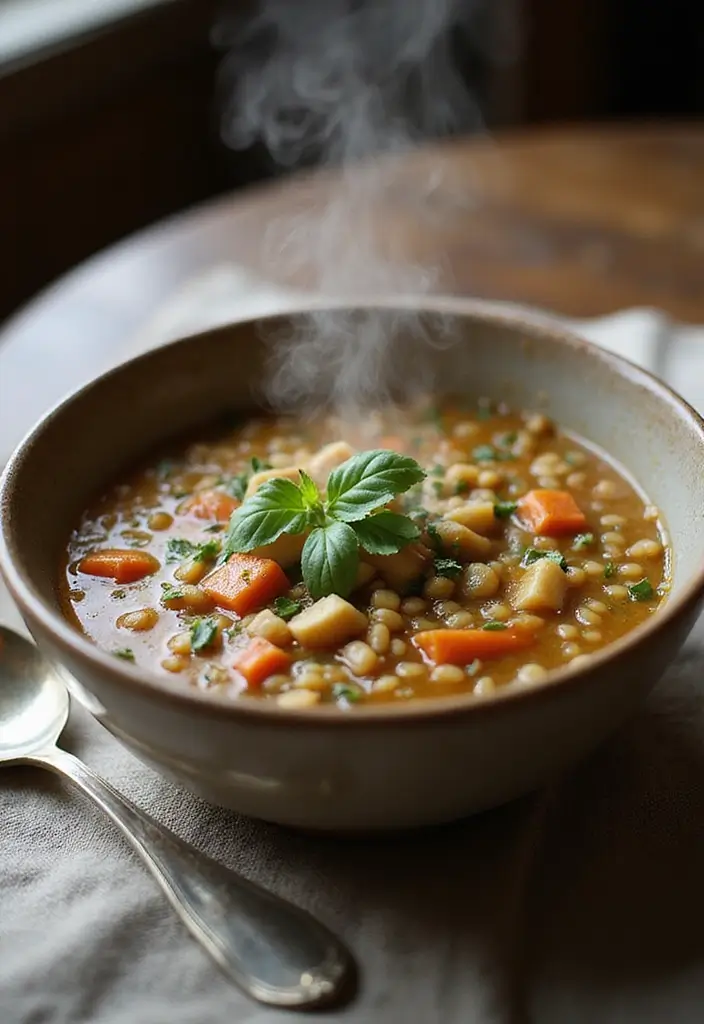
Warm and comforting, this Lentil Soup is your go-to for cozy meals on a budget! With protein-rich lentils and a colorful mix of veggies, this dish not only fills you up but also nourishes your body. It’s simple to whip up and perfect for meal prepping, making it easy to grab a bowl when you’re on the go.
Imagine savoring this hearty soup on chilly evenings—it’s like a warm hug in a bowl! Plus, you can make a big batch and store it in the fridge or freezer for quick lunches or dinners. Let’s break down how to make this delicious dish.
Recipe Overview:
– Servings: 6
– Prep Time: 10 minutes
– Cook Time: 40 minutes
– Total Time: 50 minutes
– Calories: 220 per serving
Nutrition Information:
– Protein: 12g
– Dietary Fiber: 8g
– Total Fat: 4g
– Carbohydrates: 36g
Ingredients List:
– 1 cup dried lentils
– 1 onion, diced
– 2 carrots, diced
– 2 celery stalks, diced
– 3 cloves garlic, minced
– 6 cups vegetable broth
– 1 teaspoon thyme
– Salt and pepper to taste
Step-by-Step Instructions:
1. In a large pot, sauté the onion, garlic, carrots, and celery until they soften, about 5-7 minutes.
2. Stir in the lentils, vegetable broth, thyme, salt, and pepper.
3. Bring the mixture to a boil, then reduce the heat. Simmer for about 30 minutes, or until the lentils are tender.
4. Taste and adjust the seasoning as needed. Serve the soup warm.
5. Store leftovers in airtight containers in the fridge or freezer.
Want to customize it? Here are some tips:
– Blend the soup for a creamy texture if you prefer.
– Add fresh spinach or kale for an extra nutrient boost.
Frequently Asked Questions:
– Can I freeze this soup? Yes, it freezes well for up to 3 months!
– How do I make it spicy? Simply add red pepper flakes for a kick.
Enjoy making this Lentil Soup! It’s not just filling; it’s a vibrant, nutritious option that makes healthy eating on a budget easy and satisfying.
Lentil Soup
Editor’s Choice

Bonsenkitchen Hand Blender, Immersion Blender with 2 Mixing Speed, Elect…
 Amazon$14.44
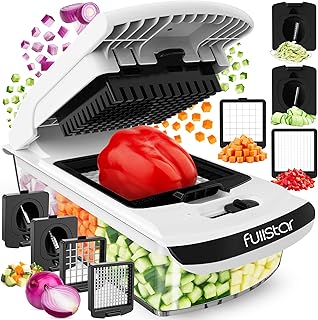
Fullstar The Original Pro Chopper – Vegetable Chopper and Spiralizer, Fo…
 Amazon$29.99
6. Greek Yogurt Parfait
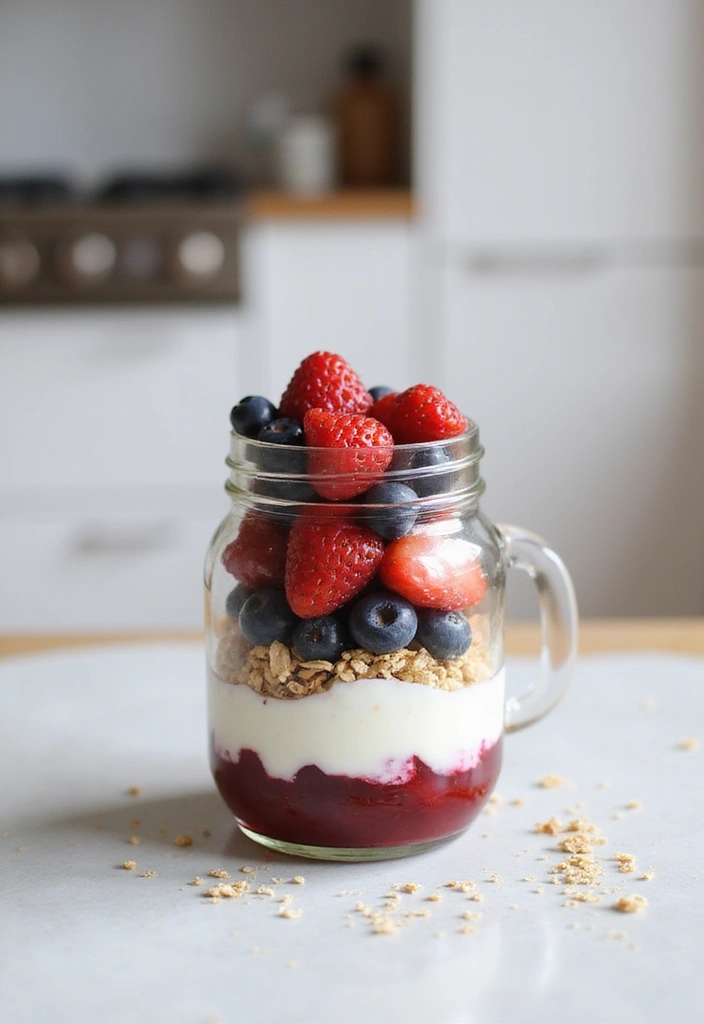
Start your day on a delicious note with a Greek Yogurt Parfait! This colorful treat layers creamy Greek yogurt with fresh fruits and crunchy granola, making it a satisfying breakfast or snack. Not only is it tasty, but it’s also packed with protein, keeping you full and energized throughout the morning.
You can easily customize your parfait with any fruits you love—think berries, bananas, or even tropical fruits! Plus, it looks stunning in a jar, making it perfect for meal prep. Prepare a few jars at the start of the week, and you’ll have a quick, nutritious option ready to go.
Here’s how to whip up this delightful parfait:
Recipe Overview:
– Servings: 2
– Prep Time: 5 minutes
– Cook Time: 0 minutes
– Total Time: 5 minutes
– Calories: 200 per serving
Nutrition Information:
– Protein: 15g
– Dietary Fiber: 4g
– Total Fat: 5g
– Carbohydrates: 25g
Ingredients:
– 2 cups Greek yogurt
– 1 cup mixed berries (blueberries, strawberries, raspberries)
– 1 cup granola
– Honey or maple syrup for drizzling
Step-by-Step Instructions:
1. In a jar or glass, start with a layer of Greek yogurt.
2. Add a handful of mixed berries on top.
3. Sprinkle a layer of granola over the berries.
4. Repeat the layers until you fill the jar.
5. Drizzle with honey or syrup if you’d like a touch of sweetness.
6. Cover and store in the fridge for up to 3 days.
Tips:
– Use low-sugar granola for a healthier option.
– Experiment with different fruits and nuts for variety.
Frequently Asked Questions:
– Can I use dairy-free yogurt? Yes! Feel free to swap with your favorite plant-based yogurt.
– Can I prep these in advance? Absolutely! Just keep the granola separate until you’re ready to enjoy.
This Greek Yogurt Parfait is not only easy to make but also a fantastic way to enjoy clean eating on a budget. Give it a try, and brighten your mornings!
Greek Yogurt Parfait
Editor’s Choice

50 Pack (100-Piece) 32 oz Meal Prep Containers Reusable with Lids 3-Comp…
 Amazon$21.99

Hunnibi 8oz No Drip Glass Honey Dispenser with Plastic Top – Honeycomb-S…
 Amazon$18.99
7. Baked Sweet Potatoes with Black Beans
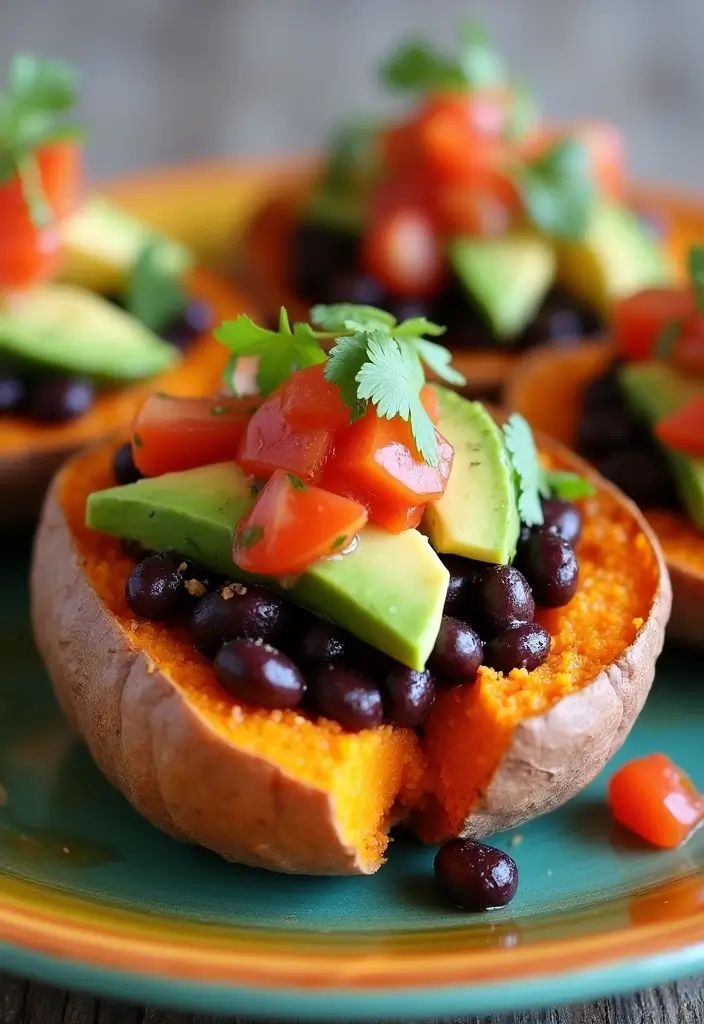
Baked Sweet Potatoes with Black Beans is a delicious and nutritious meal that’s easy to prepare. If you’re looking for a filling dish that fits your budget, this recipe is perfect. Sweet potatoes are rich in vitamins and fiber, while black beans pack in protein, making this a balanced meal you can enjoy at lunch or dinner.
This recipe is straightforward. You simply bake the sweet potatoes until they’re soft, then fill them with a tasty black bean mixture. Top it off with your favorite extras, like creamy avocado or zesty salsa, for a burst of flavor. You can make several servings at once, so you’ll have easy meals ready for the week.
Recipe Overview:
– Servings: 4
– Prep Time: 10 minutes
– Cook Time: 45 minutes
– Total Time: 55 minutes
– Calories: 300 per serving
Nutrition Information:
– Protein: 10g
– Dietary Fiber: 12g
– Total Fat: 7g
– Carbohydrates: 50g
Ingredients List:
– 4 medium sweet potatoes
– 1 can black beans, rinsed
– 1 teaspoon cumin
– 1 teaspoon chili powder
– Salt and pepper to taste
– Avocado and salsa for topping
Step-by-Step Instructions:
1. Preheat your oven to 425°F (220°C).
2. Use a fork to poke holes in each sweet potato, then place them on a baking sheet.
3. Bake for about 45 minutes, or until they feel soft when you squeeze them.
4. While they bake, mix the black beans with cumin, chili powder, salt, and pepper in a bowl.
5. Once the sweet potatoes are done, slice them open and fill them with the seasoned black bean mix.
6. Top with avocado and salsa for added flavor.
Bonus Tips:
– Add cheese for an extra layer of taste (optional).
– Store leftovers in the fridge for 4-5 days for a quick reheat.
Frequently Asked Questions:
– Can I use regular potatoes instead? Yes, but adjust the cooking time as needed.
– What other toppings are good? Try Greek yogurt and fresh cilantro for a fresh twist!
This dish is not only easy on your wallet, but it also brings warmth and comfort to your meals. Enjoy the wholesome goodness of baked sweet potatoes stuffed with hearty black beans today!
Baked Sweet Potatoes with Black Beans
Editor’s Choice

Rubbermaid Brilliance Food Storage Containers BPA Free Airtight Lids Ide…
 Amazon$34.99
SupMaKin Safe Mandoline Slicer for Kitchen, Potato Slicer for Chips, Veg…
 Amazon$26.99
8. Peanut Butter Banana Smoothie
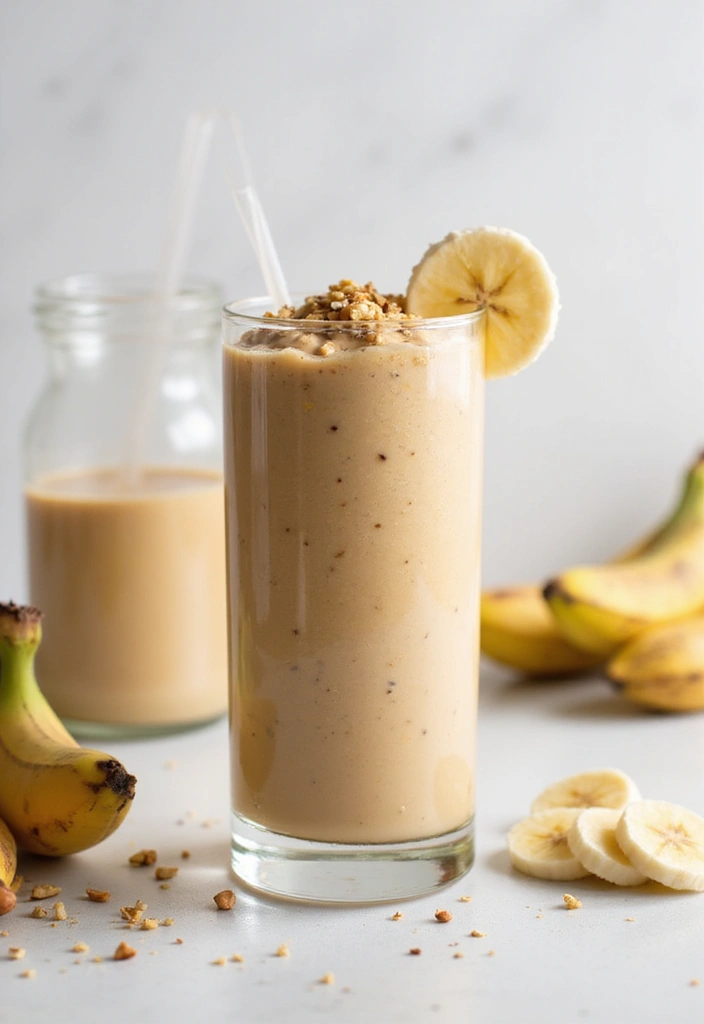
Start your day on a delicious note with a Peanut Butter Banana Smoothie! This creamy blend is perfect for busy mornings when you need a quick, nutritious boost. The natural sweetness of ripe bananas pairs beautifully with rich peanut butter, giving you lasting energy and satisfaction. Simply toss your ingredients into a blender, and you’re ready to enjoy a wholesome meal that’s easy to take on the go.
Here’s a quick look at the recipe details:
– Servings: 1
– Prep Time: 5 minutes
– Cook Time: 0 minutes
– Total Time: 5 minutes
– Calories: Approximately 300 per serving
Nutrition Information:
– Protein: 12g
– Dietary Fiber: 4g
– Total Fat: 10g
– Carbohydrates: 40g
Ingredients:
– 1 ripe banana
– 2 tablespoons peanut butter
– 1 cup milk (or almond milk)
– 1 tablespoon honey (optional)
– Ice cubes (optional)
Step-by-Step Instructions:
1. In a blender, combine the banana, peanut butter, milk, and honey.
2. If you like it cold, add a few ice cubes.
3. Blend until smooth and creamy.
4. Pour into a glass and enjoy right away!
For extra sweetness, remember to use ripe bananas. If you want an extra nutrition boost, toss in a handful of spinach—trust me, you won’t taste it!
Frequently Asked Questions:
– Can I substitute the peanut butter? Yes, almond or cashew butter works great too!
– Can I prepare this in advance? It’s best fresh, but you can prep the ingredients ahead of time for quick blending in the morning.
This smoothie is not just a treat; it’s a nutritious way to fuel your day. Perfect for busy schedules, it keeps you full and energized. So grab your blender, and whip up this tasty drink whenever you need a quick meal!
Peanut Butter Banana Smoothie
Editor’s Choice

Ninja BL660 Professional Compact Smoothie & Food Processing Blender, 110…
 Amazon$99.99
DWTS DANWEITESI Glass Cups with Lids and Straws,24 oz Smoothie Cup with …
 Amazon$24.99
9. Zucchini Noodles with Marinara Sauce
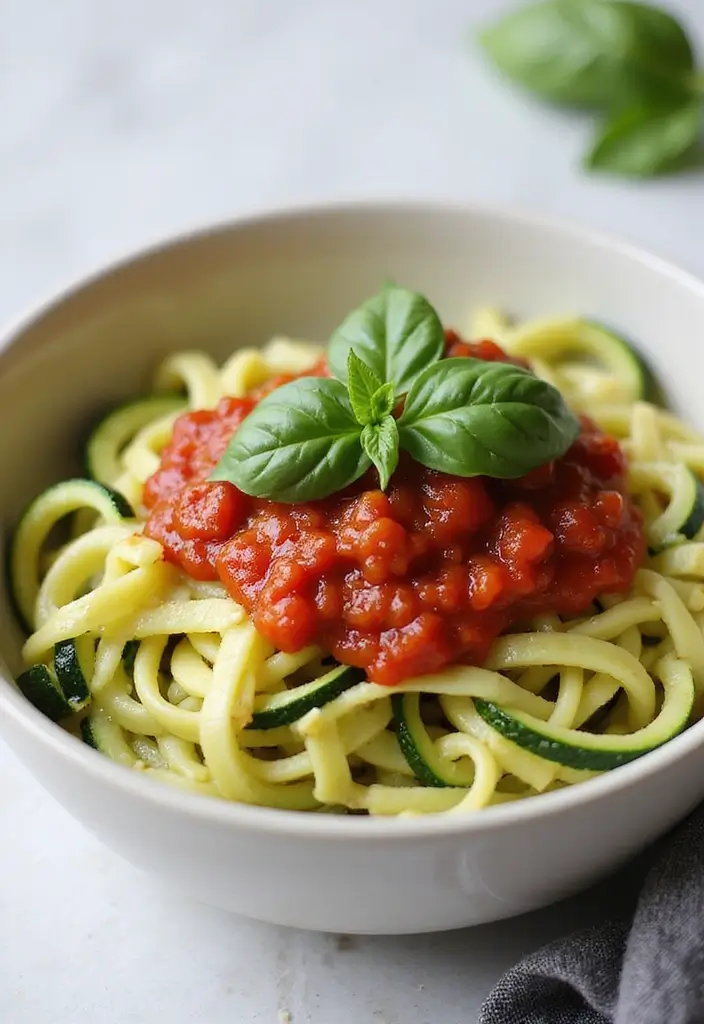
Ditch the heavy pasta and try Zucchini Noodles with Marinara Sauce instead! This dish is a fantastic way to enjoy a lighter meal while still savoring all the flavors you love. Zucchini noodles are low in calories but high in nutrients, making them a smart choice for anyone looking to eat healthier without breaking the bank.
Making zucchini noodles is easy and fun. Simply use a spiralizer to turn fresh zucchinis into long, noodle-like strands. This not only makes your meal vibrant but also adds a playful twist to your dinner table. Top your noodles with homemade marinara sauce and finish with a sprinkle of fresh basil to elevate the dish. It’s a budget-friendly meal that’s both satisfying and delicious!
Recipe Overview:
– Servings: 2
– Prep Time: 10 minutes
– Cook Time: 10 minutes
– Total Time: 20 minutes
– Calories: 200 per serving
Nutrition Information:
– Protein: 6g
– Dietary Fiber: 3g
– Total Fat: 5g
– Carbohydrates: 30g
Ingredients List:
– 2 medium zucchinis
– 1 cup marinara sauce
– 2 tablespoons olive oil
– 1 teaspoon garlic powder
– Salt and pepper to taste
Step-by-Step Instructions:
1. Spiralize the zucchinis into noodle shapes.
2. Heat olive oil in a skillet over medium heat.
3. Add the zucchini noodles, garlic powder, salt, and pepper.
4. Sauté for 3-5 minutes until the noodles are tender.
5. Pour in the marinara sauce and cook for an additional 2 minutes.
6. Serve hot, garnished with fresh basil.
Want to make your meal heartier? Add protein like grilled chicken or turkey. You can also top with grated cheese for an extra flavor kick.
Frequently Asked Questions:
– Can I use store-bought noodles instead? Sure! But zucchini noodles give a lighter option.
– How long do leftovers last? They’re best fresh but can be stored in the fridge for up to 2 days.
Enjoy your healthy twist on a classic dish! You’ll love how satisfying it is while being easy on your wallet.
Zucchini Noodles with Marinara Sauce
Editor’s Choice

Brieftons 5-Blade Vegetable Spiralizer: Strongest-Heaviest Spiral Slicer…
 Amazon$31.99
Pompeian Robust Extra Virgin Olive Oil, Contains Polyphenols, First Cold…
 Amazon$15.64
365 by Whole Foods Market, Organic Marinara Pasta Sauce, 25 Ounce
 Amazon$3.69
10. Cauliflower Fried Rice
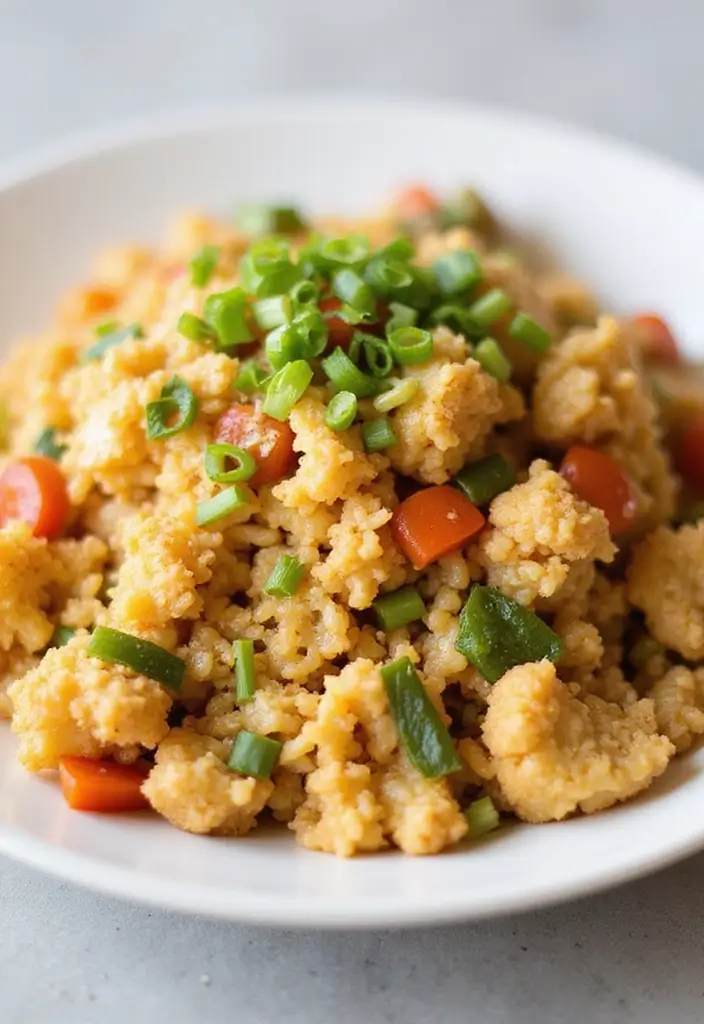
Craving a quick and healthy meal that won’t wreck your budget? Look no further than this Cauliflower Fried Rice. It’s a delicious, low-carb spin on the classic dish, bursting with flavor and nutrients. Perfect for busy weeknights, this recipe is not only fast but also incredibly satisfying.
By swapping regular rice for riced cauliflower, you cut calories while still enjoying that delightful fried rice texture. Toss in your favorite colorful veggies and some eggs, and you’ve got a wholesome meal ready in just 30 minutes. It’s a simple way to eat clean without sacrificing taste!
Recipe Overview:
– Servings: 4
– Prep Time: 10 minutes
– Cook Time: 15 minutes
– Total Time: 25 minutes
– Calories: 150 per serving
Nutrition Information:
– Protein: 6g
– Dietary Fiber: 5g
– Total Fat: 7g
– Carbohydrates: 20g
Ingredients:
– 1 small head of cauliflower, riced
– 1 cup mixed vegetables (peas, carrots, corn)
– 2 eggs, beaten
– 2 tablespoons soy sauce
– 1 tablespoon sesame oil
– 2 green onions, sliced
Instructions:
1. Heat sesame oil in a large skillet over medium heat.
2. Add the riced cauliflower and mixed vegetables. Sauté for about 5-7 minutes until tender.
3. Push the cauliflower mixture to one side and pour the beaten eggs on the other side. Scramble until fully cooked.
4. Stir everything together, then add soy sauce and mix well.
5. Garnish with sliced green onions before serving.
Want to make it even easier? Use leftover veggies you have on hand. And if you like a bit of heat, add a splash of sriracha while cooking for a spicy twist.
Frequently Asked Questions:
– Can I freeze the leftovers? Yes, they freeze well for up to a month!
– How can I boost the protein? Try adding tofu, shrimp, or even chicken for a heartier meal.
This Cauliflower Fried Rice is not only budget-friendly but also a fantastic way to enjoy a nutritious meal without the hassle. You’ll love how quick and delicious it is, making it a staple in your meal prep routine!
Cauliflower Fried Rice
Editor’s Choice

Fullgreen Riced Cauliflower With Carrots & Peas, No Preservatives, 6.7 O…
 AmazonCheck Price
Large Capacity Bento Box for Adults, 4-Piece Set – Stackable Lunch Box w…
 AmazonEUR 8.64
La Tourangelle, Toasted Sesame Oil, Great for Cooking, Add to Noodles, S…
 Amazon$9.97
11. Chickpea Salad Sandwich
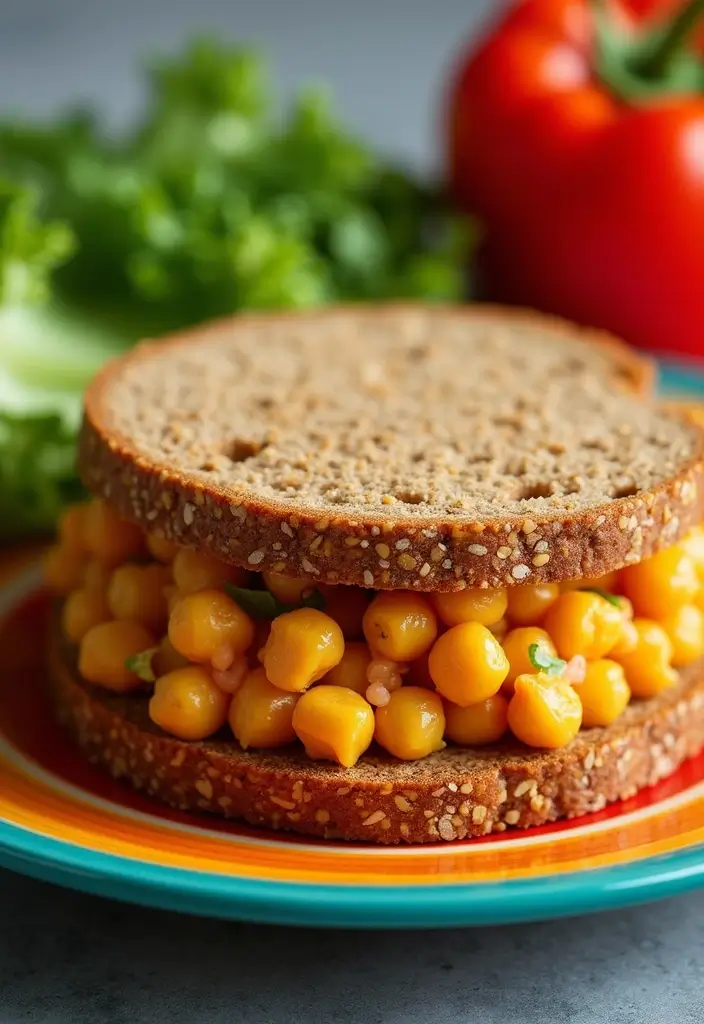
Craving a tasty meal that’s healthy and budget-friendly? Look no further than the Chickpea Salad Sandwich! This recipe gives you a delightful twist on the classic tuna sandwich, packing in protein without breaking the bank. You can whip this up in just 10 minutes, making it a perfect choice for a quick lunch on busy days.
Imagine creamy chickpeas mixed with crunchy celery and zesty onions, all dressed in a tangy sauce. Spread it on whole grain bread or wrap it up for a nutrient-rich meal that keeps you full and satisfied. Plus, it’s easy to customize with your favorite herbs or veggies!
Recipe Overview:
– Servings: 4
– Prep Time: 10 minutes
– Cook Time: 0 minutes
– Total Time: 10 minutes
– Calories: 250 per serving
Nutrition Facts:
– Protein: 10g
– Dietary Fiber: 8g
– Total Fat: 7g
– Carbohydrates: 35g
Ingredients:
– 1 can chickpeas, drained
– 1/4 cup mayo or yogurt
– 1 celery stalk, diced
– 1/4 onion, diced
– Salt and pepper to taste
– Whole grain bread or wraps
Instructions:
1. In a bowl, mash the chickpeas until they are slightly chunky.
2. Stir in the mayo, diced celery, onion, salt, and pepper until mixed well.
3. Spread the mixture on whole grain bread or wrap it up.
4. Store any leftovers in the fridge for up to 4 days.
Want to elevate the flavor? Add fresh herbs like parsley or dill! Pair your sandwich with fresh veggies on the side for a balanced and complete lunch.
Frequently Asked Questions:
– How long does it last? It stays fresh for 3-4 days in the fridge.
– Can I make it vegan? Absolutely! Just swap in vegan mayo or yogurt.
Now, you’re all set to enjoy a delicious Chickpea Salad Sandwich. It’s healthy, simple, and perfect for your meal prep!
Chickpea Salad Sandwich
Editor’s Choice

Bento Box Adult Lunch Box, Containers for Adults Men Women with 4 Compar…
 Amazon$9.99
365 by Whole Foods Market, Unsalted Garbanzo Beans, 15.5 Ounce (Pack of 4)
 AmazonCheck Price
12. Egg Muffins

Start your day on a delicious note with homemade Egg Muffins! These protein-packed bites are loaded with nutritious veggies, making them a perfect grab-and-go breakfast. Meal prepping these muffins means you’ll have a healthy breakfast option ready for busy mornings.
To whip up a batch, simply mix eggs with your choice of veggies and cheese. Pour the mixture into muffin tins, bake until fluffy, and voilà! You have a week’s worth of breakfast delights. What’s great is how customizable they are. You can easily swap ingredients based on what you have on hand or your taste preferences.
Here’s a quick recipe overview:
– Servings: 6
– Prep Time: 10 minutes
– Cook Time: 20 minutes
– Total Time: 30 minutes
– Calories: 100 per muffin
Nutrition Information:
– Protein: 8g
– Dietary Fiber: 2g
– Total Fat: 6g
– Carbohydrates: 2g
Ingredients:
– 6 eggs
– 1/2 cup diced bell peppers
– 1/2 cup chopped spinach
– 1/2 cup shredded cheese
– Salt and pepper to taste
Instructions:
1. Preheat your oven to 350°F (175°C).
2. In a bowl, whisk the eggs. Add the veggies, cheese, salt, and pepper.
3. Grease a muffin tin, then pour in the egg mixture, filling each cup about three-quarters full.
4. Bake for 20 minutes or until the eggs are set.
5. Let them cool, then store in the fridge.
To enjoy, simply reheat in the microwave for 30 seconds. Want to kick it up a notch? Add cooked sausage or bacon for extra flavor!
Frequently Asked Questions:
– How long do they last? These muffins stay fresh in the fridge for up to a week.
– Can I freeze them? Yes! Freeze for up to two months and enjoy them later.
Egg Muffins are not just tasty; they’re a smart choice for budgeting your meals while keeping your diet clean and healthy. Enjoy your meal prep journey!
Egg Muffins
Editor’s Choice

2Pack Silicone Muffin Pan for Baking with Metal Reinforced Frame, 12 Cup…
 Amazon$19.99
Bento Box Adult Lunch Box, Containers for Adults Men Women with 4 Compar…
 Amazon$9.99
Stainless Steel Egg Whisk, Hand Push Rotary Whisk Blender, Versatile Mil…
 Amazon$7.15
13. Tomato Basil Soup
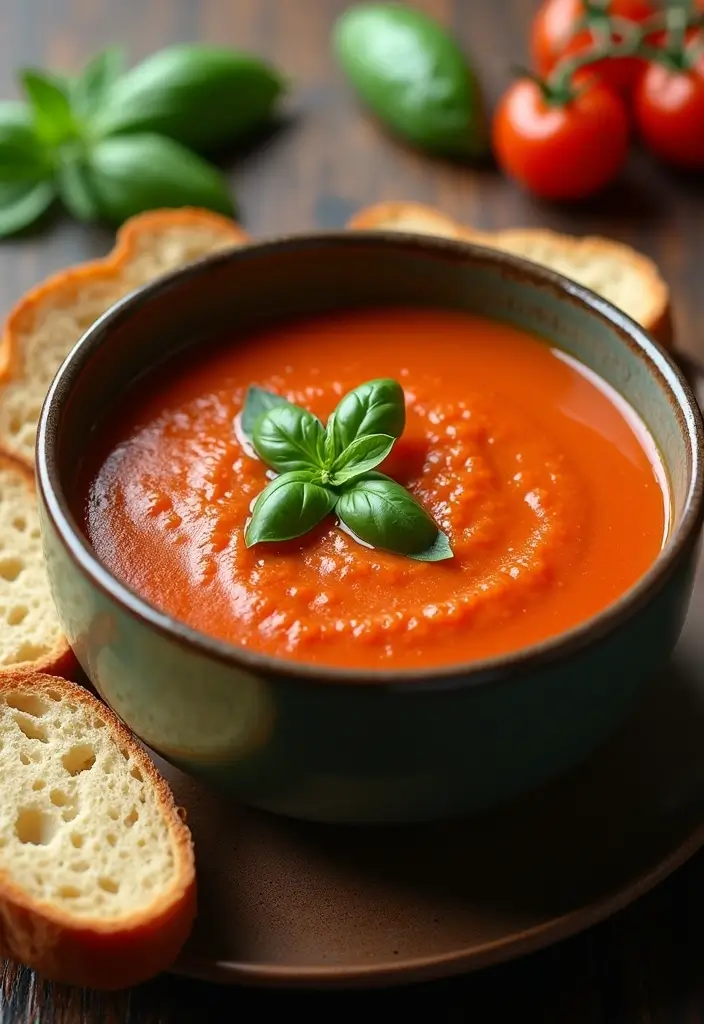
Warm up with a bowl of Tomato Basil Soup, a classic that’s both heartwarming and easy on your wallet. This soup bursts with the fresh flavors of ripe tomatoes and fragrant basil, making it a nutritious choice packed with vitamins and antioxidants. It’s perfect for a light lunch or a cozy dinner at home. Picture dipping a crunchy piece of whole-grain bread or a gooey grilled cheese sandwich into this delicious soup. It’s a simple dish you can whip up in no time and make in large batches, making it a meal prep superstar!
Here’s how to make it:
Recipe Overview:
– Servings: 4
– Prep Time: 10 minutes
– Cook Time: 30 minutes
– Total Time: 40 minutes
– Calories: 180 per serving
Nutrition Information:
– Protein: 5g
– Dietary Fiber: 4g
– Total Fat: 6g
– Carbohydrates: 30g
Ingredients List:
– 2 cans diced tomatoes
– 1 onion, diced
– 2 cloves garlic, minced
– 1 cup vegetable broth
– 1/4 cup fresh basil leaves
– Olive oil, salt, and pepper to taste
Step-by-Step Instructions:
1. Heat a splash of olive oil in a pot over medium heat. Sauté the diced onion and minced garlic until they are soft and fragrant.
2. Pour in the diced tomatoes and vegetable broth. Season with salt and pepper. Bring the mixture to a boil, then reduce the heat and let it simmer for 20 minutes.
3. Stir in the fresh basil, then blend the soup until it reaches a smooth consistency. You can use an immersion blender or a regular blender for this.
4. Serve the soup hot, garnished with extra basil leaves if you like.
Tips:
– Use fresh tomatoes when they’re in season for an even bolder flavor.
– Pair it with a grilled cheese sandwich or some crispy toast for a filling meal.
Frequently Asked Questions:
– How long does this last in the fridge? It stays fresh for about 4-5 days.
– Can I freeze it? Yes! This soup freezes well for up to 3 months.
This Tomato Basil Soup is simple, budget-friendly, and a delightful way to enjoy clean eating. Enjoy every comforting spoonful!
Tomato Basil Soup
Editor’s Choice

KitchenAid Variable Speed Corded Hand Blender KHBV53, Contour Silver
 AmazonCheck Price
Rubbermaid Brilliance Food Storage Containers BPA Free Airtight Lids Ide…
 Amazon$34.99
Pompeian USDA Organic Smooth Extra Virgin Olive Oil, Contains Polyphenol…
 Amazon$24.48
14. Stuffed Bell Peppers
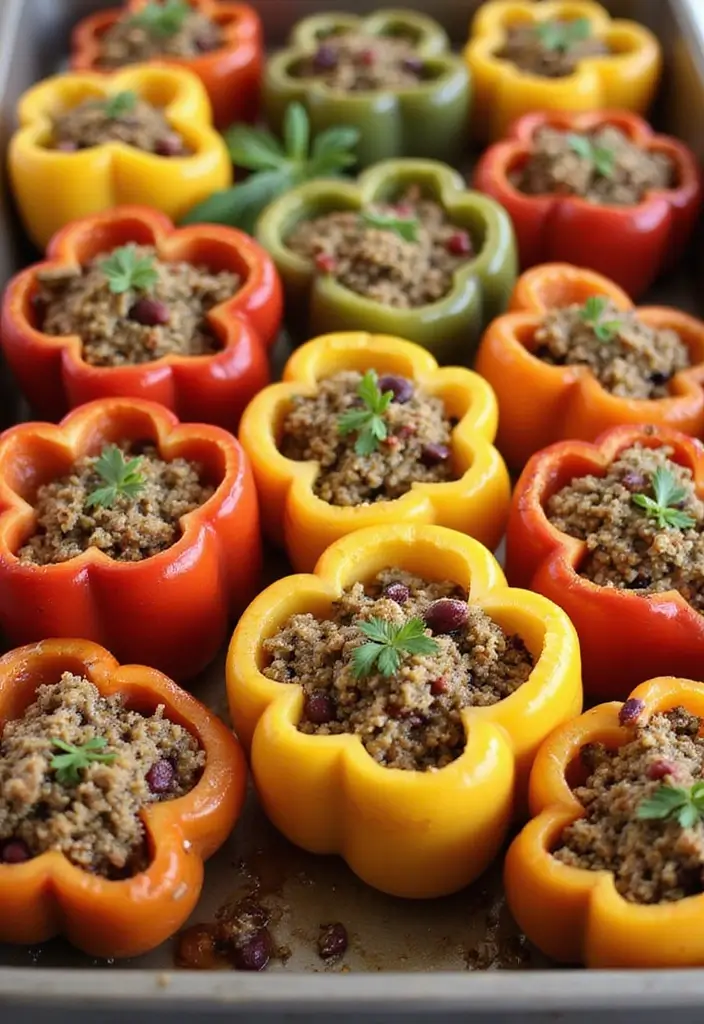
Stuffed Bell Peppers are not just a treat for the taste buds; they bring a colorful flair to your meal prep! Bursting with flavor and nutrition, these peppers can be tailored to fit your cravings perfectly. Imagine vibrant bell peppers filled with a hearty blend of quinoa, beans, and spices, all packed into one delightful dish.
These stuffed delights are not only satisfying; they’re also excellent for portion control, making them a fantastic option for those busy weekdays. You can whip up a batch in under an hour, and they store well for quick meals throughout the week.
Here’s a quick recipe overview:
– Servings: 4
– Prep Time: 15 minutes
– Cook Time: 30 minutes
– Total Time: 45 minutes
– Calories: 250 per serving
Nutrition Information:
– Protein: 9g
– Dietary Fiber: 6g
– Total Fat: 5g
– Carbohydrates: 40g
Ingredients List:
– 4 bell peppers, tops cut off and seeded
– 1 cup cooked quinoa
– 1 can black beans, rinsed
– 1 teaspoon cumin
– 1 teaspoon chili powder
– Salt and pepper to taste
– Cheese for topping (optional)
Step-by-Step Instructions:
1. Preheat your oven to 375°F (190°C).
2. In a large bowl, combine the quinoa, black beans, cumin, chili powder, salt, and pepper.
3. Stuff each bell pepper with the mixture, standing them upright in a baking dish.
4. If you like, sprinkle cheese on top for an extra layer of flavor.
5. Bake in the oven for about 30 minutes, or until the peppers are tender.
6. Serve warm and savor each bite!
Feel free to get creative! You can add diced tomatoes or corn to the filling for a burst of flavor. Plus, these stuffed peppers freeze well, making them a great option for meal prep days.
Frequently Asked Questions:
– Can I use ground turkey instead of quinoa? Absolutely! Just cook the turkey before stuffing it into the peppers.
– How long do they last in the fridge? They stay fresh for about 4-5 days, perfect for a week’s worth of meals!
Enjoy your healthy, budget-friendly stuffed bell peppers that are sure to become a favorite in your meal prep rotation!
Stuffed Bell Peppers
Editor’s Choice

50 Pack (100-Piece) 32 oz Meal Prep Containers Reusable with Lids 3-Comp…
 Amazon$21.99
BetterBody Foods Organic Quinoa, Vegan, Gluten Free, Low Glycemic Rice R…
 Amazon$11.49
15. Broccoli and Cheese Casserole
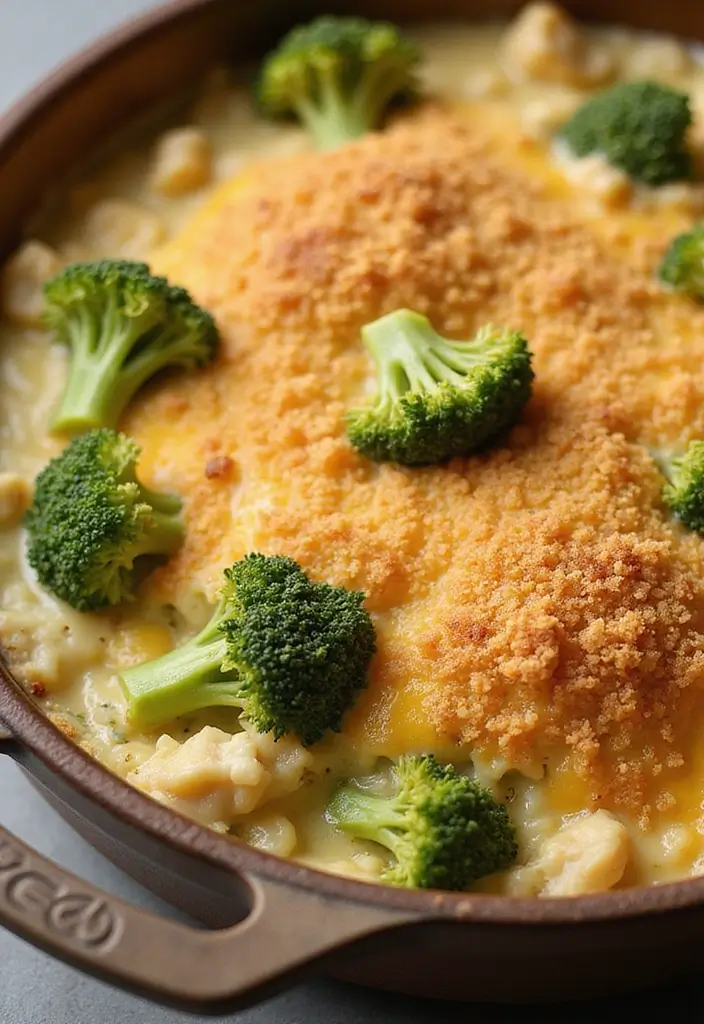
Craving comfort food that won’t break the bank? Look no further than this delightful Broccoli and Cheese Casserole. It’s creamy, cheesy, and packed with nutritious broccoli, making it a fantastic way to enjoy veggies while indulging in something delicious. Perfect for family dinners, this dish is sure to be a crowd-pleaser.
Imagine tender broccoli smothered in a rich cheese sauce, all topped with a crispy breadcrumb layer. The combination of textures creates a satisfying experience for your taste buds. Plus, this casserole is a meal prep superstar. You can make it ahead of time, store it in the fridge, and enjoy it throughout the week.
Here’s how to whip up this tasty casserole:
Recipe Overview:
– Servings: 4
– Prep Time: 15 minutes
– Cook Time: 30 minutes
– Total Time: 45 minutes
– Calories: 350 per serving
Nutrition Information:
– Protein: 15g
– Dietary Fiber: 5g
– Total Fat: 18g
– Carbohydrates: 35g
Ingredients:
– 4 cups broccoli florets
– 2 cups cheese (cheddar or your favorite)
– 1 cup milk
– 1 cup breadcrumbs
– 2 tablespoons butter
– Salt and pepper to taste
Instructions:
1. Preheat your oven to 350°F (175°C).
2. Steam the broccoli until it’s tender but still bright green.
3. In a bowl, mix the cheese, milk, salt, and pepper until smooth.
4. Combine the steamed broccoli with the cheese mixture and transfer it to a baking dish.
5. Sprinkle breadcrumbs on top and dot with butter.
6. Bake for 30 minutes or until the top is bubbly and golden brown.
Want to boost the protein? Add cooked chicken or quinoa to the mix. If fresh broccoli isn’t available, feel free to use frozen—it works just as well.
Frequently Asked Questions:
– How long can I store it? It lasts in the fridge for 4-5 days.
– Can I freeze this casserole? Yes, it freezes beautifully, making future meals easy.
This casserole isn’t just a meal; it’s a way to enjoy comfort without the guilt. It’s simple to make, affordable, and a great way to nourish yourself and your family. Get ready to enjoy a dish that’s as wholesome as it is tasty!
Broccoli and Cheese Casserole
Editor’s Choice

DOWAN Casserole Dish, 9×13 Ceramic Baking Dish, Large Lasagna Pan Deep f…
 Amazon$29.99
16. Savory Oatmeal with Eggs and Greens
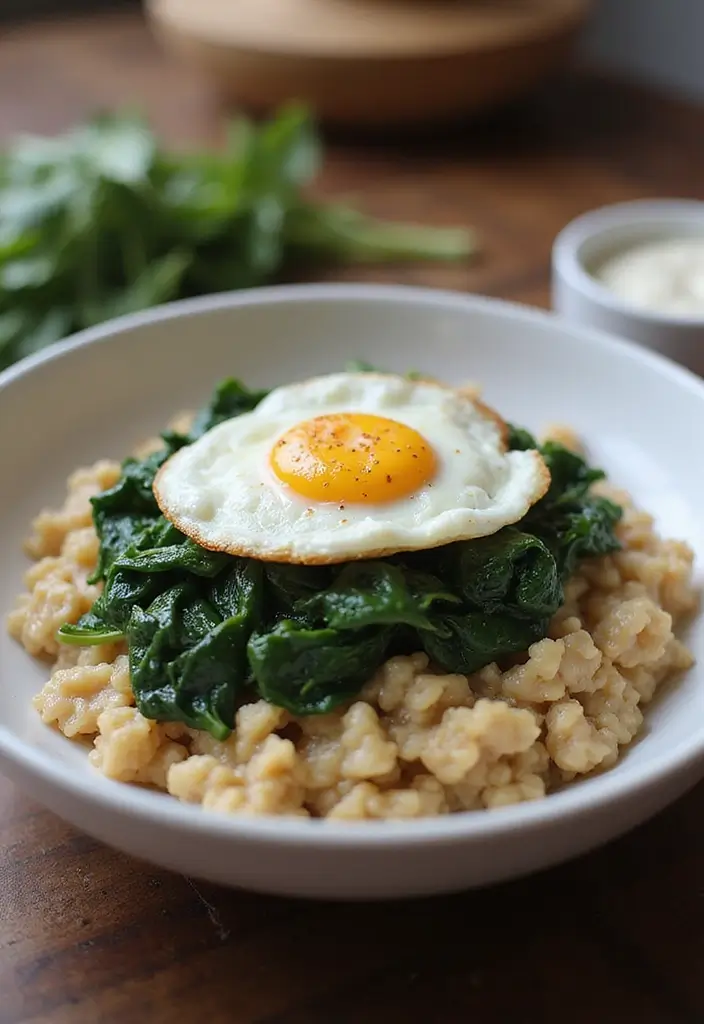
Start your day right with a delicious bowl of Savory Oatmeal with Eggs and Greens. This dish is not only hearty but also packed with nutrients, making it a perfect choice for breakfast or lunch. The fiber-rich oats serve as a filling base, while the eggs and greens boost your protein and vitamin intake.
For a flavor upgrade, cook your oats in vegetable broth instead of plain water. This simple swap adds a savory, umami flavor that elevates your meal. After cooking, top your oats with sautéed spinach and a perfectly poached or fried egg. It’s a satisfying and healthy option that’s quick to whip up!
Recipe Overview:
– Servings: 2
– Prep Time: 5 minutes
– Cook Time: 10 minutes
– Total Time: 15 minutes
– Calories: 300 per serving
Nutrition Information:
– Protein: 12g
– Dietary Fiber: 6g
– Total Fat: 10g
– Carbohydrates: 40g
Ingredients List:
– 1 cup rolled oats
– 2 cups vegetable broth
– 2 eggs
– 2 cups spinach
– Olive oil, salt, and pepper to taste
Step-by-Step Instructions:
1. In a pot, bring vegetable broth to a boil.
2. Stir in rolled oats and cook for about 5 minutes until they are creamy.
3. Meanwhile, heat a skillet and sauté spinach in olive oil until it wilts.
4. Cook the eggs to your liking. You can fry or poach them based on your preference.
5. Divide the creamy oats into bowls, and top each with sautéed spinach and an egg.
For an extra touch, consider adding avocado for creaminess and richness. You can also toss in leftover roasted vegetables to make your oatmeal even more filling and flavorful.
Frequently Asked Questions:
– Can I make this vegan? Yes! Skip the egg and sprinkle in some nutritional yeast for a cheesy flavor.
– Can I use water instead of broth? Sure, but your oatmeal will have a milder taste.
This savory oatmeal is perfect for those busy mornings or a quick lunch. Enjoy the health benefits while savoring every bite!
Savory Oatmeal with Eggs and Greens
Editor’s Choice

Pacific Foods Organic Low Sodium Vegetable Broth, 32 oz (Pack of 5)
 AmazonCheck Price
Tramontina Professional 14-Inch Non Stick Extra Large Frying Pan, Heavy-…
 Amazon$44.84
17. Whole Wheat Pasta with Spinach Pesto
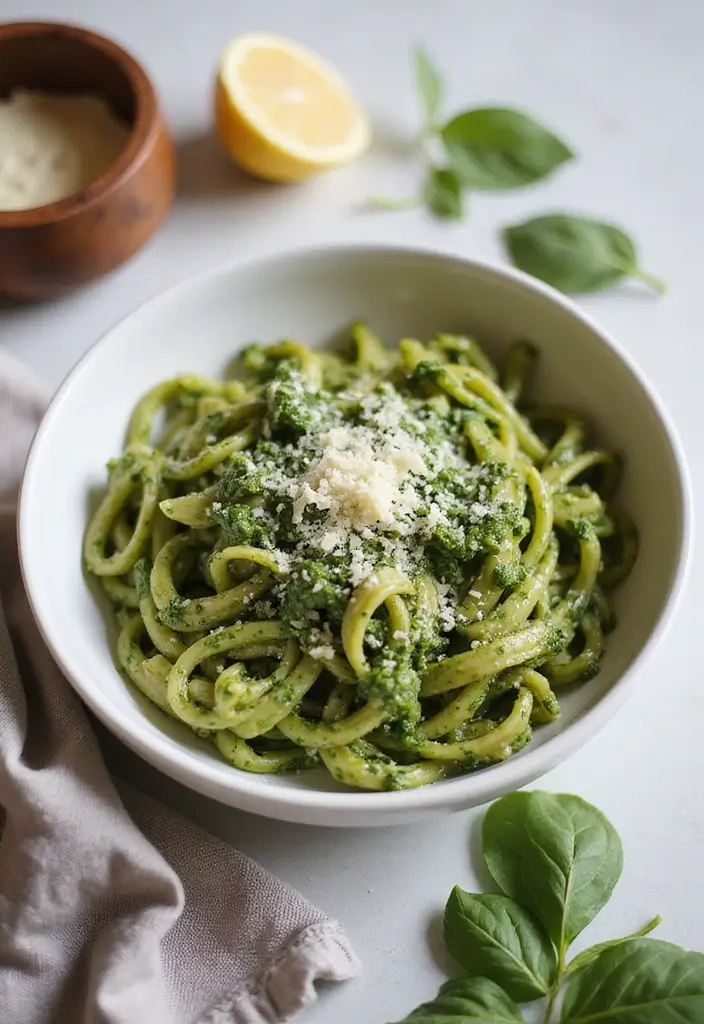
Whole Wheat Pasta with Spinach Pesto is not just a meal; it’s a delicious way to eat clean without breaking the bank. Imagine twirling nutty whole wheat pasta around your fork, coated in a bright and zesty spinach pesto. It’s a feast for your taste buds and a boost of nutrients. Perfect for lunch or dinner, this dish is simple and quick, ready in just 30 minutes!
Making your own spinach pesto is a breeze. You only need a blender and a handful of fresh ingredients. Toss in some spinach, garlic, nuts, and olive oil, and you have a vibrant sauce that packs a punch. Plus, this recipe is budget-friendly, making it a smart choice for meal prep.
Here’s what you need to whip up this delightful dish:
Ingredients:
– 8 oz whole wheat pasta
– 2 cups fresh spinach
– 1/4 cup nuts (pine nuts or walnuts)
– 1/4 cup parmesan cheese
– 2 garlic cloves
– 1/2 cup olive oil
– Salt and pepper to taste
Instructions:
1. Cook the whole wheat pasta according to the package directions until al dente.
2. In your blender, combine spinach, nuts, parmesan, garlic, and olive oil.
3. Blend until you achieve a smooth consistency, adding salt and pepper to taste.
4. Drain the pasta and toss it with the spinach pesto until well coated.
5. Serve warm, and sprinkle extra cheese on top if you like!
Want to add more protein? Add grilled chicken or shrimp for a heartier meal. You can also use leftover pesto as a tasty spread on sandwiches or as a dip for veggies.
Have questions? Let’s answer a few common ones!
– Can I make the pesto in advance? Yes, it keeps well in the fridge for up to a week.
– Can I use other greens for the pesto? Absolutely! Try kale or arugula for a different flavor.
Enjoy this simple and healthy recipe that makes clean eating easy and enjoyable! It’s perfect for busy days when you want something tasty and nutritious.
Whole Wheat Pasta with Spinach Pesto
Editor’s Choice

Ninja BL660 Professional Compact Smoothie & Food Processing Blender, 110…
 Amazon$99.99
365 by Whole Foods Market, Organic Whole Wheat Penne Rigate, 16 Ounce (P…
 AmazonCheck Price
18. Garlic Roasted Potatoes
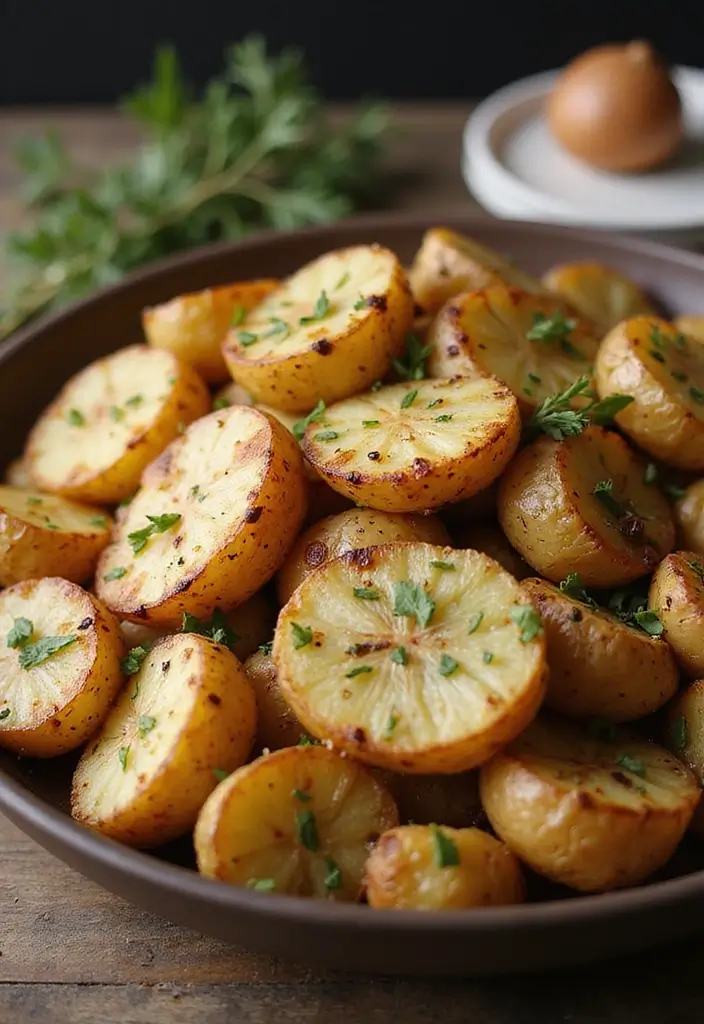
Garlic Roasted Potatoes are the ultimate side dish for anyone who loves easy, flavorful cooking. With a crispy exterior and a tender inside, these potatoes elevate any meal prep. Imagine the mouthwatering aroma of garlic mingling with herbs filling your kitchen, making you feel like a culinary star. They work beautifully alongside grilled chicken or fish, but you can enjoy them solo too!
Ready to whip these up? You’ll need just a few simple ingredients and about 40 minutes. Here’s a complete guide to making Garlic Roasted Potatoes that will impress your taste buds without draining your wallet.
Recipe Overview:
– Servings: 4
– Prep Time: 10 minutes
– Cook Time: 30 minutes
– Total Time: 40 minutes
– Calories: 200 per serving
Nutrition Information:
– Protein: 4g
– Dietary Fiber: 3g
– Total Fat: 10g
– Carbohydrates: 30g
Ingredients List:
– 2 lbs baby potatoes, halved
– 4 cloves garlic, minced
– 2 tablespoons olive oil
– 1 teaspoon rosemary
– Salt and pepper to taste
Step-by-Step Instructions:
1. Preheat your oven to 400°F (200°C).
2. In a large bowl, combine the halved potatoes, olive oil, minced garlic, rosemary, salt, and pepper. Toss until well coated.
3. Spread the potatoes in a single layer on a baking sheet.
4. Roast for 30 minutes, turning them halfway through, until they are golden brown and crispy.
5. Serve warm as a side dish or snack.
Feel free to explore different herbs like thyme or oregano to switch up the flavors. These roasted potatoes are perfect for meal prep and can last in the fridge for 3-4 days, making them a great budget-friendly option.
Frequently Asked Questions:
– Can I use regular potatoes instead? Yes, just adjust the cooking time as needed.
– What can I pair them with? They taste great with grilled meats, fish, and even salads!
Enjoy your delicious Garlic Roasted Potatoes and the compliments that come with them!
Garlic Roasted Potatoes prove that clean eating can be budget-friendly. With just a handful of ingredients, you get a crispy, flavorful side in about 40 minutes—perfect for healthy meal prep on a budget and simple recipes you’ll actually crave.
Garlic Roasted Potatoes
Editor’s Choice

Kitessensu High Effective Garlic Press With Studs, Heavy Duty Garlic Min…
 Amazon$11.99
19. Curried Lentil Bowls
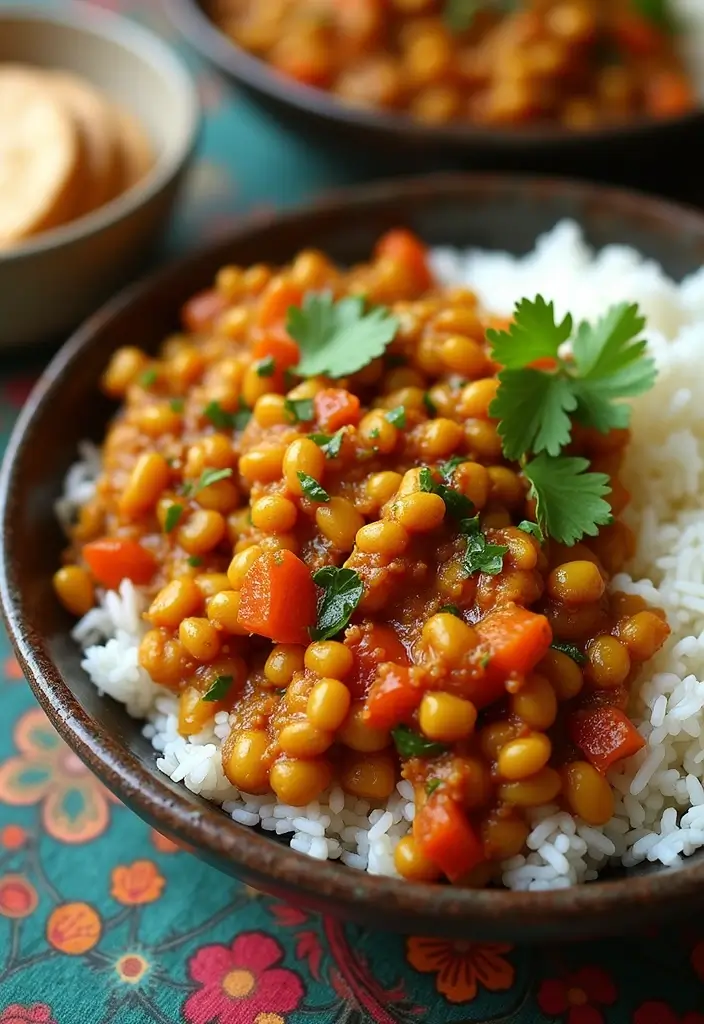
Craving a meal that warms your soul and nourishes your body? Try these delicious Curried Lentil Bowls. They’re easy to whip up and packed with protein and fiber. Lentils are not only affordable but also a versatile base for a hearty dish. With fragrant spices and colorful veggies, this meal will delight your taste buds while keeping your budget in check.
Making this recipe is a breeze, perfect for busy weekdays. You can cook a big batch and enjoy it throughout the week. Serve it over brown rice or quinoa for an extra nutrient boost. Let’s break down how to make this comforting dish!
Recipe Overview:
– Servings: 4
– Prep Time: 10 minutes
– Cook Time: 20 minutes
– Total Time: 30 minutes
– Calories: 350 per serving
Nutrition Information:
– Protein: 15g
– Dietary Fiber: 10g
– Total Fat: 8g
– Carbohydrates: 50g
Ingredients List:
– 1 cup green or brown lentils
– 1 onion, diced
– 2 cloves garlic, minced
– 2 tablespoons curry powder
– 1 can coconut milk
– 2 cups vegetable broth
– 1 cup diced tomatoes
– Salt and pepper to taste
Step-by-Step Instructions:
1. In a pot, sauté the diced onion and minced garlic until they become soft and translucent.
2. Stir in the lentils, curry powder, coconut milk, vegetable broth, and diced tomatoes.
3. Bring the mixture to a boil. Then, reduce the heat and let it simmer for about 20 minutes, or until the lentils are tender.
4. Season with salt and pepper according to your taste, then serve it over a bed of brown rice or quinoa.
5. Store any leftovers in the fridge for quick lunches throughout the week!
Want to add some greens? Toss in fresh spinach or kale during the last few minutes of cooking. For a pop of freshness, garnish your bowls with cilantro or a squeeze of lime juice.
Frequently Asked Questions:
– Can I use red lentils? Yes, but remember they cook faster, so adjust the time accordingly.
– How long do leftovers last? You can enjoy them for about 4-5 days when stored in the fridge.
With these Curried Lentil Bowls, you can enjoy a meal that’s not just satisfying but also healthy and budget-friendly. Give it a try, and enjoy the comfort it brings!
Curried Lentil Bowls
Editor’s Choice

Bentgo Prep – 20-Piece 3-Compartment Reusable Meal Prep Containers with …
 Amazon$14.99
Rani Curry Powder Hot (11-Spice Authentic Indian Blend) 16oz (1lb) 454g …
 Amazon$14.99
20. Spinach and Feta Stuffed Chicken Breast
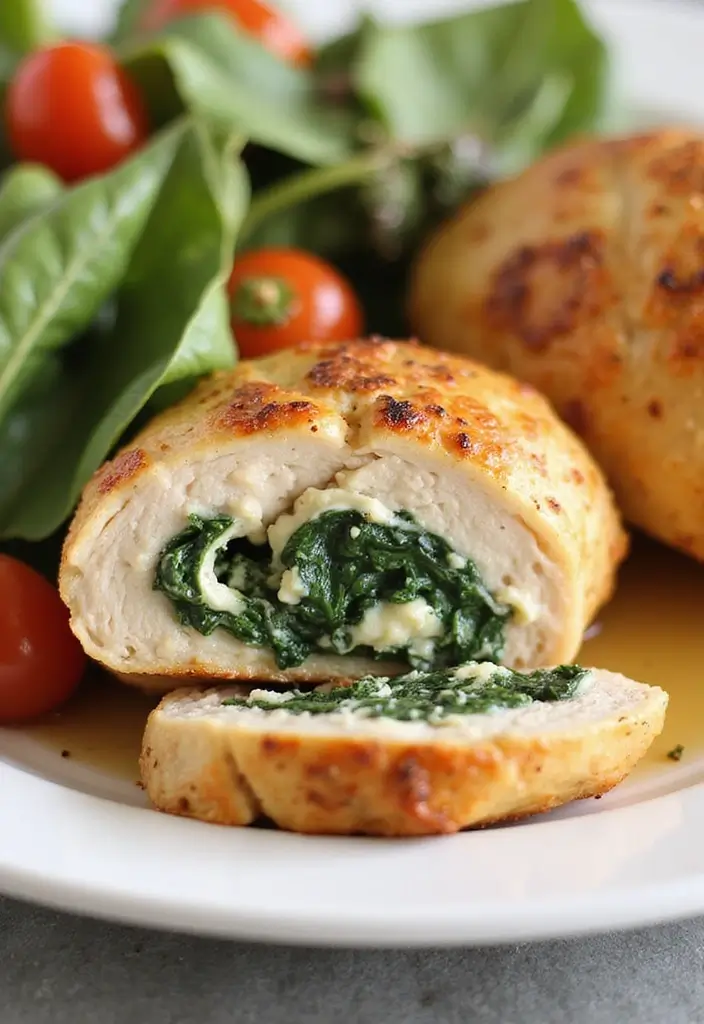
Surprise your dinner guests with the delightful flavors of Spinach and Feta Stuffed Chicken Breast! This dish isn’t just a feast for the eyes; it’s also a powerhouse of nutrition. By stuffing tender chicken breasts with a savory mix of spinach and feta, you create a meal that’s both juicy and satisfying. It’s perfect for a cozy family dinner or as part of your weekly meal prep.
Imagine the aroma of garlic mingling with fresh spinach and creamy feta filling your kitchen. This Mediterranean-inspired dish is easy to make and pairs beautifully with a crisp side salad or roasted vegetables. Your taste buds and your body will thank you!
Recipe Overview:
– Servings: 4
– Prep Time: 15 minutes
– Cook Time: 30 minutes
– Total Time: 45 minutes
– Calories: 320 per serving
Nutrition Information:
– Protein: 28g
– Dietary Fiber: 2g
– Total Fat: 12g
– Carbohydrates: 5g
Ingredients List:
– 4 chicken breasts
– 1 cup spinach, chopped
– 1/2 cup feta cheese
– 2 cloves garlic, minced
– Olive oil, salt, and pepper to taste
Step-by-Step Instructions:
1. Preheat your oven to 375°F (190°C).
2. In a bowl, combine chopped spinach, crumbled feta, minced garlic, salt, and pepper.
3. Carefully cut a pocket in each chicken breast and fill it with the spinach mixture.
4. Heat olive oil in a skillet over medium heat. Sear the chicken on both sides until golden brown.
5. Transfer the chicken to a baking dish and bake for 20-25 minutes or until cooked through.
6. Serve hot and enjoy with your favorite sides!
For an extra flavor kick, feel free to add sun-dried tomatoes into the stuffing. You can also freeze the stuffed chicken breasts before cooking them—just make sure to thaw them overnight in the fridge before baking.
Frequently Asked Questions:
– Can I use other cheeses? Yes! Mozzarella or goat cheese are great alternatives.
– How long does it last in the fridge? Enjoy it fresh for up to 3 days.
This Spinach and Feta Stuffed Chicken Breast recipe is a delicious way to eat healthy on a budget without sacrificing flavor or satisfaction!
Spinach and Feta Stuffed Chicken Breast
Editor’s Choice

Rubbermaid Brilliance Food Storage Containers BPA Free Airtight Lids Ide…
 AmazonGBP 26.25
Kitessensu High Effective Garlic Press With Studs, Heavy Duty Garlic Min…
 Amazon$11.99
21. Black Bean Tacos
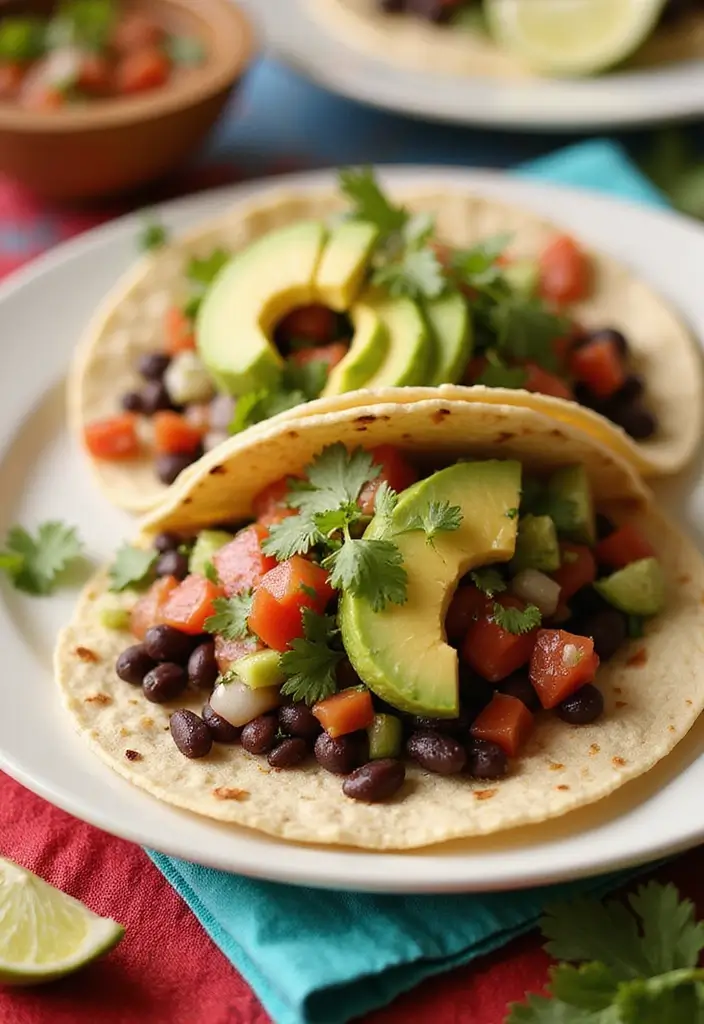
Black Bean Tacos are a delicious and budget-friendly meal you can whip up any night of the week. Packed with protein and fiber, they make for a satisfying lunch or dinner option. Plus, the best part? You can customize them with your favorite toppings for a burst of flavor!
The black beans serve as a hearty base, offering a rich texture that pairs perfectly with fresh ingredients like creamy avocado, zesty salsa, and crunchy lettuce. Assemble your tacos just before serving to keep everything fresh and vibrant. Your family will love this quick, nutritious dish!
Recipe Overview:
– Servings: 4
– Prep Time: 10 minutes
– Cook Time: 10 minutes
– Total Time: 20 minutes
– Calories: 300 per serving
Nutrition Information:
– Protein: 12g
– Dietary Fiber: 10g
– Total Fat: 8g
– Carbohydrates: 45g
Ingredients List:
– 2 cans black beans, drained
– Taco shells or tortillas
– 1 avocado, sliced
– 1 cup shredded lettuce
– 1/2 cup salsa
– Cheese for topping (optional)
Step-by-Step Instructions:
1. Heat black beans in a pot over medium heat until warm.
2. Warm taco shells or tortillas in the oven or microwave.
3. Fill each taco shell with black beans, then top with avocado, lettuce, salsa, and cheese.
4. Serve your tacos immediately and enjoy!
Want to add a little extra flair? You can also:
– Add corn or diced tomatoes for a sweeter taste.
– Choose whole grain tortillas for a healthier touch.
Frequently Asked Questions:
– Can I use other beans? Absolutely! Pinto or kidney beans work great too.
– How long do leftovers last? Store ingredients separately in the fridge for up to 4 days for the best flavor.
These Black Bean Tacos are not just a feast for your taste buds; they’re a simple way to enjoy clean eating without breaking the bank. Perfect for busy weeknights, they bring convenience and health to your table!
Black Bean Tacos
Editor’s Choice

Taco Holders 4 Packs – Stainless Steel Taco Stand Rack Tray Style, Oven …
 Amazon$14.97
22. Chicken Vegetable Soup
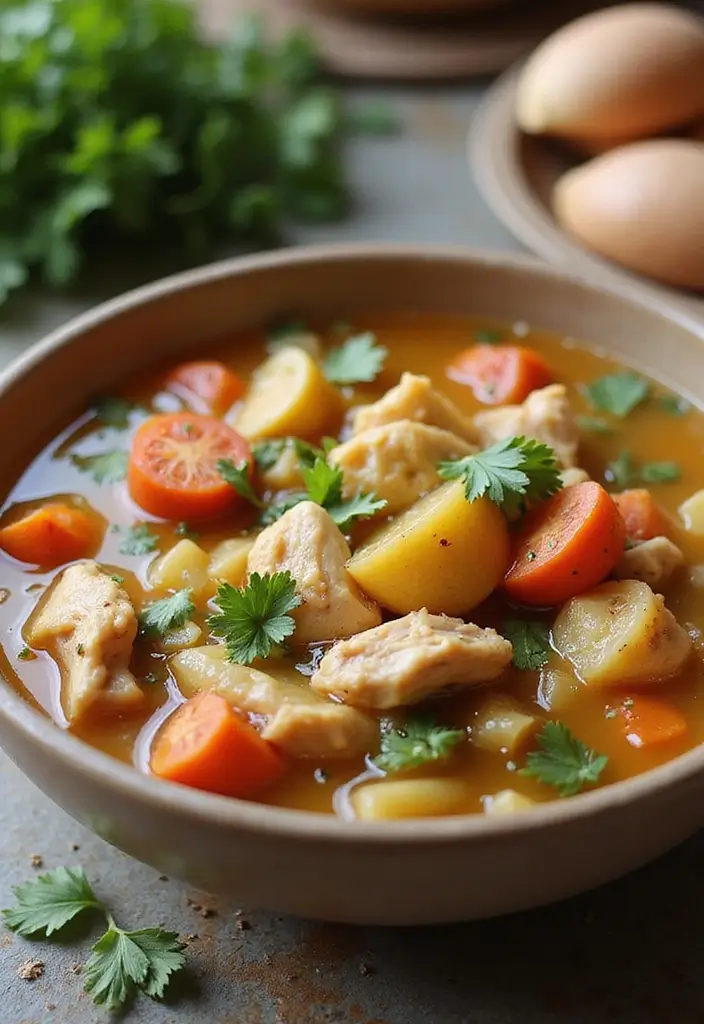
Craving a warm and hearty meal? Try making Chicken Vegetable Soup! This dish is not only comforting but also super flexible. You can mix and match vegetables based on what you have in your fridge, making it perfect for using up leftovers.
This soup is filled with lean chicken, colorful veggies, and rich broth, making it an excellent choice for meal prep. You can whip up a big batch and enjoy it for lunches or cozy dinners throughout the week.
Here’s what you need to know:
Recipe Overview:
– Servings: 6
– Prep Time: 15 minutes
– Cook Time: 30 minutes
– Total Time: 45 minutes
– Calories: 250 per serving
Nutrition Information:
– Protein: 20g
– Dietary Fiber: 5g
– Total Fat: 6g
– Carbohydrates: 30g
Ingredients:
– 2 cooked chicken breasts, shredded
– 4 cups mixed vegetables (like carrots, peas, green beans)
– 6 cups chicken broth
– 1 onion, diced
– 2 cloves garlic, minced
– Salt and pepper to taste
Instructions:
1. In a large pot, sauté the diced onion and minced garlic until fragrant.
2. Add the chicken broth, shredded chicken, and mixed veggies into the pot.
3. Bring the mixture to a boil, then lower the heat and let it simmer for 30 minutes.
4. Season with salt and pepper just before serving.
5. Store the soup in airtight containers for easy meal prep.
Want to save some for later? Freeze individual portions for quick meals on busy days! If you have leftover turkey, feel free to swap it in for a post-holiday twist.
Frequently Asked Questions:
– Can I add pasta? Yes! Toss it in during the last 10 minutes of cooking.
– How long will it last in the fridge? About 4-5 days. Keep it fresh!
This Chicken Vegetable Soup is not just delicious; it’s a smart way to eat healthy on a budget. Enjoy the warmth and nourishment it brings!
Chicken Vegetable Soup
Editor’s Choice

Airtight Food Storage Containers with Lids, Vtopmart 24 pcs Plastic Kitc…
 Amazon$35.99
Farberware Edgekeeper 5-Inch Santoku Knife with Self-Sharpening Blade Co…
 Amazon$10.79
23. Honey Mustard Chicken Thighs
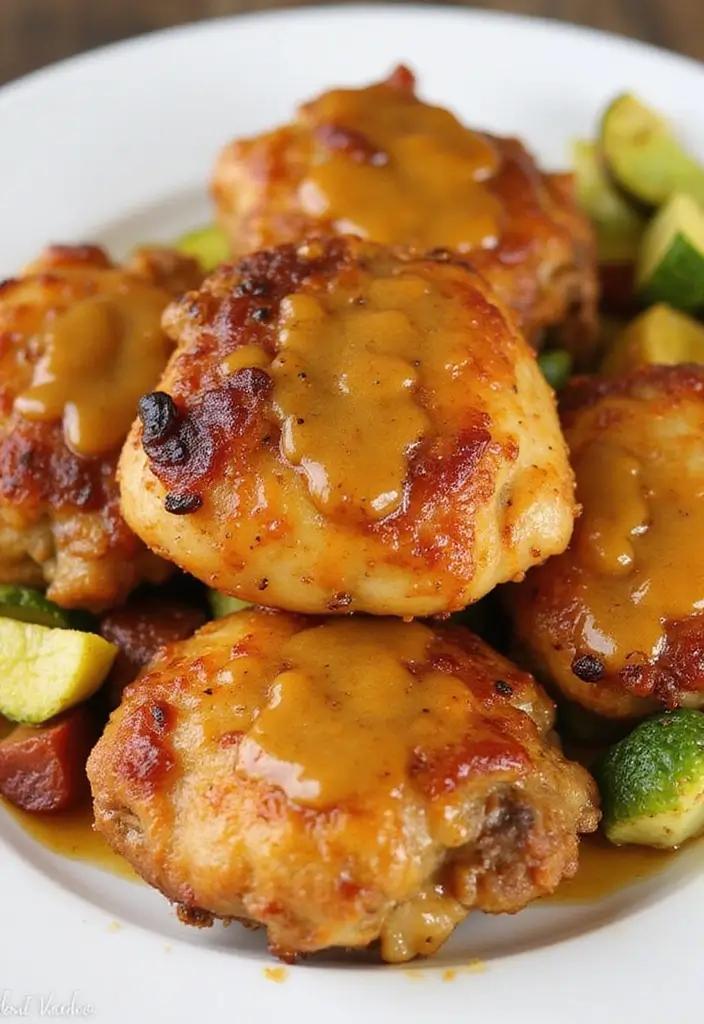
Savor the delightful blend of sweet and tangy with Honey Mustard Chicken Thighs. This dish captivates your taste buds and is simple to make, perfect for those who want a delicious meal without breaking the bank. Baked until golden, the chicken thighs become juicy, enveloped in a mouthwatering honey mustard glaze that’s sure to please everyone at the table.
For a well-rounded meal, pair these chicken thighs with roasted vegetables or a crisp salad. This recipe is a meal prep superstar, as it reheats well, keeping its flavor and tenderness intact, making your weeknight dinners a breeze.
Recipe Overview:
– Servings: 4
– Prep Time: 10 minutes
– Cook Time: 40 minutes
– Total Time: 50 minutes
– Calories: 330 per serving
Nutrition Information:
– Protein: 25g
– Dietary Fiber: 0g
– Total Fat: 18g
– Carbohydrates: 14g
Ingredients:
– 4 chicken thighs
– 1/4 cup honey
– 1/4 cup Dijon mustard
– Salt and pepper to taste
– Olive oil for greasing
Step-by-Step Instructions:
1. Preheat your oven to 375°F (190°C).
2. In a bowl, whisk together honey, Dijon mustard, salt, and pepper until well combined.
3. Lay chicken thighs in a greased baking dish. Brush the honey mustard mixture generously over each piece.
4. Bake for 30-40 minutes, or until the chicken is cooked through and juices run clear.
5. Serve warm with your favorite sides, like quinoa or brown rice, for a hearty meal.
Tip: For an extra flavor kick, marinate the chicken for a few hours before cooking.
Frequently Asked Questions:
– Can I substitute chicken breasts? Yes, just adjust the cooking time to avoid drying them out.
– How long do leftovers last? They stay good for about 3-4 days in the fridge. Enjoy your budget-friendly, flavorful meal prep!
Honey Mustard Chicken Thighs
Editor’s Choice

Rubbermaid Brilliance Food Storage Containers BPA Free Airtight Lids Ide…
 Amazon$34.99
Ken’s Honey Mustard, 1-24 Ounce Bottle Bundled with a JFS Recipe Card
 AmazonCheck Price
YARRAMATE 16oz/470ml Glass Olive Oil Sprayer for Cooking with Stickers, …
 Amazon$8.99
24. Sautéed Kale and Chickpeas
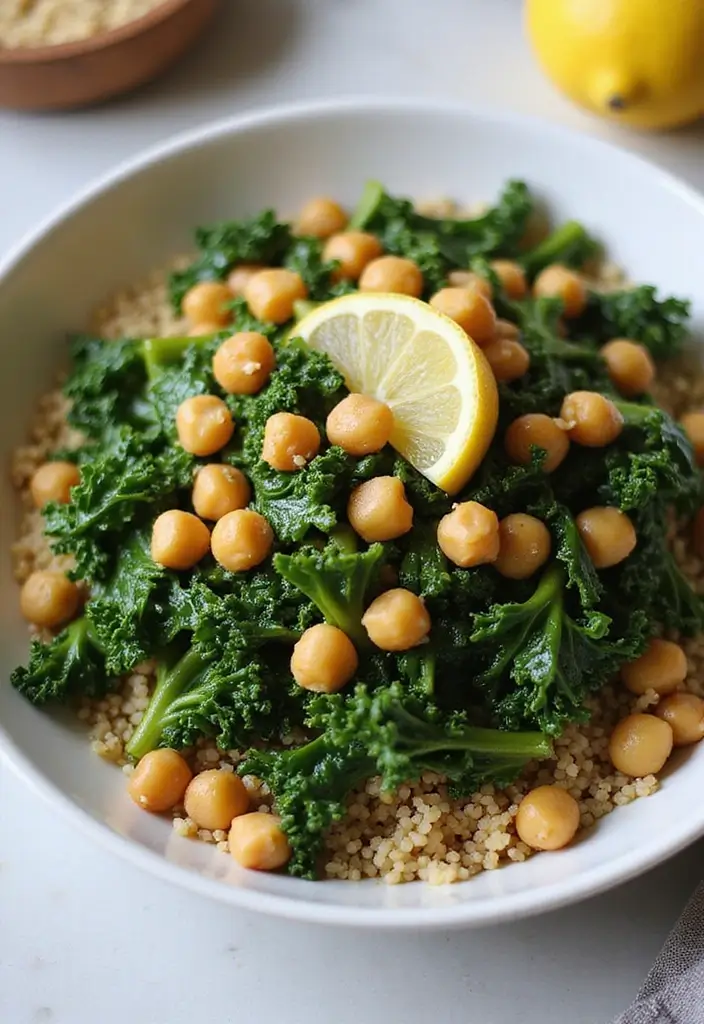
Sautéed Kale and Chickpeas is a fantastic dish that packs a nutritious punch without draining your wallet. This vibrant meal combines hearty kale with protein-rich chickpeas, making it perfect for a light lunch or dinner. Picture the deep green of the kale, brightened by a squeeze of fresh lemon juice. It’s a dish that’s not only tasty but also refreshing, especially when served over a bed of quinoa or brown rice.
Ready to make it? This recipe is simple and quick, taking just 15 minutes from prep to plate. You can whip it up even on the busiest days! Plus, it’s an excellent way to incorporate more greens and plant-based protein into your diet, perfect for clean eating on a budget.
Here’s what you’ll need:
Ingredients List:
– 1 bunch kale, chopped
– 1 can chickpeas, drained
– 2 cloves garlic, minced
– 1 tablespoon olive oil
– Juice of 1 lemon
– Salt and pepper to taste
Step-by-Step Instructions:
1. In a skillet, heat the olive oil over medium heat.
2. Add the minced garlic and sauté for about a minute until fragrant.
3. Toss in the chopped kale and chickpeas, cooking until the kale wilts.
4. Squeeze in the lemon juice, then season with salt and pepper.
5. Serve warm over grains if you like!
Want to spice things up? Try adding red pepper flakes for a kick. This dish is also great for meal prep, keeping well in the fridge for up to three days.
Frequently Asked Questions:
– Can I use frozen kale? Yes, just thaw and drain any excess moisture.
– Is it okay to add other vegetables? Absolutely! Carrots or bell peppers make excellent additions.
This Sautéed Kale and Chickpeas dish is not just good for you; it’s also easy on your budget and full of flavor. Enjoy your healthy meal prep adventure!
Sautéed Kale and Chickpeas
Editor’s Choice

Atlas 750 mL Organic Cold Press Extra Virgin Olive Oil in Glass Bottle, …
 Amazon$22.94
Kitessensu High Effective Garlic Press With Studs, Heavy Duty Garlic Min…
 Amazon$11.99
25. Miso Soup with Tofu and Seaweed
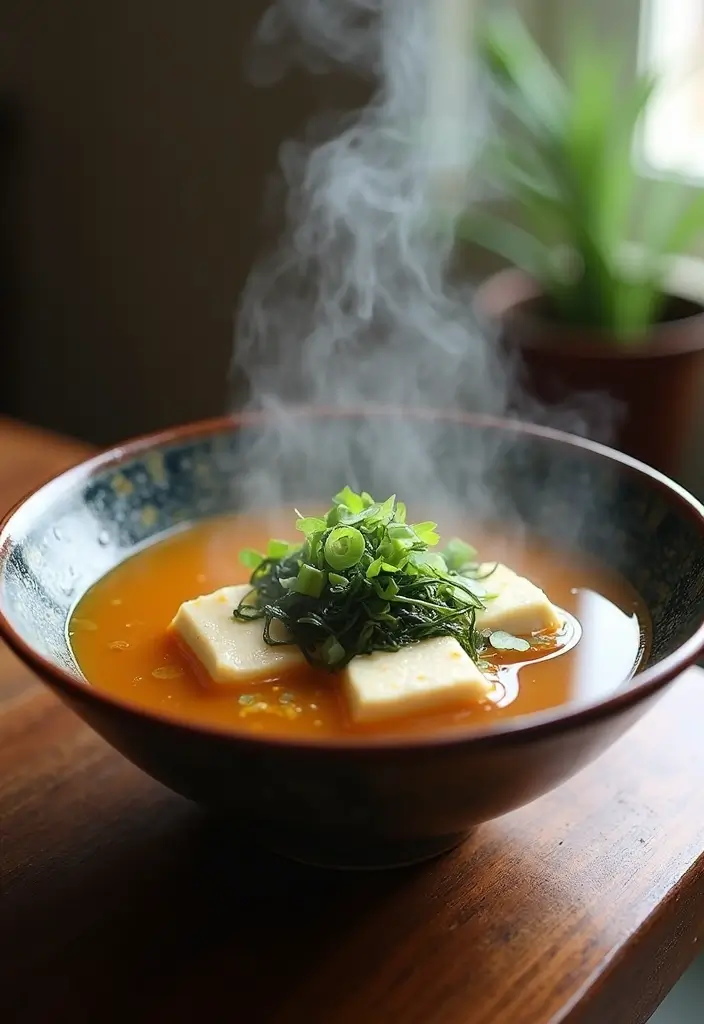
Warm up your evenings with a bowl of Miso Soup featuring Tofu and Seaweed. This traditional Japanese dish is not only comforting but also super easy to whip up. With its light texture and rich umami flavor, it serves as a delightful starter or a light meal that will leave you satisfied.
Miso paste forms the heart of this soup, giving it a deep, savory taste. Tofu adds a nice protein boost, while seaweed brings in essential nutrients. Plus, it’s a fantastic option for meal prep—make a big batch and store it in the fridge for quick, healthy meals throughout the week.
Recipe Overview:
– Servings: 4
– Prep Time: 5 minutes
– Cook Time: 15 minutes
– Total Time: 20 minutes
– Calories: 150 per serving
Nutrition Information:
– Protein: 8g
– Dietary Fiber: 2g
– Total Fat: 5g
– Carbohydrates: 18g
Ingredients List:
– 4 cups vegetable broth
– 3 tablespoons miso paste
– 1 cup tofu, cubed
– 1/2 cup dried seaweed
– 2 green onions, sliced
Step-by-Step Instructions:
1. Heat the vegetable broth in a pot until it simmers.
2. Stir in the miso paste until it fully dissolves.
3. Add the cubed tofu and dried seaweed, simmer for 5-7 minutes.
4. Garnish with sliced green onions before serving.
5. Serve warm and enjoy!
To keep it lighter, opt for low-sodium broth. You can also customize your soup by adding extra vegetables like mushrooms or spinach for more flavor and nutrition.
Frequently Asked Questions:
– Can I use chicken broth instead? Yes, but it will change the flavor.
– How long does it last? While it’s best enjoyed fresh, it can last in the fridge for 2-3 days.
So why not give this Miso Soup a try? It’s quick, tasty, and perfect for those budget-friendly meal prep days!
Miso Soup with Tofu and Seaweed
Editor’s Choice

YAMASAN KYOTO UJI White Miso Paste with Malted Rice, Japanese Traditiona…
 Amazon$18.66
Mori-Nu Silken Tofu Extra Firm, Velvety Smooth and Creamy, Low Fat, Glut…
 Amazon$35.14
Wel-Pac – Fueru Wakame (Dried Seaweed) Net Wt. 2 Oz. (Pack of 2)
 Amazon$11.99
26. Vegetable Curry
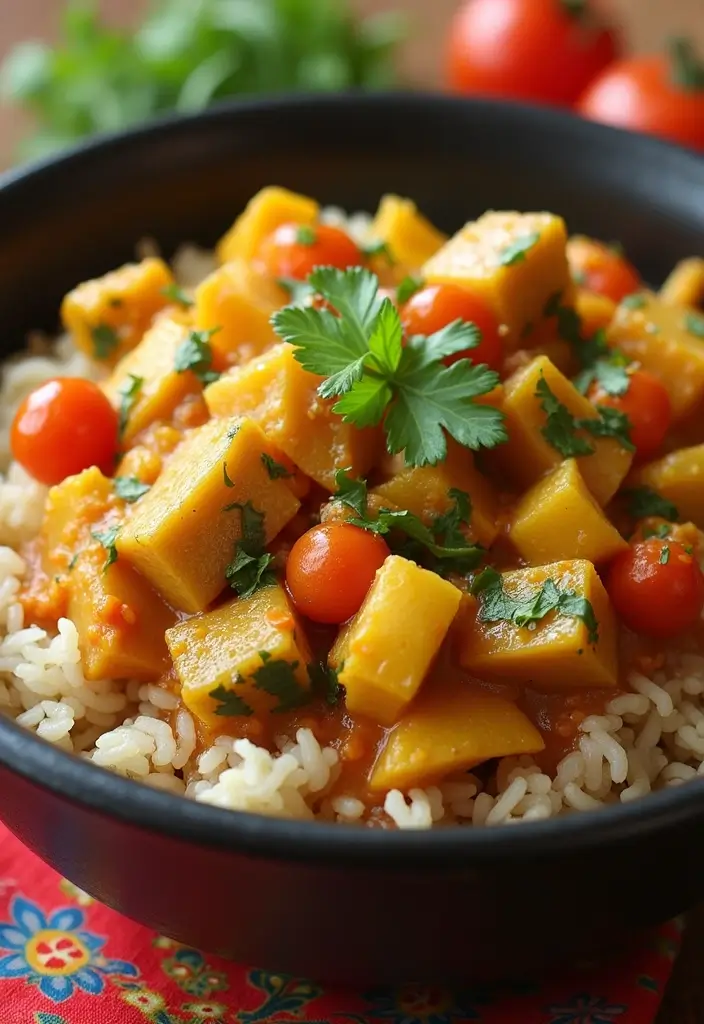
Dive into the world of Vegetable Curry, a dish that marries flavor and nutrition without straining your wallet. This colorful curry is brimming with fresh vegetables, making it a feast for your taste buds and a boost for your health. Imagine enjoying a warm bowl of curry over fluffy brown rice or nutty quinoa. The aromatic spices wrap around each bite, creating a delightful experience. Plus, it’s a flexible recipe that can easily fit into a vegan or vegetarian diet!
Recipe Overview:
– Servings: 4
– Prep Time: 15 minutes
– Cook Time: 25 minutes
– Total Time: 40 minutes
– Calories: 300 per serving
Nutrition Information:
– Protein: 10g
– Dietary Fiber: 8g
– Total Fat: 10g
– Carbohydrates: 45g
Ingredients List:
– 1 can coconut milk
– 2 cups mixed vegetables (like carrots, peas, bell peppers)
– 1 tablespoon curry powder
– 1 onion, diced
– 2 cloves garlic, minced
– 1 tablespoon olive oil
– Salt and pepper to taste
Step-by-Step Instructions:
1. Heat olive oil in a pot over medium heat. Add the diced onion and minced garlic, cooking until soft.
2. Stir in the mixed vegetables, curry powder, salt, and pepper. Cook for a few minutes to let the flavors meld.
3. Pour in the coconut milk, stirring well. Bring to a simmer and cook for about 20 minutes, allowing the curry to thicken.
4. Serve the curry hot over a bed of brown rice or quinoa.
5. Store leftovers in the fridge for up to 4 days.
For a fresh kick, garnish with cilantro before serving. Want to save even more? Use seasonal vegetables to keep costs down while enjoying the freshest flavors.
Frequently Asked Questions:
– Can I add protein? Yes! Toss in chickpeas or tofu for an extra protein boost.
– How long will it last? This dish stays fresh for about 4 days in the fridge.
With its hearty ingredients and simple preparation, this Vegetable Curry is perfect for busy weeknights or meal prepping. Enjoy a comforting dish that nourishes both body and soul!
Vegetable Curry
Editor’s Choice
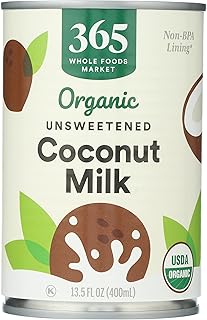
365 by Whole Foods Market, Organic Coconut Milk, 13.5 Fl Oz
 Amazon$2.69
27. Coconut Chia Pudding
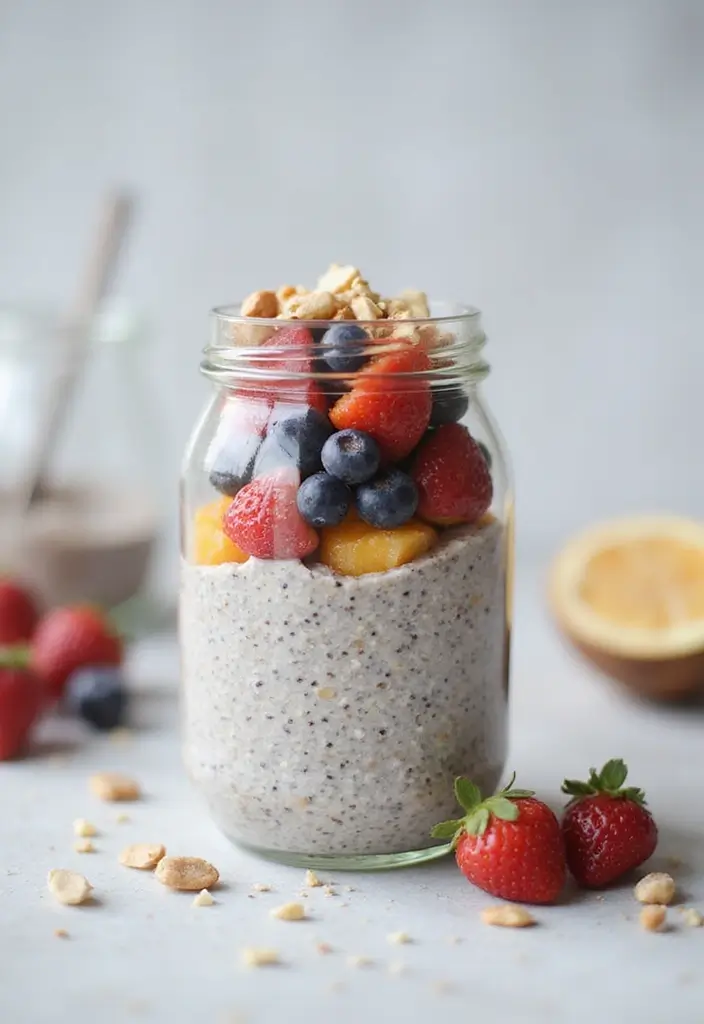
Coconut Chia Pudding is not just a dessert; it’s a deliciously nutritious snack that you can whip up in no time. With chia seeds brimming with omega-3 fatty acids and fiber, this pudding is a guilt-free treat you can enjoy any time of the day. Imagine waking up to a creamy bowl topped with fresh fruit. Sounds delightful, right?
Making this pudding is a breeze. All you need to do is mix chia seeds with coconut milk and let it sit overnight. The magic happens as it thickens into a luscious pudding. In the morning, add your favorite fruits, a sprinkle of nuts, or a drizzle of honey to take it to the next level. It’s perfect for meal prep, so you can grab it on busy mornings!
Recipe Overview:
– Servings: 2
– Prep Time: 5 minutes
– Cook Time: 0 minutes
– Total Time: 5 minutes
– Calories: 220 per serving
Nutrition Information:
– Protein: 6g
– Dietary Fiber: 10g
– Total Fat: 10g
– Carbohydrates: 28g
Ingredients List:
– 1/2 cup chia seeds
– 2 cups coconut milk
– 2 tablespoons honey or maple syrup
– Fresh fruit for topping
Step-by-Step Instructions:
1. In a bowl, mix together chia seeds, coconut milk, and honey.
2. Stir well and let it sit for 10 minutes. Then give it another stir.
3. Cover the bowl and refrigerate it overnight.
4. In the morning, serve it topped with fresh fruit.
Tips to Enhance Your Pudding:
– Experiment with different nut milks for varied flavors.
– Add coconut flakes for a crunchy texture.
Frequently Asked Questions:
– Can I make it in advance? Yes! It stays fresh for up to 5 days in the fridge.
– Is it safe for kids? Absolutely! It’s a healthy snack for everyone.
Enjoy this Coconut Chia Pudding as a quick, nutritious option that fits perfectly into your meal prep routine!
Coconut Chia Pudding
Editor’s Choice

Garden of Life Chia Seeds 100% Organic for Smoothies, Pudding – Raw Orga…
 AmazonCheck Price
Thai Kitchen Organic Unsweetened Coconut Milk, 13.66 fl oz (Pack of 12)
 Amazon$25.98
Bentgo Prep – 20-Piece 3-Compartment Reusable Meal Prep Containers with …
 Amazon$14.99
28. Balsamic Grilled Chicken
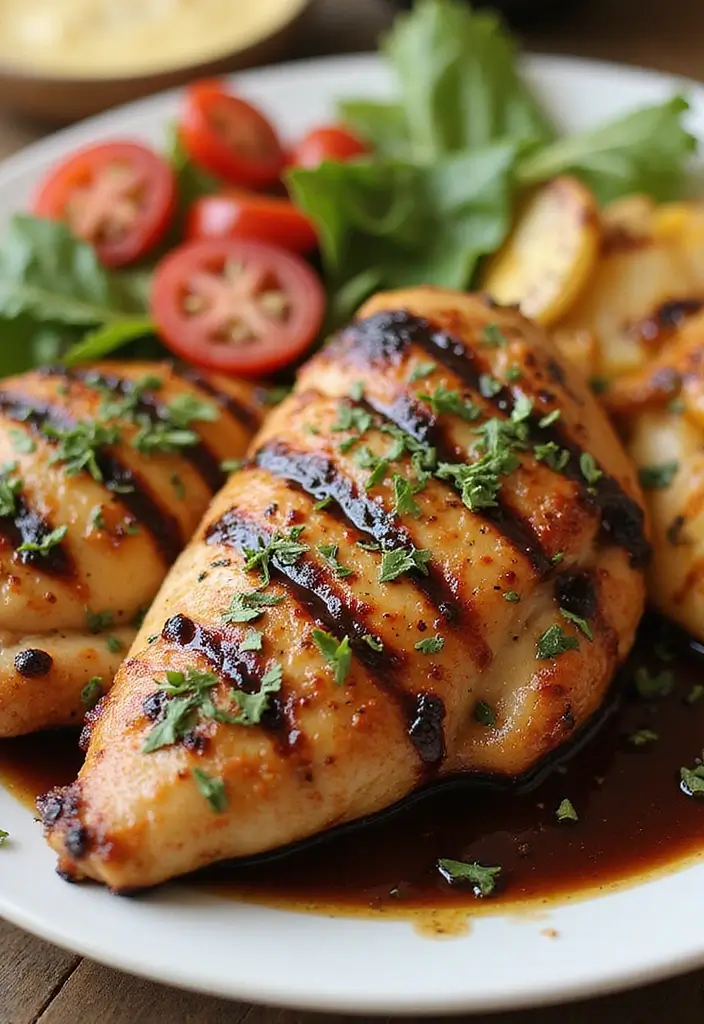
Balsamic Grilled Chicken is a tasty and simple dish that packs a punch of flavor. By marinating chicken in balsamic vinegar, you bring out a sweet and tangy taste that makes every bite delightful. This dish is not just delicious; it’s a healthy choice, making it ideal for your meal prep plans. Pair it with some colorful steamed veggies or a fresh salad, and you’ve got a complete meal ready to enjoy all week long!
Ready to get cooking? Here’s how to make your own Balsamic Grilled Chicken. It’s budget-friendly and takes just a little time to prepare. Perfect for busy weeks, you can whip this up in advance and have nutritious meals ready to go!
Recipe Overview:
– Servings: 4
– Prep Time: 15 minutes
– Cook Time: 20 minutes
– Total Time: 35 minutes
– Calories: 280 per serving
Nutrition Information:
– Protein: 26g
– Dietary Fiber: 0g
– Total Fat: 10g
– Carbohydrates: 8g
Ingredients List:
– 4 chicken breasts
– 1/4 cup balsamic vinegar
– 2 tablespoons olive oil
– Salt and pepper to taste
Step-by-Step Instructions:
1. In a bowl, combine balsamic vinegar, olive oil, salt, and pepper.
2. Marinate the chicken breasts for at least 30 minutes. For deeper flavor, marinate overnight.
3. Preheat your grill or skillet. Cook the chicken for 6-7 minutes on each side until it’s cooked through.
4. Let the chicken rest for a few minutes before slicing it.
5. Store any leftovers in the fridge for up to 4 days.
Want to add more flavor? Try these tips:
– Add herbs like rosemary or thyme to your marinade for extra depth.
– Serve it with quinoa to boost the nutrients in your meal.
Frequently Asked Questions:
– Can I use chicken thighs instead? Absolutely! Just adjust the cooking time for juicier results.
– How long can I keep it? Your grilled chicken will stay fresh for about 4 days in the fridge.
This Balsamic Grilled Chicken is a fantastic addition to your meal prep repertoire. Enjoy the flavors and the convenience it brings to your week!
Balsamic Grilled Chicken
Editor’s Choice

50 Pack (100-Piece) 32 oz Meal Prep Containers Reusable with Lids 3-Comp…
 Amazon$21.99

Pompeian Robust Extra Virgin Olive Oil, Contains Polyphenols, First Cold…
 Amazon$15.64
29. Cabbage Stir-Fry
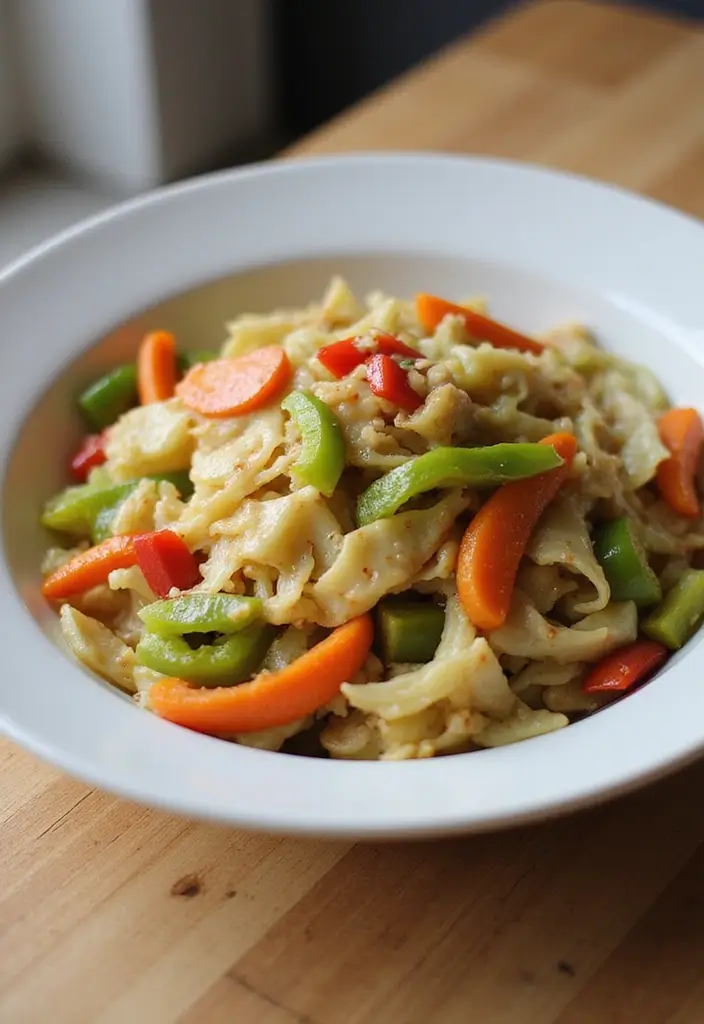
Meet the Cabbage Stir-Fry, your new go-to for quick, budget-friendly meals. This dish is not only healthy but also incredibly versatile. Cabbage is rich in fiber and vitamins, making it a fantastic choice for anyone looking to eat clean without breaking the bank. You can whip this meal up in mere minutes, using whatever veggies you have lying around. Want to make it hearty? Just toss in some tofu or chicken!
Let’s break down the recipe so you can start cooking.
Recipe Overview:
– Servings: 4
– Prep Time: 10 minutes
– Cook Time: 10 minutes
– Total Time: 20 minutes
– Calories: 150 per serving
Nutrition Information:
– Protein: 5g
– Dietary Fiber: 5g
– Total Fat: 7g
– Carbohydrates: 20g
Ingredients List:
– 1 head of cabbage, sliced
– 1 bell pepper, sliced
– 2 carrots, sliced
– 2 tablespoons soy sauce
– 1 tablespoon sesame oil
– 2 cloves garlic, minced
– Salt and pepper to taste
Step-by-Step Instructions:
1. Heat the sesame oil in a large skillet over medium heat.
2. Add the minced garlic and sauté until fragrant, about 1 minute.
3. Toss in the sliced cabbage, bell pepper, and carrots. Cook for 5-7 minutes until tender.
4. Drizzle in the soy sauce and mix everything well.
5. Serve hot and enjoy your nutritious meal!
This dish is a fantastic way to use up leftover vegetables. You can also add cooked protein like chicken or shrimp for a more filling option.
Frequently Asked Questions:
– Can I add nuts? Yes! Peanuts or cashews make great additions.
– How do I store leftovers? Refrigerate for up to 3 days.
This Cabbage Stir-Fry is not just about flavor; it’s about making cooking simple and satisfying. Try it out, and you’ll see how easy healthy eating can be!
Fun fact: cabbage is often under $1 per pound and high in fiber, helping you feel full longer. For healthy meal prep on a budget, a quick cabbage stir-fry with whatever veggies you have turns into simple recipes for clean eating in minutes—easy, versatile, and delicious.
Cabbage Stir-Fry
Editor’s Choice

50 Pack (100-Piece) 32 oz Meal Prep Containers Reusable with Lids 3-Comp…
 Amazon$21.99
Fullstar The Original Pro Chopper – Vegetable Chopper and Spiralizer, Fo…
 Amazon$29.99
EIKS Excelity Cruet Dispenser Set for Olive Oil Vinegar Soy Sauce with E…
 Amazon$7.79
30. Fruit and Nut Energy Bites
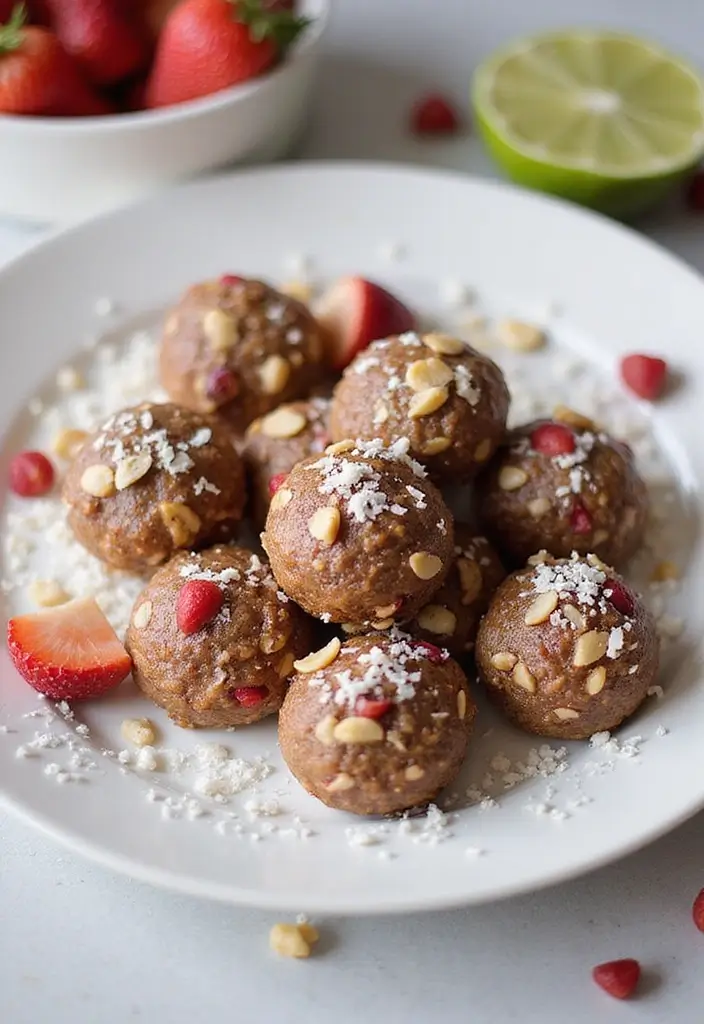
Snack time just got a whole lot better with these delicious Fruit and Nut Energy Bites! If you’re searching for a quick and healthy snack that keeps you energized, look no further. These bites are super simple to make, require zero baking, and are fully customizable. You can mix and match your favorite nuts and dried fruits to create a snack that’s uniquely yours.
Packed with natural sweetness and nutrients, these energy bites are guilt-free and perfect for any time of the day. Meal prepping? Just roll them into bite-sized balls and store them in the fridge. They’re ready to grab when you need a tasty boost!
Here’s everything you need to whip up a batch:
Ingredients:
– 1 cup dates, pitted
– 1 cup mixed nuts (like walnuts, almonds, or cashews)
– 1/2 cup rolled oats
– 1/4 cup cocoa powder (optional for a chocolatey twist)
– 1/4 cup shredded coconut (optional for extra flavor)
Instructions:
1. Toss the dates, nuts, oats, and cocoa powder (if using) into a food processor.
2. Blend until everything is sticky and well combined.
3. Roll the mixture into small balls, coating them with shredded coconut if you like.
4. Store your bites in the fridge for up to two weeks.
Here are some tips to make them even better:
• Experiment with different nuts for unique flavors.
• Add a pinch of sea salt to elevate the sweetness.
• Try incorporating other dried fruits like cranberries or apricots.
• Use honey or maple syrup for additional sweetness if desired.
Frequently Asked Questions:
Can I swap out the sweeteners? Yes, feel free to use honey or maple syrup.
What’s the best way to keep them fresh? Store in an airtight container in the fridge.
With these Fruit and Nut Energy Bites, you’ll have a tasty, healthy snack ready whenever hunger strikes!
Fruit and Nut Energy Bites
Editor’s Choice

Rubbermaid Brilliance 16-Cup Airtight Food Storage Container with Lid Cl…
 Amazon$13.29
Kirkland Signature QNKDQK Extra Fancy Unsalted Mixed Nuts 2.5 (LB), 2 Pa…
 AmazonCheck Price
Conclusion
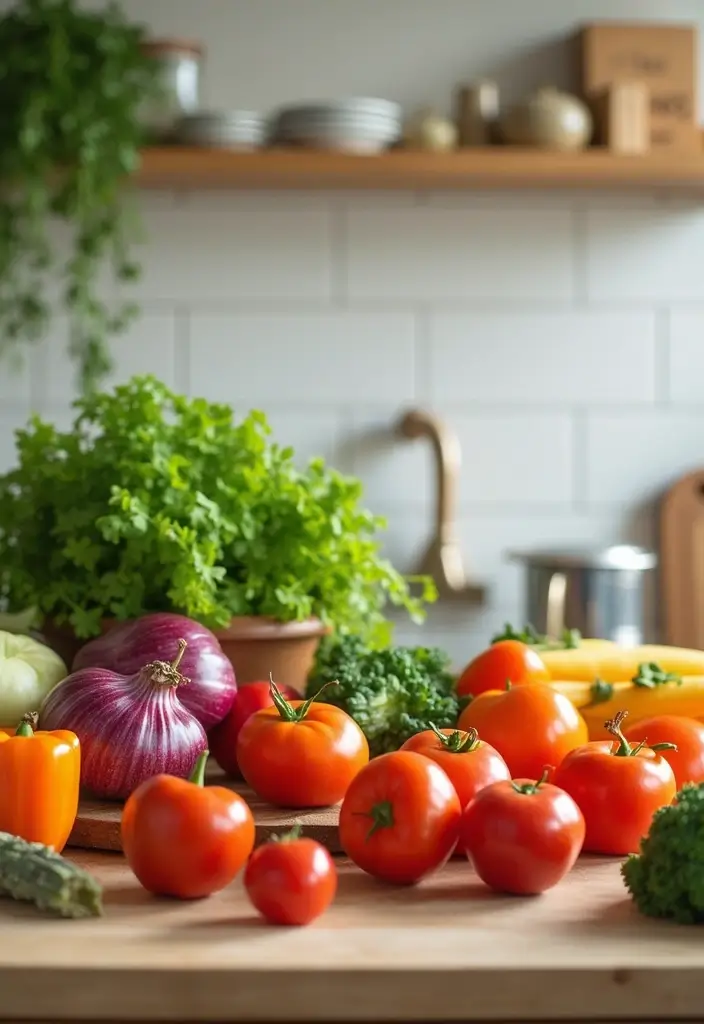
Eating healthy on a budget is not just a dream—it’s a reality with these simple recipes! Whether you’re packing a lunch for a busy workday or preparing dinners to enjoy throughout the week, these meals are designed to keep you nourished without the stress.
Experiment with the flavors and ingredients to suit your personal taste, and make clean eating an easier and more enjoyable part of your daily routine!
Note: We aim to provide accurate product links, but some may occasionally expire or become unavailable. If this happens, please search directly on Amazon for the product or a suitable alternative.
This post contains Amazon affiliate links, meaning I may earn a small commission if you purchase through my links, at no extra cost to you.
Frequently Asked Questions
What are some of the best healthy meal prep ideas for busy professionals?
If you’re a busy professional, time is often your biggest challenge. Consider simple recipes like overnight oats, quinoa salads, or stir-fried veggies with lean protein. These dishes are not only quick to prepare but also budget-friendly, making them perfect for healthy meal prep on a budget. Plus, you can make them in bulk and store them for the week ahead!
How can I make clean eating more affordable without sacrificing nutrition?
Great question! To keep clean eating affordable, focus on seasonal fruits and vegetables, which tend to be cheaper and fresher. Buy in bulk when possible, especially grains and legumes. Planning your meals ahead using budget-friendly meals from this article can help you avoid impulse buys while ensuring you’re getting the nutrients you need without breaking the bank!
What are some simple healthy dishes I can prepare that are also kid-friendly?
Absolutely! Kids love fun, colorful meals. Try making mini turkey meatballs, whole grain wraps with lots of veggies, or even fruit smoothies packed with spinach. These simple healthy dishes are not only nutritious but also appealing to younger taste buds, making it easier to introduce clean eating habits at home!
Can I meal prep for the entire week in one day? What are some tips?
Yes, you can definitely meal prep for the entire week in one day! Start by choosing a few healthy meal prep on a budget recipes that share ingredients. Cook grains and proteins in batches, chop veggies all at once, and portion out snacks. Using clear containers helps you see what you have, making it easier to grab meals on busy days. Just remember to store everything properly to keep it fresh throughout the week!
What are some affordable meal prep recipes that are high in protein?
If you’re looking for affordable meal prep recipes high in protein, consider dishes like chickpea salad, lentil soup, or chicken stir-fry. These meals are not only budget-friendly but also packed with protein to keep you satisfied. Pair them with whole grains or vegetables for a complete meal that aligns perfectly with your clean eating goals!
Related Topics
healthy meal prep
budget-friendly meals
clean eating recipes
simple healthy dishes
meal prep ideas
affordable cooking
easy recipes
quick meals
meal planning
healthy eating
time-saving recipes
weeknight dinners

